
When I was younger, my father and I went to the local hobby store and bought model rockets to build and launch together. Assembling the rocket and heading over to a local field was so fun, but nothing could compare to the actual moment we’d launch the rocket. A lot of people wonder how this is done, but it’s actually quite simple.
How do you ignite a model rocket?
Generally, small use rockets use a battery powered launch controller that is connected to a metal igniter and placed inside of the rocket engine and fastened with a plug. When the igniter lights the engine, it forces the plug out and the rocket launches skyward.
Let’s cover in more detail the specific components of the rocket and hopefully the launch process with then make a little more sense.
Are you still using the standard Estes controllers for your launches?
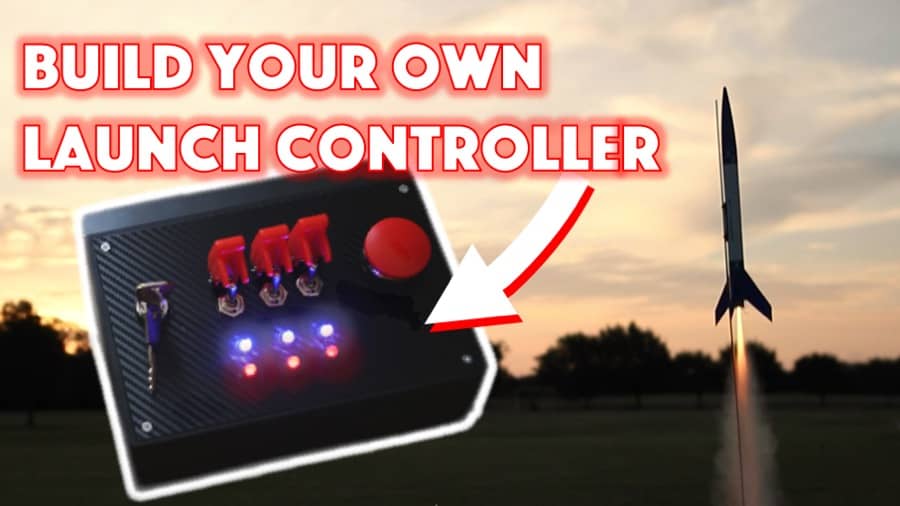
We just built our own beautiful launch controllers that make launches SO much more fun, and we documented EVERY single step and item purchased and put it into a step-by-step course that teaches you how to do the exact same thing.
Click here to learn more about how you can build your own launch controllers!
The Easiest Type of Model Rockets to Launch as a Beginner
Estes Rockets
Estes is a Colorado-based company that makes an excellent assortment of model rockets ideal for the beginner rocket enthusiast. Many of their rockets come pre-assembled (meaning not all model rockets have to be cut out, pasted together, or carved by hand.) Here is a list of our favorite beginner model rockets and why we love them. These kits come prepped with everything you need to easily set up, fire your rocket, and launch again (and again!)
The Components that Make Up the Rocket and Its Launch Set Up
First, it’s important to understand all the components that go into creating a model rocket, and the essential aspects of its set up that allow the rocket to launch into the air. Below is a brief description of all the things your Estes rocket kit should contain:
Starting from the top of the rocket and moving downward we have:
- The Nose Cone (Payload) – this is a removable part of the rocket. You may have purchased a rocket kit that comes with an already formed nosecone, or you may have wood worked and sanded your very own cone. Either way, this is the very tip of your model rocket. Need payload ideas? Here are 16 model rocket payload ideas.
- Launch Lug – on the external part of the rocket, about ¼ of the way down is the launch lug. This small cylinder (the circumference size of a straw, but about as long as a small pinky finger) is used to hold the rocket upright in place on the launching pad.
- Shock Chord – this is an internal component that rests inside your rocket near the nose cone. This chord holds all the parts of the rocket together after it is deployed.
- Parachute Lines & Parachute – this is another internal item inside your rocket. The lines are near your nose cone, while the parachute itself rest somewhere in the middle of the rocket. The parachute gets deployed by the engine of the rocket. When the rocket has completed its propulsion upward, and that part of the launch process is used up, the second stage of the engine sends a small charge up the rocket tube in the direction of the nose cone, releasing the cone and the parachute. But be sure not to pack your parachute too tightly or it won’t unfold and won’t be able to float down. Interestingly, sometimes streamers are used instead of a parachute, and there are situations where one can be better than the other. Check out our post on model rocket parachute vs. streamers.
- Recovery Wadding – is inserted into the rocket body between the engine mount and the recovery system to prevent hot gas from damaging the recovery system. This item is typically sold with engines. In a pinch and don’t have recovery wadding? Here are some model rocket recovery wadding alternatives.
- Engine Mount (fixed) – This is at the bottom half of the rocket and it holds the engine firmly in place. This is a super critical component of a model rocket (without this your engine will be loose and you’ll have an unsuccessful launch)
- Rocket Engine (removable) – many model rocket engines are made of paper tubing with clay nozzles, and solid collection of black powder propellent, as well as a delay and smoke charge, and an ejection charge.
- Fins – these are the wings that protrude out near where the engine is inserted. The fins help the rocket to glide through the air swiftly and successfully.
- Igniter – this is the thin wire in the shape of a distorted, long ‘U’, with a small white and broad paper attached. This will be inserted into the engine, and then alligator clamps from the launch controller will be attached to provide the charge.
- Igniter cap / plug – this small plastic item is used to hold the igniter firmly in place and plugs up the tiny hole at the bottom of the engine.
- Alligator Prongs – these are the wire with fanged clamps at the end that are connected to the launch controller. They are meant to bite down on one of the two wires each on the igniter.
- Launch Controller (reusable)- this is the handheld device you’ll use to launch your rocket. It usually has a key that you turn, and a button you’ll push to send the electricity to your igniter, which in turn heats up the engine and sets the rocket into motion. This is operated with normal lithium batteries, and the electricity that surges through the alligator wires comes from the energy of the batteries in this controller.
- Launch Pad (reusable) – The pad is where set your rocket. The launch pad comes with a launch rod, which goes inside the launch log to hold the rocket upright and in place.
What is the Igniter and How Does it Work?
The igniter that usually comes with an Estes motor has two thick wires and then a very slender wire at the top, called the bridge wire. It’s fragile, so you don’t want to put the igniter in your rocket motor until right before you’re ready to launch. If you’re curious as to what the tiny knobby part of the bridge wire is, that’s glue, it helps hold it all together and make the bridge wire more durable when inside the rocket motor.
The bridge wire’s job is to supply heat to get the engine burning and going. This heat is created through electricity that is supplied from the launch controller alligator prongs that attach to the two thicker wires of the igniter. You attach each clip to one of the two legs of igniter. When you press the launch control bottom it sends energy to the two prongs, which then creates heat when they connect to the wires of the igniter. This heat ignites the rocket engine.
If you are more of a visual or auditory learning, I’d recommend watching This informative video by Apogee Rockets, featuring Tim Van Milligan, on how to ignite an Estes model rocket engine. It explains essentially all that I’ve detailed above, but with excellent visuals of the igniter so you can better understand the process of energy creating heat which is ultimately what allows the engine to ignite.
Troubleshooting Common Launch Malfunctions
If you experience issues during your launch (i.e. the rocket won’t launch), often times people will think something is wrong with the igniter, but that’s typically not the case – the malfunction can be in the launch controller. Checking the batteries is the first place I’d look, followed by ensuring that the safety pin is correctly activating the check light on the launch controller. If your light no longer works, you might have to test an igniter outside of a rocket engine to ensure that it is working properly. If it is, then the issue could be that the engine is bad or that the launch wires are connected improperly while on the launch pad.
Do not allow the lead clips on the launch controller to touch one another, nor the two wires on the igniter clip. Doing this when heat is applied to the igniter could short circuit the igniter. Instead of the energy moving up through the side of one wire, to the bridge wire, and out the other side of the opposing wire, it would move through the clips instead, never even reaching the bridge wire.
You can technically send energy to the igniter as much as you want till it burns out, as far as testing out your igniter to see if it works. But once the igniter is inside the rocket, and you move forward with the actual launch, the process of the launch will totally fry the igniter, make it no longer usable. In fact, it is extremely rare to find a model rocket igniter that can even be used more than one time. This is true of the engines, and igniter plugs as well (they are also not reusable.)
Fortunately, if you buy a pack of Estes engines, it will also come with multiple igniters as well as igniter plugs.
Where Does my Igniter Go?
This part is fairly straightforward. As you are already familiar with all the components of your model rocket, you’ll now know the igniter goes inside the engine. You will place your igniter bridge wire side in, leave the two wire legs sticking out. At this point, you will take your igniter plug, and secure the igniter inside the engine by very literally plugging it in.
If you’ve purchased an Estes engine pack, your igniter plugs are likely a bright yellow, and all attached to one another still. You can very easily pull them apart from one another. If there is still a small plastic add-on protruding out the side of your igniter plug, that’s okay, you can just wiggle that part off.
You’ll want to notice where your launch lug is located on your rocket, as you’ll want your igniter to be bend down on the opposite side as your launch lug. This is because when your rocket is on the launch pad, the launch rod that goes inside the launch log could interfere with the launch controller wires (alligator clips) that are meant to clamp onto the legs of the igniter wire.
So you’ll take your igniter, gently bend it to the opposite side of the launch log, and then take your igniter plug and push it in very firmly. You want to be able to lift the rocket up shake it around and the igniter to stay firmly in place. If your igniter plug is loose and falls out, it’s possible you have the wrong size igniter plugs.
Is it Safe to Ignite and Launch my Model Rocket?
In a word, yes. We did a whole post covering “are model rockets safe?“
Igniting and launching your rocket is indeed safe, as by design you’ll be standing several yards away from the rocket with the launch controller. If your launch lug is secured, and your rocket is towards the sky on the launch pad, you are good to go.
If, however, you notice something strange about the way your rocket is positioned (like it is pointing directly at you or other, um, obstacles) then do not launch your rocket. Re-adjust your rocket to sit upright, or re-secure your launch lug (whatever you deem to be the problem, fix it before daring to launch).
Take Away
The process of igniting and launching your rocket is easy, and Estes model rocket beginner kits have everything you need to get started! Now that you’ve well-versed yourself in how to ignite your rocket, you’ll be able to avoid simple pitfalls (like being able to tell if your launch controller is low on batteries or is malfunctioning), and bending your igniter to the correct side so it doesn’t interfere with the launch rod when inserted into the launch lug. You can also rest assured that launching your rocket will be safe.
Build Your Own Launch Controller
Don’t forget! You can ditch the stock controllers and confidently build your own from scratch using our step-by-step instructions and exact materials list! We promise this will make your launch experience 10x better, and using our course License to Launch you can be 100% confident you’ll be able to finish this project and be super proud of what you’ve built! Here’s a sneak peek below.