Building a model rocket can be an exhilarating and hands-on way to learn about the forces of a rocket and dream of space. Like any airplane or model car, it will need to be created mimicking the realistic design of its model, matching the aerodynamics of the real-deal. You can’t accomplish this using the wrong glue though and will need to take steps to increase your skill.
What is the best blue for model rockets? These glues are among the best:
- Carpenter’s Glue
- Elmer’s White Glue
- Elmer’s Carpenters Wood Glue
- Titebond Ultimate Wood Glue
- Testor’s Cement for Plastic
- E6000® Permanent Craft Adhesive
- Gorilla Condition Clear Multipurpose Adhesive
The key will be to use the proper glue for the materials you are working with (meaning – do not place plastic glue on wood, or wood glue on plastic). Not only will they not hold together but may deteriorate, crumble, and/or compromise your entire model rocket design.
Super glue may seem like the obvious answer, but you want to seek out white or yellow glues or adhesives that will not grow brittle when exposed to oxygen for long periods of time. The reason that super glue does not work is because it will grow weak when exposed to oxygen, causing components to break off more easily and ruin your hard work. This guide will be your go-to source for all things on what glue to use, dry times, what reviewers have to say, as well as great resources on how to build your model rocket!
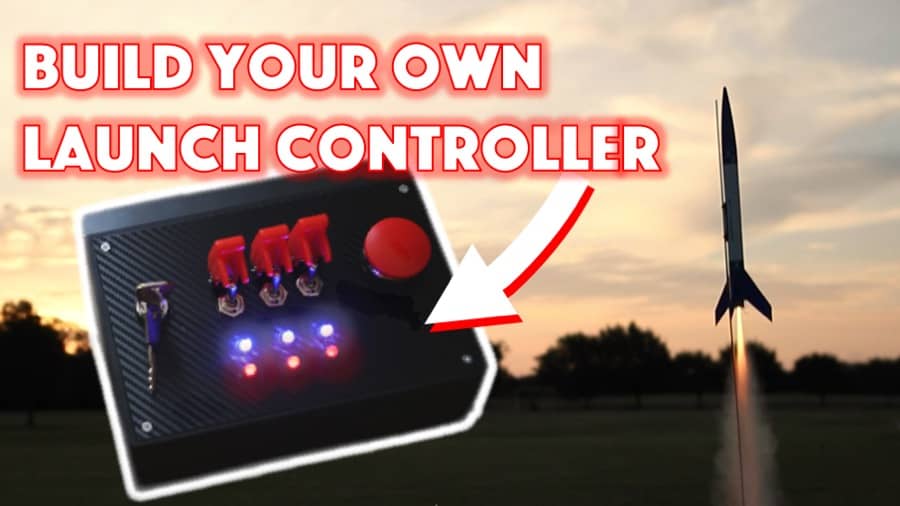
Are you still using the standard Estes controllers for your launches?
We just built our own beautiful launch controllers that make launches SO much more fun, and we documented EVERY single step and item purchased and put it into a step-by-step course that teaches you how to do the exact same thing.
Click here to learn more about how you can build your own launch controllers!
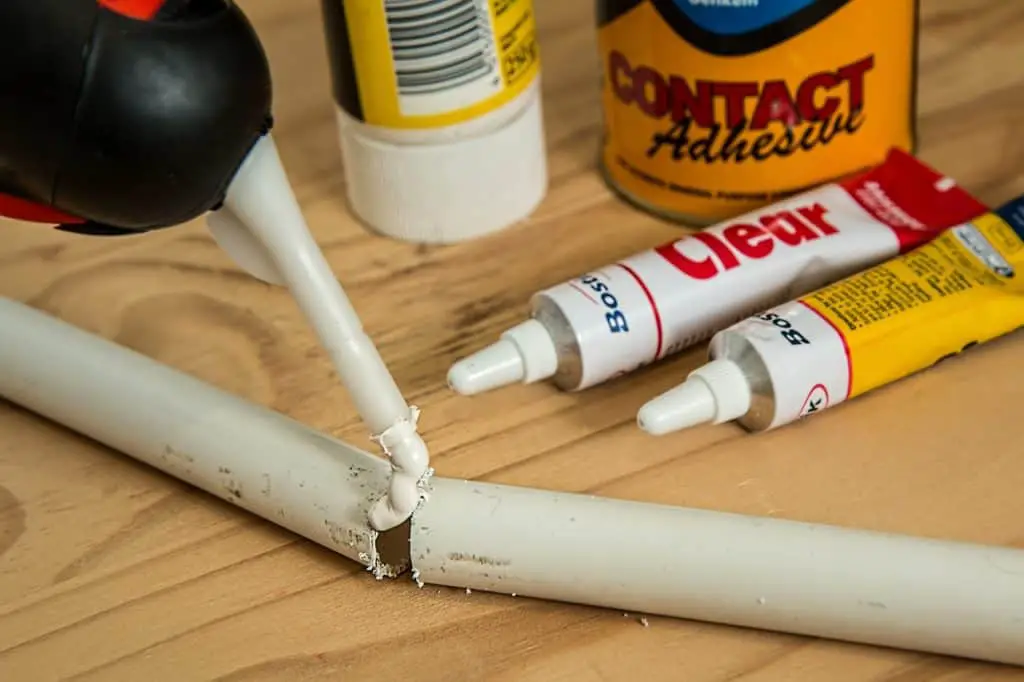
Best Glue for Model Rockets (Tip: It’s Not Super Glue!)
When designing your model rocket, you can truly have some fun with the individual parts and assemble it in whatever creative way you see fit. Your collection of models should speak to your personality and be something you can display with pride.
Most kits will give you directions that you can follow precisely or play around with experimentally. There is no ‘one-right-way’ to build a model rocket, so you can even mix different kits together if you’re able to keep track of what part attaches to where.
As far as the glue, there’s really no wrong answer as long as you’re utilizing the proper glue type for that material (as outlined above, wood glue on wood, plastic glue on plastic, adhesive should work on all), but do NOT use super glue. Super glue will destroy your design and crumble it in a matter of years.
A word of caution: exposure to glue and its fumes can cause irritation to your eyes, skin, and lungs. Be sure to exercise caution when interacting with these materials and work in a well-ventilated area.
Keep your safety in mind throughout the entire process of building, launching the rocket, and enjoying the fruits of your labor. You won’t be able to enjoy it if you poke an eye out or glue your hands together, so take your time, think before acting, and move with focused intention.
Now for the moment you’ve all been waiting for! To cover each of the following glue brands in depth, here are the top 7 most recommended glue-types for building model rockets:
#1 Carpenter’s Glue
This product works for wood projects and is very rapid-drying. This 8-ounce bottle (link to read reviews on Amazon) should last you for the entire project leaving some to spare.
Why this product is so versatile and useful to have in your crafting-artillery is because you can easily warp it, sand down the glue, and work with the wood as you could without any glue. This makes it a very valuable addition to your toolbox if you work mostly with wooden-materials.
There is no mention of how fast it dries as this may be dependent on how much you use, how well it is secured in place, and a variety of other factors.
The product does boast a nearly perfect rating out of 15 purchasers. One reviewer says, “This is by far the best craft glue I’ve used. I use it instead of mod podge. Now if only they made it in gloss finish.”
#2 Elmer’s Glue All 1 Gallon Bottle All-Purpose
You can read the forums for yourself to realize that some model-builders respect a classic. Many model-fanatics lean towards the tried-and-true quality of Elmer’s. A gallon of this affordable glue should last you for a plethora of creative projects!
It is a nontoxic and quick-drying formula that will work on all of the following materials:
- Paper
- Ceramics
- Leather
- Fabric
- Wood
- And more
A great tip from a reviewer you can keep in mind for your craft studio is, “If you use a lot of glue, this is way cheaper than always buying the small bottles. I just use a funnel and refill the small bottles that I already had. I mean, what’s not to love? It’s a GIANT thing of glue.”
#3 Elmer’s Carpenter Wood Glue
If you’re using a wood model kit, this is the glue I would personally recommend (link to read reviews on Amazon). Not only is it waterproof, stainable, heat-resistant, and sand-paperable, but it’s also MADE for carpentry.
Constructing a model made entirely of wood will require a specific wood-glue brand, and Elmer’s is one of the most reputable companies you can find.
Some other key features about this product you may find
useful are that it is nontoxic, anti-molding, and mildew resistant. They list the dry time as: “20 to 30-minute clamp time, 24 hours to
full bond.”
With a nearly perfect 5-star review out of 250 reviews, it seems
unanimous that the variety for this wood-adhesive is nearly limitless.
Pro tip from Elmer’s:
“As with any wood glue, pre-wet the wood surface to be glued with water, allow to set a few minutes, dab off excess water then apply glue with a paint brush. Clamp up and allow to set. I always allow 48 hours. Pre wetting the wood opens up the pores of the wood, allowing for better penetration of the glue. Slightly cheaper than Titebond-III, but every bit as good.”
Essentially, you always pre-wet your wood surface to allow the pores to expand. As it dries, the adhesion will be even tighter through this method.
#4 Titebond Ultimate Wood Glue
Comparable to the Elmer’s wood glue, this is slightly more expensive. That does not always mean better quality, although many could argue that you get what you pay for. With over 350 reviews and an actually perfect 5-star review (link to read on Amazon), the verdict may be unanimous that the Titebond investment is worth a few dollars more.
Some of the key features of this product includes that it is waterproof and claims to have ‘superior strength.’ Able to be used for indoor or outdoor projects, it is unaffected by the finish so long as it is being used on its intended target of wood.
This product is ranked #2 in wood glue, only behind Gorilla’s Wood Glue. Feel free to experiment with all three of these wood glues (Elmer’s, Titebond, and Gorilla’s) to see which finish you prefer, and which product is your favorite.
#5 Testor’s Cement for Plastic
If your model rocket is made of plastic, this is the brand that comes most highly recommended. This is rated the #1 best seller under hobby glues, and they even include 4 narrowed glue tips to filter the glue with precision in a thinner line.
This brand has been around for decades and is viewed as a real staple to model makers that have been using this product for all their lives. Do note that some people gave it a lower review due to it coming out a bit runnier than they were expecting.
One great remedy for this from a reviewer is, “don’t squeeze it when removing and replacing lid. I always open it over a folded paper towel. If too much comes out, the towel catches it, and I simple use a toothpick to apply it to model.”
There is no mention of the dry-time on their page but stick with the recommended 24-48 hours of setting time.
#6 E6000 Permanent Craft Adhesive
This is your go-to multipurpose glue that will work on any material you may be using including:
Many model-makers really gravitate towards these multi-purpose adhesives, especially if their design features multiple materials, and they are seeking a consistent aesthetic in the glue.
By this, I mean, you don’t want some glue lines to be tinted yellow for plastic, while other parts on the same model rocket are glued together with a tinted white glue. Keep consistency in the glue you’re using so the piece doesn’t look odd.
This set includes precision tips to allow you to create the pencil-thin lines. They also include a cap, so it won’t dry out on the precision tip and spoil the bottle (as happens to many-a-superglues).
Another perk to this glue type is that it will dry clear and be resistant to extreme temperatures. Not that you’ll be washing your model rocket, but if you for some weird reason decide to – it’s also washer/dryer safe!
With a 4-star review out of 288 ratings, one purchaser says, “This size of E6000 is THE BEST to work with. It comes with the tips which make it super easy to put down small amount of glue rather than worry about a “big glob” of it coming out onto your piece.”
#7 Gorilla Ultimate Adhesive Multipurpose Construction Glue
Last but absolutely not least, the highly reputable brand of Gorilla Glue is a wonderful option for all of your craft/glue needs.
The reason we saved possibly the best for last is really based on the dry time for this product. The company claims, “Instant Grab – Holds in 0 seconds.” It is one of the fastest drying glues on the market (link to buy on Amazon).
It will be mildew and mold preventative and work in interior or exterior environments.
This product will bond with almost anything.
And perhaps the real selling point for model-fanatics – you can paint over this glue within 30 minutes of application. Sold!
Other Supplies You May Need
Some purchases you may need to get started in your rocketry passion will be:
- Model rocket kit – check out our post on best model rockets for beginners
- Paint – see our post on the best paints for model rockets
- Range box – here are the 11 items you need in your model rocket range box
- A sharpened blade or pointed end like a pencil
- Q-tips to clean up any glue or paint
And of course, the glue you’ve selected based on materials from the above recommendations of top glue brands for model rockets.
Tips on Constructing Your Model Rocket
Some hacks you may or may not be aware of to get you started in your model rocket building are:
- Open your kit and check that everything is inside as it ought to be. Contact the manufacturer if something is missing or you need a part replaced.
- The ends of your tubes will be the weakest part of the rocket. Some rocketeers will secure the entire body of the tube with their preferred glue before beginning.
- Experiment with the amount of glue you like on something less important than your rocket kit. You’ll need to get a feel for the flow of that brand, how quickly it rushes out, if it’s runny or thick, etc. You’ll want to use enough glue that the rocket parts will stay in place without using too much that it expands and breaks. Again, this may take some trial and error with any brand of glue you select.
- If, after all of your work, the nose doesn’t fit on your model rocket, this is where the sandpaper comes in. Don’t sand too hard or low, but slightly smooth down the surface and test if the fit is closer to accurate. Do this in minimal sanding increments as to not sand too much away. You can always sand the rocket down more, but if you’ve gone too far – there’s no getting it back.
- Any knots you create or tying pieces together, secure with a bead of glue, regardless of if that’s mentioned in instructions. This will simply secure your work as you go and set each knot from loosening.
- Lastly – NEVER use super glue. The super glue will expand and stiffen parts of your model rocket that you don’t want stiffened. It is always recommended to use a white or yellow glue.
Resources to Get You Started
Many of you may already be keen on the rocket-building process and simply be seeking a new glue brand.
In that case, these resources may not be useful to you. But I’m a firm believer that there’s always something new to learn and I’m sure there’s something in the process you could use a fine-tuning or refresher-course on.
Here are some resources we have found or put together that should help get you started:
- NASA’s Guide to Model Rockets
- Are Model Rockets Safe?
- Best Model Rockets for Beginners
- Best Materials to Make Model Rockets
- Model Rocket Engine Sizes and Classifications
I hope this guide has been useful to you in building your rockets with the best quality glue possible.
Choosing the right materials will allow you to enjoy your model rocket for many years to come. You will be able to look at your craft with pride, knowing you truly created something of quality.
Build Your Own Launch Controller
Don’t forget! You can ditch the stock controllers and confidently build your own from scratch using our step-by-step instructions and exact materials list! We promise this will make your launch experience 10x better, and using our course License to Launch you can be 100% confident you’ll be able to finish this project and be super proud of what you’ve built! Here’s a sneak peek below.