Launching model rockets can be a fun hobby. It could even turn into a competitive pastime. If you really want to put your inner rocket scientist to the test, you could add things like altimeters and accelerometers to the payload to gather data about each flight. I was eager to see what options were out there. After some research, this is what I came up with.
Should I purchase an altimeter and accelerometer for my model rocket project?
If you are interested in tracking the altitude or speed data related to the flight of a model rocket, you should purchase an altimeter and an accelerometer for your model rocket project. Be mindful of the weight, size, storage capacity, and data syncing methods when purchasing the altimeter that’s right for you.
The options for gathering data from your model rocket launches are infinite. You can add other instruments to your rockets, test different materials, use different sized rockets, and more. I learned about some options to play around with that you might find useful and entertaining.
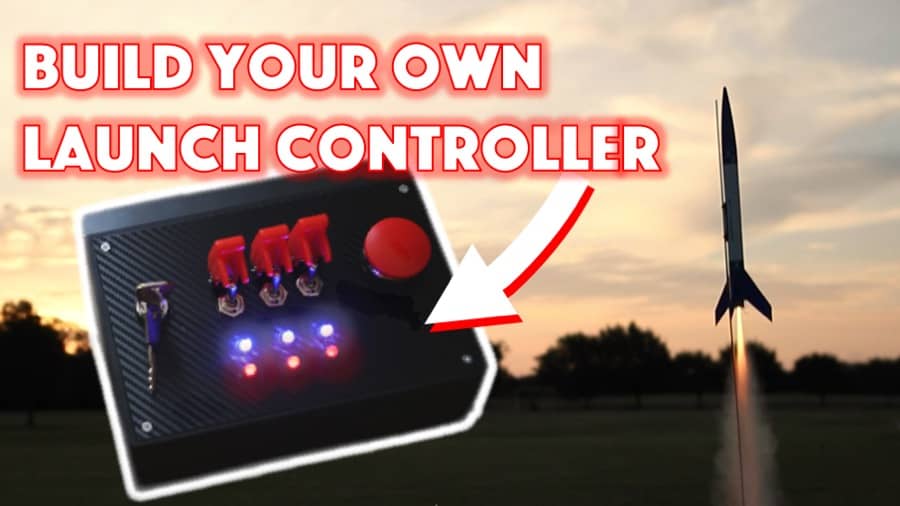
Are you still using the standard Estes controllers for your launches?
We just built our own beautiful launch controllers that make launches SO much more fun, and we documented EVERY single step and item purchased and put it into a step-by-step course that teaches you how to do the exact same thing.
Click here to learn more about how you can build your own launch controllers!
How Do I Pick An Altimeter For My Model Rocket?
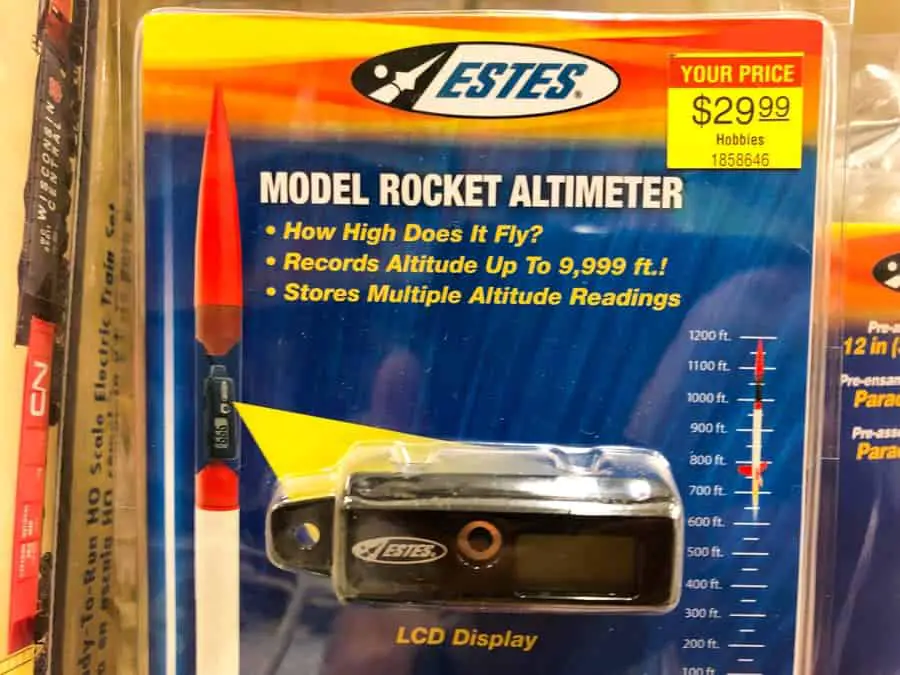
An altimeter measures the height achieved during a launch, and a lot of factors go into picking an altimeter for your model rocket. Below are some ideas to consider when purchasing your own altimeter.
If you’re working with a rocket that’s smaller than most, you will definitely want to take into account the minimum amount of space you need for your altimeter. This will ensure it fits in the rocket. However, if you find out your altimeter doesn’t fit as it should, you can always modify the rocket like in this video:
These devices have different methods of installation. Some altimeters hook into the payload beneath the nose cone. On the other hand, some altimeters go in the payload of the rocket (with a small screw or wire), which might take up valuable space during launch.
Altimeters come in various shapes, sizes, and of course recharge in different ways. Some don’t recharge and simply need a new battery when you’re ready to launch. Others can be recharged with a USB plug. Pay attention to the instrument’s specifications before you purchase.
If you are new to model rockets, you might have concerns over cost for items such as altimeters. Rest assured even Amazon has affordable items like this altimeter. There are lots of options available.
You should also consider whether or not you are going to enter competitions with your rockets. If you do, smaller altimeters are the better choice because they reduce the weight of the rocket, which helps with performance.
What Kind Of Data Can I Collect From An Altimeter?
Altimeters collect the peak height of the rocket during its flight, so you can use it to find your highest altitude launch. However, there is a lot more you can do with the data as well—especially if you have multiple rockets.
- Compare the altitude of rockets with different engines: Not all engines are built the same way, so it’s safe to say not all of them will propel a model rocket the same way. Try using the same rocket with a variable—the engine—and see what kind of results you uncover.
- Compare the altitude of rockets with different weights: You could find out how much weight affects the altitude a rocket can reach by tracking your data and findings.
- Compare the altitude of rockets that are different sizes: The variable in this experiment is the model itself. Are both altitudes the same? Or are they different?
- Compare the altitude of rockets made with different materials: Some materials are lighter, sturdier, or more aerodynamic than others. How does this affect the peak altitude of the rocket?
- Compare the altitude of rockets with different weather conditions: You might find the weather will play a factor in the peak altitude of your rocket’s flight. The direction of the wind—or how fast it was blowing—plays a part. But how?
You will also be able to compare the duration of these flights using similar variables.
If you track your data over several launches, you can learn how much the peak altitude changes due to variables like engine power, weight of a rocket, size of the rocket, materials used, and weather conditions. These are just a few ways you can look at the data you retrieve and track.
How Do I Retrieve Data From My Altimeter?
After your launch, you can retrieve data from your altimeter to keep track of or compare with other data you collected. The retrieval process will vary depending on the type of altimeter you use. The two examples provided are a micro version and a version from Jolly Logic.
Altimeters Like MicroPeak Altimeter
With micro altimeters, you can retrieve your data and upload it to your computer. This particular altimeter is designed for competition rockets because it is compact and lightweight for maximum altitudes. It records for 48 seconds after launch.
With this particular altimeter model, you need a few things to get started:
- MicroPeak altimeter
- Micro USB cord
- Computer with necessary software
- A receiver board to sync the data
Start by loading the software on your computer. On the top toolbar, select file, then download. Select “OK” in the pop-up menu.
At this point you should plug in your micro USB cord to the altimeter and your computer.
Turn on the receiver and carefully place the receiver close to the altimeter. Lights will indicate the signals are working between the boards. When the light turns blue, the data is syncing, and the data should appear on your computer screen with details of your launch.
Altimeters Like Jolly Logic Altimeter 3
The Jolly Logic Altimeter 3 (link to read reviews on Amazon) is a larger altimeter with a hook for attaching to your rocket. These are not usually used for competitions because they are heavier than micro options. However, you can sync data retrieved on your launch very easily. You will only need the following to get started before your launch:
- A smartphone (either iPhone or Android work)
- The Jolly Logic app
- Bluetooth connection between the devices
The first step of retrieving your flight’s data is to prepare prior to the launch. To connect the devices via Bluetooth, turn on the altimeter. On your phone, go to your settings, then your Bluetooth menu. Select the Jolly Logic Altimeter 3. It is important to approve the pairing on both devices for a successful connection.
You are now ready to launch your rocket. Your data will appear on your app in real time while the Bluetooth is connected.
Other Altimeters
Sometimes the data retrieval process isn’t the same from instrument to instrument. You should look at the directions of your altimeter to make sure you know how to retrieve the data prior to use.
How Do I Pick An Accelerometer For My Model Rocket?
Accelerometers measure the force of acceleration your rocket achieves during launch. There are numerous factors to consider when purchasing one. I outlined some of the factors below.
Keep in mind that accelerometers are going require more work than the altimeter readings we covered above. There are lots of open-source accelerometers out there that are very affordable but will take some research to understand how to use them.
When you’re looking into purchasing an accelerometer for a model rocket, you need to take into account how much space you have in the payload of the rocket as well as the size of the chosen instruments. Sometimes you have to modify the rocket’s body or the configuration of instruments inside. There are countless videos about modifying rockets online.
Another factor to consider is how the accelerometer can be installed. Does it require a screw, wire, or both? Can it be attached with an adhesive like super glue (side note, see our post on the best model rocket glue – it isn’t super glue!) or simple double-sided tape? These questions are especially important to ask if you are competing with your model rocket because weight plays a factor in the performance of your flights; it also dictates if you can reuse the equipment.
Consider the differences between rechargeable and single-use batteries. The latter incurs extra expenses down the line, but this often makes devices like accelerometers lighter in weight. If weight is not a concern (as in competitions), rechargeable accelerometers might be a wise choice. Many plug directly into an outlet or computer via USB cord.
If the accelerometer cost is a concern, you might consider less technologically advanced ones. There are some that are similar to the MicroPeak Altimeter in the aspect that they need a receiver and other equipment to retrieve data, but an accelerometer chip is less expensive than professional options, which can cost $1,000 or more.
Sometimes storage capacity plays a role when you purchase an accelerometer. If you are looking to store more data, however, that also comes with a hefty price tag of several hundred dollars or sometimes even more. An instrument with 1 gigabyte of storage can hold up to 17 continuous hours of data, but model rockets don’t usually require this level of sophistication.
If you enter model rocket competitions, you are more likely to favor small, lightweight options for accelerometers and other instruments for your rockets. These, along with other factors, will help optimize your flights for goals like highest altitude, longest duration, and best craftsmanship.
Finding the right accelerometer depends on factors such as size, installation methods, and cost. Whether you enter competitions for rocketry (or simply like the hobby) will also influence your purchasing options. There is a lot to take into consideration.
What Kind Of Data Can I Collect From An Accelerometer?
Accelerometers track the acceleration of the rocket you launch. It collects data points throughout the flight and records them. With this collected data, you can:
- Compare the acceleration of rockets with different engines/motors: If the rockets are exactly the same—aside from the engine/motor—this means the engine is the variable in the experiment. Compare the data points from the accelerometer to find out if one engine is superior to the other.
- Compare the acceleration of rockets with different weights: As a variable, weight of a rocket will make a big difference in how fast the rocket is able to accelerate, but you can find out how large or small that difference is with the help of the data you collect.
- Compare the acceleration of rockets with different sizes: The components are the same, but the rocket size is different. How will this affect your flight? With the data you collect from your accelerometer, you will be able to find out how this affects your flight.
- Compare the acceleration of rockets with different adhesives: If you mount your instruments with adhesive, will that provide a different result than if you mount them with a screw? The data you collect from both flights will help you determine this.
- Compare the acceleration of rockets with different wadding material: If you want to retrieve your rocket, you need to be sure the parachute deploys safely. This is achieved with flame-retardant wadding material. Does using different types of wadding material change the outcome of the flight? Compare these two flights to find out.
Flight duration can also be altered by variables like the ones above.
These are only a few ideas of experiments you can conduct with the help of an accelerometer and its data. Compare two or more flights to get started, but keep in mind a good experiment has several sets of data.
How Do I Retrieve Data From My Accelerometer?
You can retrieve data from your accelerometer in a number of ways. Here are two to get you started. Keep in mind, you should know the general method used to retrieve data prior to purchasing your accelerometer as this could influence what you should buy.
Micro SD Card
It’s easy to retrieve data from your accelerometer with a micro SD card that will be attached to your accelerometer circuit board. Here’s what you need to get started:
- Accelerometer circuit board
- Mounted micro SD card slot
- Micro SD card
- USB card reader (micro SD compatible)
- Any software you have to interpret data
- Computer
Before you launch your rocket, mount your accelerometer in the rocket and turn it on. This will allow you to collect data on the micro SD card during the flight.
After the flight, turn the accelerometer off. You will be able to remove the micro SD card and transfer the data to your computer using the USB card reader (along with software).
This step-by-step guide will help you retrieve the data points collected with the accelerometer in your model rocket. From here, you can learn a lot about this and other flights you might launch.
If you have any trouble with the micro SD card, try watching this video about how to use one with an accelerometer:
USB/Micro USB
If you have a larger accelerometer, you might be able to skip the Micro SD card and retrieve your data. First, you’ll need the items listed below:
- Accelerometer
- USB/Micro USB cord
- Computer (with appropriate software)
Make sure your accelerometer is on during the flight so it can document data. After the flight, turn off your accelerometer to conserve battery and keep data limited to the flight record.
To retrieve the data saved, load the software needed to interpret the data. Then plug the accelerometer into the cord and computer. Follow prompts on the screen if necessary. Your data points will appear in a graph on screen with the results of the flight.
The data you collect over time will serve you well for any tests or experiments you conduct.
Important Notes
If you are unsure of how to retrieve data from your accelerometer, it’s best to ask the manufacturer how to do so. Ideally, you should do this before you buy the product to be sure you have what you want and need. The extra time and effort will be worth it.
What Are Model Rocket Competitions?
Model rocket competitions take place throughout the US. There is a sporting code here to learn more about the rules and regulations of the events as well as the three categories: altitude, duration, and craftsmanship.
Altitude
The rocket with the highest peak altitude (within the given power limit restrictions) wins this category.
It is important to take the model’s size and materials into account in this situation. For example, a small, less sturdy cardboard model might reach higher altitudes than its larger, sturdier plastic cousin. As long as the rocket can be recovered for the altimeter data, it doesn’t matter how damaged the rocket is.
Another factor in this competition is reducing drag. Drag, the effects of friction on the surface of the rocket, can be reduced by reducing the size of the rocket as well as using a more aerodynamic design. If the rocket reduces enough drag, the altitude will likely be higher.
Duration
The rocket with the longest flight duration (with a given recovery system) wins this category.
It is key to test out recovery system solutions before the competition. For example, not all parachutes will provide help with extending the duration of the flight. The ideal solution will have a lot of lift and allow the rocket to stay airborne for a longer period of time. You can see in this NASA diagram of a model rocket launch how a slow descent will extend the duration of the flight.
If you have a higher altitude after the powered ascent, you are more likely to have a longer duration for your flight. This will give you the upper hand sooner as well.
Launching your model with certain weather conditions could help lengthen the flight, too. Test out some ideas, such as launching into the wind or without any wind during launches.
Craftsmanship
In this category, the winner will have an aesthetically pleasing product to show off.
Crafting a model rocket that is pleasing to the eye is no small feat—especially considering the fact that they are judged after launch. Some things to think about include color, shape, and ability to fly well.
Keep in mind if the rocket is damaged during its flight, this will count against you, so don’t cut corners on cost in this type of contest—especially if it provides a more aesthetically appealing result. One make-or-break facet of craftmanship is how neat it is. Examples here include an even paint job and no visible adhesive.
Other Contests
The winner of a spot landing contest will have the nose cone of their rocket closest to the center of the spot designated for landing on. There are three different kinds of spot landing competitions, including:
- Open spot landing: Here you can use any recovery method.
- Parachute spot landing: You must use a parachute as a recovery method.
- Streamer spot landing: You need to use streamers as a recovery method (within given measurements).
The winner of the precision payload contest will have the best craftsmanship for the payload portion of the rocket. One idea includes landing a raw egg without breaking it. However, you cannot use devices on the rocket that measure altitude (altimeters) or duration during flight; this is considered cheating.
The winner of the research and development contest is truly advanced. However, the winner will help advance model rocketry technology with their findings. This is where experiments with rocket launches could come in handy because you can use the results of these experiments for the contest.
How Do I Find A Contest?
Each year, the National Association of Rocketry (NAR) has up to 27 events for model rocket enthusiasts to participate in. You can find their calendar on their website.
Some events take place each month, which is a nice touch for those who can’t attend one or others for various reasons. This also means you could meet some new friends with similar interests—consistently at that.
There are also some contests that take extra strides in being particularly family-friendly. They also have food available for purchase (among other things) at family-friendly events. It looks like a blast!
What Other Instruments Can I Use On Model Rockets?
There are additional instruments available to add to your model rockets. Here are a few examples.
Rocket Locators
Rocket locators are objects that will help you find your rocket after it lands. There are two types of locators: beacons and GPS locators.
Beacons project lights and/or sound to make your model easier to find. This is helpful if you launch in a smaller field with tall grass, for example. This has unlimited range after launch, which means you don’t need to worry about your rocket going out of range to find it.
GPS locators give you the exact location of your rocket for recovery purposes. Some point you in the right direction (using a device that comes with the GPS locator). The range the devices work together can vary. Some devices have a range up to 8 miles away so you can easily locate your rocket.
Cameras
Camerasare also available to add to your model rockets to get great aerial photographs or videos. They are great to record the memory of your first rocket launch—especially if rocketry becomes a hobby or career later on in life.
These cameras are small. Some are as small as a keychain!
Keep in mind cameras are definitely not ideal if you are participating in competitions, but can make great memories.
These are a few ideas of additional pieces of equipment you can add to your model rockets. Keep in mind during competitions these add-ons might not be practical because they add weight to your rocket.
Here is our recommendation on in-flight cameras for model rockets (with examples of actual footage).
Where Do I Place/Mount All Of These Instruments?
Each piece of equipment you purchase should have a recommended method of mounting or placing the instrument in the product description. Check these guidelines prior to purchase for the desired results, or improvise for some interesting data.
There are several ways to place or mount equipment in model rockets including:
- Tape: This is common for hobbyists, especially with cameras. Double-sided tape is a good option for these projects.
- Screw: A small, lightweight screw will ensure more expensive instruments remain in place—especially falling from such high altitudes. These are good for permanent setups.
- Wire: Thin wires are helpful in securing instruments as well. This is a sturdy way to secure an instrument with a less permanent setup.
- Adhesive: Some adhesives like super glue make a permanent hold. This is great for competition-worthy model rockets.
- Hook: Some altimeters hook under the nose cap of the model rocket. Hooks are easier to remove than permanent adhesives.
It is important to consider how temporary or permanent the solution is when before you start—just in case you want to remove the equipment later.
If the equipment is in the payload, remember it is also vital to add recovery wadding to cushion the equipment for shaky landings. This will extend the life of the equipment and ensure it doesn’t catch fire.
Building and launching model rockets can be an awe-inspiring and educational hobby. You can even attach equipment like altimeters and accelerometers (among other things) to collect data about each of your flights. With events like family-friendly competitions all across the country, there’s no doubt there is something in it for everyone.
Build Your Own Launch Controller
Don’t forget! You can ditch the stock controllers and confidently build your own from scratch using our step-by-step instructions and exact materials list! We promise this will make your launch experience 10x better, and using our course License to Launch you can be 100% confident you’ll be able to finish this project and be super proud of what you’ve built! Here’s a sneak peek below.