Build Your Own Launch Controller

Recent Posts

Is Launching a Model Rocket Legal in California?


Launching a model rocket is perfectly legal with very few restrictions in most states, but there are a few states that make it more difficult than others. The most notorious of these is California. Let’s answer this question once and for all.

Is launching a model rocket legal in California? Yes. Launching a model rocket is legal in California, but you must first obtain permission from your local fire department and the owner of the property where you intend to launch. You can also only use motors certified by the California State Fire Marshal. Local laws may vary.

Launching model rockets is legal in every state, but some states have more restrictions placed on the activity than others, and California is one of them. Continue reading for all of the details on how to legally launch a model rocket in the state of California and even how to pursue high power model rocketry.

A brief disclaimer: we are not lawyers and this article does not constitute legal advice. This article is based on hours of our own research on the topic and an aggregation of the information we were able to find.


Are you still using the standard Estes controllers for your launches?

We just built our own beautiful launch controllers that make launches SO much more fun, and we documented EVERY single step and item purchased and put it into a step-by-step course that teaches you how to do the exact same thing.

Click here to learn more about how you can build your own launch controllers!

Get the EXACT materials list along with easy to follow step-by-step instructions on how to build your very own launch controller and make launches 10x BETTER in our course: License to Launch

Legal Definition of a Model Rocket in California

When you ask someone whether you can launch a model rocket in California, everyone will say yes, but the details of that yes may be different. There is some confusion about the legal ways of launching model rockets in California because there was a somewhat recent change in the laws concerning model rockets.

Until 2016, California used a definition for model rockets and model rocket motors which made it very difficult for hobbyists to launch their chosen rockets.

The old definition of a model rocket according to the state of California was any toy or educational device that uses a model rocket engine and that does not weigh more than 500 gram (17.6 ounces) including the engine and payload.

Yikes! This would mean that any model rocket that weighs a little over a pound would require a special permit or it would be illegal for you to launch it. There are plenty of model rockets that weight over a pound after you put an engine in them!

The new definition of a model rocket reflects the National Fire Protection Association’s (NFPA) definition of model rocket listed in NFPA 1122, which is a definition widely accepted in most states, and it is also the definition used by the Federal Aviation Administration.

The new legal definition of a model rocket in California is a rocket that uses no more than 4.4 ounces of propellant that is slow burning, is made of paper, wood, or breakable plastic, contains no substantial metal parts, and weighs 53 ounces or less including the propellant.

Below is the checklist version of the definition that you can check your rocket against. If your model rocket does not check off each of these characteristics, it is not legally considered a model rocket. It is a high power rocket.

  • Uses 4.4 ounces of propellant or less
  • Slow burning
  • Made of paper, wood, or breakable plastic
  • No substantial metal parts
  • Weighs 53 ounces or less including the propellant

These regulations allow much more freedom to launch different rockets. The increased weight limit allows for rockets that are almost 3 times heavier to be launched.

Requirements Before You Can Launch in California

Even with the changes in the law, California did not change the hoops you must jump through before you can launch a model rocket. Luckily, these hoops are relatively painless and understandable considering that setting a model rocket off in the wrong place at the wrong time could lead to a wildfire.

In order to launch a model rocket, you must first obtain permission from the property owner, even if that is a public space. For example, if you’re looking at a local park for your launch site, you would probably need to contact your local parks and recreation office to ask for permission.

You must also get permission from your local fire department, and this permission should be in writing so that you can easily prove to any law enforcement officers that may check in on you that you have permission.

California Regulations Concerning the Purchase of Motors

Nationwide there are a number of restrictions concerning who can and who cannot purchase model rockets of varying powers, but in California, there is even more regulations than in most states.

Age Requirements

In most states, anyone can purchase a model rocket motor with an impulse class of E or lower as long as they are not in a metal casing. You must be 18 to purchase any motor in a metal casing and you must be 18 to purchase motors with impulse classes of F or G.

The logic behind this is that after the E class, model rocket motors start to become very powerful. The total impulse of a model rocket’s motor doubles with each impulse class. After E, that doubling starts to be significant.

In California, you must be 14 years of age or older to purchase any model rocket with an impulse class of 1/4A through D. All other motors require that you are at least 18 years old.

Additionally, model rocket motors can be given to children ages 12 and up to use as part of an educational program that has been approved by the fire department. They must be under direct supervision when in use.

Motor Certification

The NAR and the TRA both require that model rockets be launched using motors that have been certified. The NAR and TRA both offer model rocket motor certification, and they have reciprocity with each other.

California has its own certification process for model rocket motors. The California State Fire Marshal carefully tests each model rocket motor and determines whether it is eligible for certification. Any model rocket you buy in California, or have shipped to you, should have a special seal on it that denotes that it is approved for use in California.

This particular regulation creates a lot of angst among California’s model rocket launchers because it is often the case that a new motor is released nationwide for some time before it becomes certified in California.

What about Composite Motors?

The legality of composite motors is another area where people may be misinformed because of the 2016 change in the regulations concerning model rockets in California.

Under the old safety codes, a model rocket motor was defined as commercially manufactured, non-reusable rocket propulsion device that is constructed of nonmetallic casing and uses a solid propellant.

This meant that until 2016 any model rocket motor that had a metallic case or that was reloadable could not be bought or used in the state of California. This ruled out a lot of composite motors.

As you can imagine, this was a major point of contention for many model rocket enthusiasts.

Under the new safety codes concerning model rocketry, a model rocket motor must be commercially manufactured, use solid propellant, and it cannot require mixing by the user. It also must conform to the definition of a model rocket motor used by the NFPA.

The NFPA defines a model rocket motor as a solid propellant motor with a total impulse of 160 Newton seconds or less and an average thrust of 80 Newtons or less.

This means that under the amended Californian safety codes, composite motors and reloadable composite motors are legal to buy and launch so long as they do not exceed a total impulse of 160 Newton seconds, and so long as their average thrust does not exceed 80 Newtons.

No matter what you still must obtain permission from the property owner of your launch site and permission from the local fire department.

Safe Launching in California

California also uses the NFPA standards that determine how you go about using your model rocket. This is not unusual. Many states use these standards to set their fire and safety codes, and they are also used by the NAR.

The list of regulations is long and outlines every detail on how to launch a model rocket safely. I will highlight some of the most pertinent ones below, but if you’re interested, you can find the complete standards on the NFPA website.
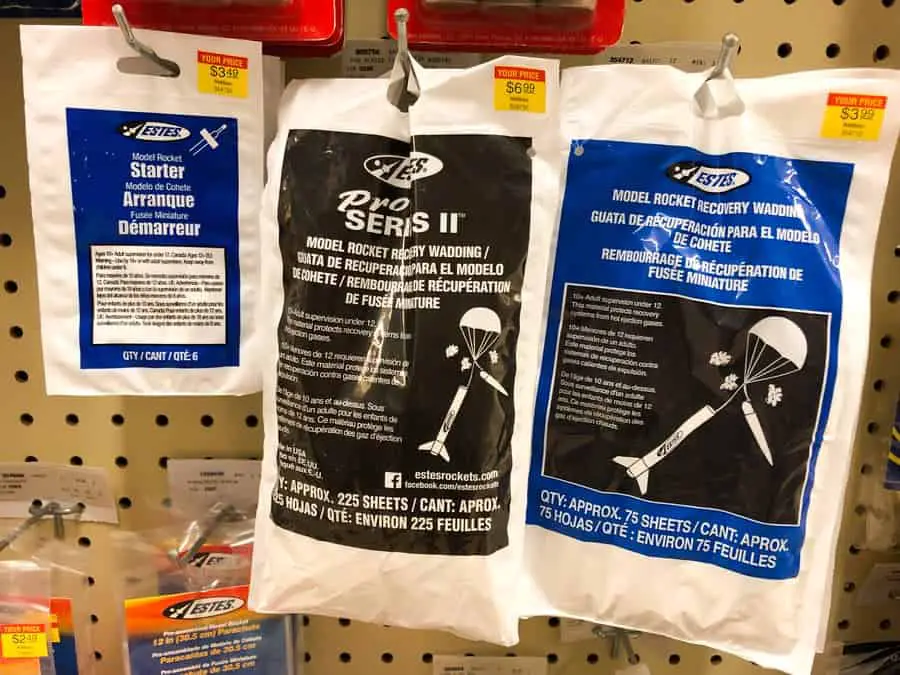
Recovery System

A model rocket must be equipped with some form of recovery system like a parachute. It also must be loaded with a flame-resistant recovery wadding.

The Motor

The motor installed in the model rocket must not exceed 320 Newton seconds of total impulse.

Only commercially manufactured, certified model rocket motors can be used for a model rocket launch. At the national level, certification happens through the National Association of Rocketry or the Tripoli Rocketry Association.

A single use motor cannot be reloaded, and any kind of motor cannot be altered in any way.

Launch Site

The launch site must be clear of power lines, tall trees, buildings, and dry brush and grass, and it must meet the minimum launch site dimensions listed below. The dimensions should not be shorter than half the highest projected altitude for the model rocket.


For example, if the projected altitude for a model rocket is 1,000 feet. The minimum dimensions for the launch site should be 500 feet by 500 feet.

Minimum Launch Site Dimensions

Installed Total Impulse in Newton Seconds Equivalent Motor Type Minimum Site Dimension
0-1.25 ¼ A and ½ A 50
1.26-2.50 A 100
2.51-5.00 B 200
5.01-10.00 C 400
10.01-20.00 D 500
20.01-40.00 E 1,000
40.01-80.00 F 1,000
80.01-160.00 2F ir 1G 1,000
160.01-320.00 4F ir 2G 1,500

(source)

Spectator distance from the model rocket’s launch system during ignition is also dictated in the NFPA code. If you’re using a motor with a total impulse of 30 Newton seconds or less, spectators should be at least 15 feet away from the model rocket.

If you’re using a model rocket motor with a total impulse greater than 30 Newton seconds, then spectators must be at least 30 feet away.

High Power Model Rockets in California

If you’ve ever watched any of the model rocket launches that people do in the Mojave Desert in southern California, then you know that to some extent, launching high power model rockets has to be legal in California.

And, indeed, it is. In order to launch high power rockets in California, you must obtain a special permit from the California State Fire Marshal, permission from the owner of the launch site, and permission from the local fire department as usual.

The California State Fire Marshal now as a way for you to begin the permit process through their website!

FAA Regulations

Of course, if you are launching a high power rocket in California or anywhere else in the United States, you will also have to comply with the Federal Aviation Administration regulations.

FAA regulations require that you notify the nearest FAA Air Traffic Control facility of the planned launch, and you may also need to obtain a permit from the FAA for the launch.

NAR and TRA Regulations

Generally speaking, the model rocket community and retailers of model rocket equipment work together to make sure the community members stay safe.

This means it is virtually impossible to purchase the required certified, high power model rocket motor without getting certified through the NAR or TRA.

There are three levels of certification: Level 1, Level 2 and Level 3. Each level allows you to purchase more powerful motors and each level is harder and harder to obtain. The process is meant to ensure the launcher has enough experience and knowledge to safely launch with these powerful motors.

Levels of NAR and TRA Certifications

Certification Level Impulse Classes You Can Buy
Level 1 F and G class motors with average thrusts greater than 80 Newtons and H and I motors
Level 2 J, K, and L motors
Level 3 M, N, and O motors

Join a Club

If you are looking to get into launching high power model rockets, then you are going to want to go about it legally. You don’t want to end up with a huge fine or worse just because you didn’t go through the proper processes.

Additionally, the laws and regulations around high power model rockets are there to help keep the sport safe and in good standing with the greater community. Going through the level 1 certification process with the NAR or TRA is a fun and educational experience that will ensure you have the knowledge and experience to launch high power rockets safely.

The best way to go about launching high power rockets is to join one of your local rocketry clubs, and California has many of them. Many of model rocket clubs already have ideal launch sites, permits, and waivers set up so that you do not have to get them for yourself.

Not only can a high power model rocket club help you launch legally, the members of the club have years of experience in model rocketry and are generally happy to share it with newcomers. Finding a model rocket mentor is one of the best ways to learn.

What About Experimental Motors?

If you’re thinking about experimental motors, you’ve probably heard talk of “rocket candy” or homemade model rocket motors using stump remover and sugar. These rockets are cheap and the processes for making them are simple but making your own model rocket motors is a dangerous activity.

The process may not look much more difficult than making a cake, but the simplicity lures some people into believing that it is safe. It is not.

That being said, plenty of model rocket enthusiast take to making experimental motors. If you’re interested in this subject, the best thing you can do is find a mentor who knows how to do it as safely as possible.

Regulations on Experimental Motors in California

All of the laws in the California Health and Safety Code states that all model rockets, including high power rockets, must be flown using commercially made motors that are certified by the California State Fire Marshal.

There is no clear cut pathway for obtaining permission to build and test experimental motors outlined in the regulations, but it does indicate that the California State Fire Marshal can give a license and permits for experimental rocket building.


The Pyrotechnic Operator Class 1 license, not to be confused with the Level 1 NAR certification, allows for the manufacture, testing, and launching of experimental motors.

There are many hobby groups dedicated to making model rocket motor experimentation accessible and safe. If you are interested in experimental motors, you may want to contact a group like the Friends of Amateur Rocketry, Inc (FAR) or the Reaction Research Society  that are devoted to the creation and testing of experimental rockets and motors.

Experimental motors may require some very special licensing if you’re to do legally in California. The FAR, for example, has an Explosive Manufacturing Permit from the Bureau of Alcohol, Tobacco, Firearms and Explosives, along with a long list of other permits.

So yes, even making experimental motors in California is legal so long as you get the proper licenses and permissions from the California State Fire Marshal.

Build Your Own Launch Controller

Don’t forget! You can ditch the stock controllers and confidently build your own from scratch using our step-by-step instructions and exact materials list! We promise this will make your launch experience 10x better, and using our course License to Launch you can be 100% confident you’ll be able to finish this project and be super proud of what you’ve built! Here’s a sneak peek below.

How Fast Do Model Rockets Fly?


If you’ve ever watched a model rocket zip through the air at top speed and disappear against the sky, then you know that model rockets are fast. Watching a launch of a high-powered model rocket got me contemplating this subject, so I began some in depth research.

So, how fast do model rockets fly? Model rockets generally fly at top speeds less than 250 mph, but there are some that fly faster. Larger high powered rockets can reach speeds greater than Mach 1.

The speed that a model rocket can reach depends on the power of the motor used to launch it and the speed characteristics of the rocket itself. This article will explore all the factors that influence model rocket speed.


Are you still using the standard Estes controllers for your launches?

We just built our own beautiful launch controllers that make launches SO much more fun, and we documented EVERY single step and item purchased and put it into a step-by-step course that teaches you how to do the exact same thing.

Click here to learn more about how you can build your own launch controllers!

Get the EXACT materials list along with easy to follow step-by-step instructions on how to build your very own launch controller and make launches 10x BETTER in our course: License to Launch

Speeds of a Model Rocket

You don’t hear as much talk about model rocket speed because it can be difficult to measure with the use of specialized equipment or a rocket simulator, and the speed for a rocket depends on numerous factors, some inside our control and some outside of our control.

The trouble with pinpointing a model rocket’s speed is that it is constantly changing as it goes through each stage of flight.

The model rocket launches with a burst of power. Its speed accelerates until the point that it burns through all its fuel. The rocket will reach its top speed right before its motor runs out of fuel.

After the rocket runs out of fuel, it enters the coasting phase. Propelled forward by its own momentum, it will continue to go higher, but it will also gain that altitude at slower and slower rates.

The model rocket begins to slow because of the effects of weight and drag, which I will talk about more below. Eventually the rocket will stop gaining altitude. This is when the rocket reaches apogee.

The recovery system will launch shortly after the rocket reaches apogee as it begins its fall back to the ground under the power of gravity.

It is difficult to pinpoint exactly how fast a model rocket will go in the seconds that it burns up its fuel, and the top speed a model rocket reaches doesn’t always mean that it will gain greater altitude.

Estimating Model Rocket Speed

Even though model rocket speed changes rapidly after you launch the rocket, there are some ways you can go about getting an idea of the model rocket’s average speed. None of these methods are accurate, but if you’re just looking for a vague ballpark of your model rocket’s average speed, they will help you.

Using Information from the Kit

If you are buying a model rocket kit, you can use the information on the kit’s packaging and motor to get a general idea of what the rocket it capable of. This is definitely not the most accurate way to determine the speed of your model rocket, but it might give you a general idea of the speed potential of the model rocket in your kit.

Here is the information you will need:

  • Estimated maximum altitude
  • Most powerful motor recommended burn out time
  • Most powerful motor recommended delay time

Typically, you can find the estimated maximum altitude of a model rocket on its packaging or on its product description page online, and the delay time is the number in the motor’s code.

Finding the burn out time might take a little more digging. Estes’ details a lot of useful information on their Engine Chart, including the thrust duration, or how long it takes before the motor burns out. It has many commonly used motors, but it is does not include every motor you might come across.

In order to determine what kind of average speed you could get out of your rocket divide the estimated maximum possible height by the time delay plus the thrust duration listed for the strongest motor on the list of recommended motors.

An example:

Let’s take the Estes Silver Arrow Launch Set (link to read reviews and see pricing on Amazon) and see what kind of average speed estimate we can get for it.

Estimated Maximum Height: 1125 feet

Most Powerful Motor: C6-7

Burnout/Thrust Duration: 1.9 seconds

Delay Time: 7 seconds

Burnout (1.9) + Delay (7) = 8.9 seconds

Max Height (1125) / 8.9 = 126.4 feet per second or 86 mph

Now what does this number really tell you? It only tells you the average speed including its very slowest speeds as it comes to a stop. A rocket is at its fastest right before its motor reaches burnout. It’s top speed could easily double its average speed.

Using Measurements You Take Yourself

For a more hands-on experience, you could estimate the average speed of your model rocket by measuring the rocket’s altitude at apogee and how long it took to get there. This method will only work if you can actually see the rocket when it reaches apogee.

Here is what you’ll need:

  • An altitude tracker like the Estes Altitrack (link to read reviews and see pricing on Amazon)
  • A stopwatch
  • Someone to help

To take these measurements, one person will need to be using the Altitrack to measure the model rocket’s altitude at apogee, and the other will need to use a stopwatch to measure how long it takes for the rocket to reach apogee.

There are ways to measure the altitude of the rocket at apogee other than the Altitrack, but they involve rigged up angle calculators and calculus. Using the Altitrack works on the same principles, but it is a lot more convenient.

To calculate the average speed of the rocket, you will take divide the altitude at apogee by how long it took the rocket to reach apogee.

An example:

Altitude: 900 feet

Time to reach Apogee: 5 seconds

900 / 5 = 180

If it takes 5 seconds for the rocket to reach its peak and it traveled 900 feet, it would be traveling 180 feet per second or 122.7 mph.

Remember, this is not the speed that it starts with at takeoff or ends with after it reaches its peak because the rocket is constantly accelerating until it runs out of fuel and then it is constantly decelerating. It is an average of the speed it traveled.

Accurately Measuring Model Rocket Speed

So far, I’ve shown you how to make some basic estimates of your model rocket’s speed, but as I’ve said these are inaccurate. If you’re working on science project or want to get into model rocket competitions, then you’re going to want accuracy.

The only way to measure a model rocket’s true speed is to attach a device called an accelerometer to the rocket before you launch it.

Products like the Jolly Logic AltimeterTwo (link to read reviews and check pricing on Amazon) will measure your rocket’s top speed and more. The AltimeterTwo includes 10 different pieces of data about each flight including the top speed, the highest altitude, motor thrust duration, peak acceleration, ejection timing, and total flight time. It can be attached to the outside of your rocket or it’s also small enough to fit inside most rockets.

If you’re looking for ever more data, you could try the Jolly Logic AltimeterThree (link to read reviews and check pricing on Amazon) which connects to your Bluetooth enabled smartphone. The launch data is sent to your phone where it creates a graph with all the pertinent information.

Alternatively, you could create a DIY accelerometer, but this requires a deeper understanding of electronics.

How Thrust Affects Speed

Thrust is the force which moves a rocket through the air. It is generated by the reaction that takes place in the motor when it is ignited.

Thrust is what causes the rocket to overcome weight and drag and move from the ground. If a rocket does not have enough thrust, it will not overcome these forces and it won’t lift off.

The amount of force with which a model rocket will launch depends up on the total impulse and the average thrust, which I will outline for you below.

The more thrust a motor puts out in an instant, the faster the model rocket will fly. In the sections that follow, I will discuss how the classification code on a model rocket motor describes the amount of thrust it can put out.

Total Impulse

The total impulse is the amount of energy available in a model rocket’s motor. To think of it in layman’s terms, it is the amount of fuel the motor has. If we compared it to a car, it would be the amount of gas in the tank.

To determine the total impulse of a model rocket’s motor, you must refer to the code printed on the motor. It will look something like this: B4-4. The first letter in this code, in this case a B, refers to the total impulse class of the motor.

Here is a chart that shows the total impulse for different model rocket motors.

Rocket Motor Total Impulse

Rocket Motor Class Total Impulse (in Newton-seconds)
1/4A 0.625
1/2A 1.25
A 2.5
B 5
C 10
D 20
E 40
F 80
G 160

As the letters ascend, the total impulse of the model rocket motor typically doubles.

The total impulse will determine how long the motor can produce the thrust needed to continue to accelerate.

Thinking of the car example, the amount of fuel in our gas tank does not determine how fast we can go, but how long we can go at a certain speed.

Average Thrust

The number that follows the letter in the code refers to the average thrust of the motor. In the example of the B4-4 motor, this is the number 4.

The average thrust is the rate at which the motor will use the fuel available to it.

All motors rated with a B will have approximately the same energy available for them to use to send the rocket through the air, but those with a higher number will burn up that fuel more quickly and those with a lower number will do it more slowly.

If we compare this to a car, the average thrust would be the amount of pressure you put on the gas pedal. The average thrust relates directly to how much fuel is used and how fast the model rocket will go.

In case you’re curious, the last number is how many seconds after the motor runs out of fuel that it will take before it activates the recovery system. At this point, all thrust would be stopped and the rocket would begin a safe descent.

How Weight, Drag, and Lift Affects Model Rocket Speed

Weight, drag, and lift are all natural forces that impact the top speed a model rocket can reach. In order to reach its top speed, a model rocket must overcome the effects of weight and drag, and utilize lift forces to its advantage.

Weight

We don’t always think about it, but our weight is all about gravity. It is a measurement of the downward force that the Earth’s gravity has on us. The weight of a model rocket will tell you how much force will be pulling it down as the motor struggles to launch it upwards.

The heavier a rocket is, the bigger the motor will have to be to counteract the force of gravity.

Drag

Drag is all about the aerodynamics of the rocket. Drag is created when a solid body, like a rocket, comes in contact with liquid or gas, like air.

The more aerodynamic a rocket is, the less drag there will be, the faster it can go and further it can fly.

Lift

Lift is another aerodynamic force, but unlike drag, lift will help your rocket travel faster. In airplanes, lift is the force that helps the aircraft overcome its weight.

In the case of rockets, lift is used to stabilize the rocket and keep it flying straight up. If a rocket doesn’t not fly straight up, it may encounter more drag, and it would slow down.

How Does Motor Size Affect Model Rocket Speed

The size of the motor does not affect the speed of the rocket directly. The speed of the rocket is most strongly influenced by the average thrust, or the speed with which the motor burns through its fuel to create thrust.

Estes Rockets come in four sizes mini (13mm), standard (18mm), 24mm, and 29mm. As the motor increases in size, so does the total impulse because there is room for more fuel in the motor, but a model rocket will also have to be larger and heavier to hold the larger sized motor.

The extra fuel available in a larger motor can be used for different purposes, and those purposes are not always speed. Here is what a motor can do with extra fuel.

  1. A motor could use that extra fuel to lift a heavier rocket
  2. A motor could use the extra fuel to increase the thrust duration, or the length of time the motor provides thrust to the rocket
  3. A motor could use the extra fuel to increase the model rocket’s speed by increasing the average thrust. The faster it burns through fuel, the faster it will fly

So, a larger motor will not always mean a faster model rocket.

A Rocket that Breaks the Sound Barrier

That’s right. Some model rockets made out of paper and plastic can break the sound barrier and create a sonic boom. Of course, that sonic boom is hard to hear as the rock is already likely to be over 100 feet in the air and the boom is relatively small. It is still an amazing feat.

In order to break the sound barrier and create a sonic boom, a rocket must be traveling at over 767 miles per hour.

Now, I’ve already said that most model rockets don’t go faster than 250 miles per hour, and this is certainly true, but in order for a rocket to be capable of breaking the sound barrier, it must be specially made with that purpose in mind. The motors used to do this are also restricted to those 18 years of age and older.

The Apogee Aspire

But how do they manage it? Let’s look at one model rocket kit that claims to be able to break the sound barrier – the Apogee Aspire.

The Apogee Aspire (link to read reviews and check pricing on Amazon) can fly over a mile high using and F motor, and it can break the sound barrier when using a G motor.

It accomplishes this feat by being incredibly lightweight. The rocket is 29 inches long and it only weighs 1.85 oz. All the components of the rocket are extremely lightweight. The body it made out of thin paper tubes, the nose is thin plastic and the fins are made out of super light balsa wood.

According to altitude predictions generated using a simulator called RockSim, when paired with the Estes E12-8, the Apogee Aspire can reach an altitude of 2,116 feet in somewhere around 10 seconds (estimated from the burn time plus delay time). This is about 212 feet per second or 144 miles per hour on average.

With a stronger motor like the Apogee F10-8, the Apogee Aspire reached a height of 5,479 feet in about 16 seconds in the simulator. This is an approximate average of 342 feet per second or 233 mph.

With an even stronger motor like the Aerotech 29mm G78G-10, the Apogee Aspire reached a height of 4,171 feet in about 11 seconds. This is approximately 379 feet per second or 258 miles per hour.

One thing this shows us is that speed isn’t everything. The slower motor actually resulted in a higher altitude, while the faster motor had a faster burn time and so could not go as high.

Now none of these numbers show that the rocket broke the sound barrier, but these are a) just estimates of the speed based on the information I have and b) only reflect the average speed, not the top speed. However Apogee does report that with a G motor the rocket will in fact cross the 767 miles per hour mark to break the sound barrier (albeit momentarily).

In addition, because the delay usually activates the recovery after the rocket has stopped gaining altitude, these speeds are probably a little slower than they should be.

The speed of the Apogee Aspire can be witnessed in this video:

Build Your Own Launch Controller

Don’t forget! You can ditch the stock controllers and confidently build your own from scratch using our step-by-step instructions and exact materials list! We promise this will make your launch experience 10x better, and using our course License to Launch you can be 100% confident you’ll be able to finish this project and be super proud of what you’ve built! Here’s a sneak peek below.

How Does Humidity Affect Model Rockets?


If you live in an area that gets hot, humid summers, then you know what it is like. It can be miserable. If you’re in misery, then you are probably wondering how your model rocket is faring.

So, how does humidity affect model rockets? Humidity can cause the paper tube of your model rocket to swell, a plastic parachute to stick, or glue to set ineffectively, but launching in humidity can help your model rockets reach a higher altitude.

Model rocketry is rocket science. So many different things can influence the flight of a model rocket that it can sometimes it can be mind boggling. Humidity is another one of those things that impacts the model rocket at every phase of its life. Continue reading to find out how humidity can impact your model rocket.


Are you still using the standard Estes controllers for your launches?

We just built our own beautiful launch controllers that make launches SO much more fun, and we documented EVERY single step and item purchased and put it into a step-by-step course that teaches you how to do the exact same thing.

Click here to learn more about how you can build your own launch controllers!

Get the EXACT materials list along with easy to follow step-by-step instructions on how to build your very own launch controller and make launches 10x BETTER in our course: License to Launch

Humidity and Model Rockets

In order to understand how humidity affects model rockets, I’m first going to explain what humidity is, and then I’ll explain how it impacts the building of your model rocket, as well as the launch, retrieval, and storage.

What is Humidity?

Humidity describes the amount of water vapor that is in the air. It is most commonly measured as relative humidity when you’re looking at the local weather report.

Relative humidity describes the amount of humidity in the air compared to how much water vapor the air is capable of holding. How much water vapor the air can hold will increase as the temperature increases.

For example, if the relative humidity is 75%, then the air is holding three quarters of the water vapor it could potentially hold at the temperature it is currently at.

This means that on a hot day with a relative humidity of 75%, the amount of water vapor in the air will be greater than on a cold day with a relative humidity of 75%.

If the relative humidity is 100%, it cannot hold any more water vapor. Evaporation will stop, and condensation may appear.

In high humidity conditions, we feel hotter because the sweat on our skin evaporates at a slower rate. In 100% humidity, our sweat would not evaporate at all. This why people tend to prefer a “dry heat” to humidity.

There are other ways to measure humidity, but relative humidity is the easiest to get information on because it is listed by the weather report.

But how does this all relate to model rockets? Continue reading!

The Problems of Humidity

Humidity causes several problems at different stages of your model rocket’s life, and I will take you through each of these problems one by one.

You won’t experience most of these problems, at least not in a substantial way, when the humidity is at moderate levels of 40%-60% relative humidity.

When You’re Building the Model Rocket

The problems with humidity start right away. Humidity can really get in the way of you building your model rocket efficiently. If you are building on a humid day, you may experience trouble with the following:

  • Paint dry times
  • Glue dry times
  • Tape not sticking
  • Blushing in lacquer paint

The most noticeable difference you will experience in humid weather is that glue and paint are going to take a longer time to dry. This can be really frustrating. I don’t know about you, but humid or not, it feels like my glue and paint takes forever to dry as it is, or maybe I am just impatient.

Glue and paints take longer to dry because they rely on evaporation to remove moisture, and in high humidity, the rate of evaporation decreases. You will have to wait longer between coats of paint and leave pieces to dry for longer.


If you use tape when you are building the rocket or the rocket’s engine, you should also note that tape often has trouble sticking when it is excessively humid. Scotch makes a masking tape (link to read reviews on Amazon) that is specific for humid condition, if you need to build or launch in high humidity.

If you use a lacquer paint or finish on your model rocket it can also “blush” in high humidity. A blush creates a foggy looking finished product, and is not at all desirable. Your best bet is to wait for a day with less humidity to paint or switch to enamel paints which will not blush.

When You’re Launching the Model Rocket

There are a couple of difficulties you could face when you launch a model rocket on a humid day. Luckily, these aren’t so difficult to overcome.

Problems you could face at launch include:

  • Swelling in the paper parts of the model rocket
  • Nose cone not coming off
  • Plastic parachutes not opening

The paper parts of a model rocket can swell in high humidity because the paper will soak up moisture from the damp, humid air, and it will expand as it does this. As the paper tube swells, the circumference of the interior will shrink.

In moderate humidity, this swelling won’t make much of a difference, but if the paper tube is exposed to too much humidity, you could have trouble inserting or removing the engine.

You can usually solve any nose cone problems by sanding the nose cone to fit into the tube, but for the engine, you may have to just push it in to place.

On a humid day you will need to check the fit of your nose cone as the swelling of the tube could make the fit too tight. If the fit of the nose cone is too tight, it will not pop off the way it should with the ejection charge. You can sand down the shoulder of the nose cone a little to get it to fit better in the tube.

If the nose cone does come off the way it should, you could still have trouble with a plastic parachute that doesn’t want to open. This happens because the plastic of the parachute tends to stick together in high humidity.

You can solve this problem by sprinkling baby or talc powder on the parachute before folding it. This will prevent any sticking. Some people like to do this as part of their normal routine.           

Alternatively, you could use a nylon streamer or a nylon parachute.

When You Store Your Model Rocket

If you live in an area where you get high or drastically fluctuating humidity, you will need to be more careful about how your store your model rockets. Model rockets are typically stored in garages, basements, and attics, but these may not be the best places to keep them.

You should store your model rockets in a cool dry area to prevent them from becoming damaged from the humidity.

Drastically fluctuating humidity is perhaps even worse for model rockets than high humidity as the rocket’s paper and wood parts will absorb moisture and dry repeatedly, a process that could cause substantial damage over time.

You should be doubly careful about how you store your model rocket engines. Tossing them in your garage is not a great idea if you live in an area that gets very humid or freezing weather.

Estes says that as long as the engines are “not exposed to excessive humidity, and temperature cycling [extreme heat or cold (140 degrees to 32 degrees Fahrenheit)] the engines should perform properly” (source).

The danger of excessive humidity is that moisture will get into the engine and the propellant. If enough moisture gets into the propellant, the engine will probably CATO.

This risk is even greater if excessive humidity causes moisture to get into the engine, and then that moisture freezes inside the propellant because of a dip in the temperature. This will cause cracks to form in the propellant as water expands when it turns to ice.

Temperatures below freezing will often cause cracks in black powder propellant even without humidity, but the humidity will exacerbate the situation.

It is best to store your model rocket motors in a location that is dry and that does not experience below freezing temperatures.

The Advantage of Humidity

But, having humid weather isn’t all bad when it comes to model rockets. In fact, if you’re trying to beat a record, personal or otherwise, for altitude, a humid day would be the perfect day to launch.

Many people believe that the air is thicker when the weather is humid, and this is a completely understandable assumption because it certainly feels thicker, but this is not true. The more humid the air is, the less dense it becomes, the higher your model rocket will fly.

The model rocket will fly higher in the less dense air because it will not experience as much drag.

But let’s take a step back. How on earth is humid air less dense than dry air? It goes against everything we experience on a humid day, but it is the truth. Humid air is less dense because water vapor does not weigh as much as the oxygen and nitrogen gases that make up most of the Earth’s atmosphere.

According to the results of simulated model rocket launches in RockSim, a launch that takes place on day with 15% humidity will not go as high as a launch that takes place on a day with 85% humidity. The difference in the high altitude flights (21,000+ feet) was only about 51 feet.

This difference is noticeable at these heights, but if you’re only launching to a couple hundred feet the difference would not be as significant. Even if you are launching to 1,000 feet you may only see a foot or two difference.

The best way to predict how high humidity will affect your model rocket is to use a rocket simulator.

However, it is important to remember the air temperature also has an impact on how high a rocket will fly as well as the elevation of the launch site.

Temperature and Humidity

The warmer the air is, the more water vapor it can hold. When talking about relative humidity, this means a cold day and a warm day could have the same relative humidity, but the actual amount of water vapor in the air, which is called the specific humidity, would be very different.

However, not all warm air carries a lot of moisture in it. Desert areas often experience dry heat, while areas near large water sources often get a lot more humid weather. In these dry environments, evaporation takes place rapidly. Your paint and glue will dry rapidly, and humidity will not gum up the workings of your rocket.

You will likely see enhancements to the performance of your model rocket when the weather is both hot and humid because the amount of moisture in the air will be greater and higher temperatures have also proven to allow a model rocket to fly higher.

When you are selecting a day for a high altitude flight, don’t only focus on humidity. There are other factors that are more important like wind speed, temperature, and the elevation of the launch site. In fact, humidity probably has the least impact on altitude when compared to these other things.

Tips for Dealing with High Humidity

Honestly, the best tip I can give you for dealing with the disadvantages of high humidity is to avoid it, but if you’re going to build or launch on a day with high humidity, then here are some things you can try to help offset some of the drawbacks.

  • Use baby powder on any plastic parachutes or swap them out for nylon parachutes.
  • Bring sandpaper to the launch to address any issues with the nose cone.
  • Bring a wooden dowel to the launch so you can push out any stuck engines or recovery systems.
  • Allow the rockets to dry in a climate controlled location.
  • Use tape that can hold up in humidity like the Scotch masking tape for humid conditions.
  • Avoid lacquer paints. Stick to enamel paints because they will not ghost in humidity.
  • Store your engines in above freezing temperatures and out of humidity.
  • Store your rockets in a cool dry location.
  • Bring some cold drinks on launch day, because humidity can make it feel far hotter than it actually is.

If you do these things, you will probably not run into many of the problems that humidity can cause.

Humidity and Rain

High humidity is necessary for clouds and precipitation. If you live in an area with high humidity, you probably also get a lot of rain.

Launching model rockets in the rain is not the best idea. A lot can go wrong during a rainy day launch, but one of the most pertinent reasons to avoid a rainy day launch is because it is kind of miserable. Trying to watch a model rocket fly through up into the sky with raindrops pelting you in the face isn’t a fun experience.

If you plan to launch in a light rain, make sure you have a dry location to store your equipment and to prepare your model rocket to launch. Bring a raincoat with a hood or an umbrella and extra tarps or plastic covering for any equipment that could get wet.

Also, be prepared to recover your model rocket quickly if it is made with paper tubes. If water gets inside the tube, it could get ruined.

You should never launch in a heavy rain or a storm. You won’t enjoy it, and your launch equipment and rocket could get ruined by water damage.

The Most Humid Locations in the US

If you live near any of these locations, you are more likely to experience problems with humidity. The humidity likely won’t impact your enjoyment of your model rocket as long as you take some of the precautions listed above.

US Cities with the Highest Average Relative Humidity

US City Average Relative Humidity
New Orleans, Louisiana 75.9
Jacksonville, Florida 75.8
Houston, Texas 74.7
Orlando, Florida 74.1
Tampa, Florida 74.1
San Francisco, California 73.7
Seattle, Washington 73.3
Miami, Florida 73.2
Portland, Oregon 73.2
Rochester, New York 72.6

(source)

If you’re interested in finding areas with higher specific humidity, you should check out the map that is located here. It shows that most of the United states has average to higher than average specific humidity, except for the mid-south, which tends to be drier.

The Takeaway

Humidity can cause problems during a model rocket build by increasing the amount of time it takes paint and glue to dry. It can cause problems with your launch if the paper tube swells or the parachute does not open all the way, and it can cause problems with storing both the model rocket itself and its engines.

But humidity has one redeeming quality, which is that it actually allows a model rocket to reach a slightly higher altitude.

However, the difference in altitude is negligible in most cases unless you are launching a high altitude model rocket and going for a record.

Build Your Own Launch Controller

Don’t forget! You can ditch the stock controllers and confidently build your own from scratch using our step-by-step instructions and exact materials list! We promise this will make your launch experience 10x better, and using our course License to Launch you can be 100% confident you’ll be able to finish this project and be super proud of what you’ve built! Here’s a sneak peek below.

Can You Launch a Model Rocket in the Rain?


Rain, rain go away, and come again a day when I don’t want to launch a model rocket! We all know what a perfect launch day feels like. A warm day with no wind and clear skies is meant for launching rockets. More often than not, we do not get such ideal weather.

Can you launch a model rocket in the rain? It is not a good idea to launch a model rocket in the rain. A slight drizzle should not cause too much trouble, but even a moderate rain could interfere with your ignition system, damage your rocket, and impact the visibility of the launch.

The Mojave Desert is common launch location for model rockets not only because it is isolated and open, but also because it gets very little wind and rain. But most of us don’t have access to such an ideal location. Continue reading to find out why you shouldn’t launch when it is raining, and what you can do if you want to give it a try.


Are you still using the standard Estes controllers for your launches?

We just built our own beautiful launch controllers that make launches SO much more fun, and we documented EVERY single step and item purchased and put it into a step-by-step course that teaches you how to do the exact same thing.

Click here to learn more about how you can build your own launch controllers!

Get the EXACT materials list along with easy to follow step-by-step instructions on how to build your very own launch controller and make launches 10x BETTER in our course: License to Launch

Why You Shouldn’t Launch in the Rain

Common sense tells us that launching a model rocket in the rain is not a good idea, but just how bad of an idea is it? And why exactly should you avoid it?  I will take you piece by piece through the launch process to explain why.

The Rain and Your Igniter

A model rocket igniter works by supplying heat to the rocket fuel which then ignites. When you hit the launch button on the launch controller, the system will begin to heat up the igniter that you put in the bottom of the rocket.

As you know, electricity and water do not play well together, which is why an electronic igniter is susceptible to malfunctioning on a rainy day.

Rain can cause a short in electrical connections that would prevent the model rocket from launching if it gets inside the launch control. This is disappointing, but it is not the worst that can happen with a faulty igniter.

A malfunctioning igniter could also cause the rocket to prematurely launch. This is a very dangerous situation as the rocket could launch while you are next to it, or even while you are touching it, which would lead to you becoming seriously injured.

Your launch equipment will not thank you for launching it in the rain. After shorting, the igniter would most likely be damaged, and you would probably have to buy a new one.

The good news is that because the launch remote uses batteries, it is very unlikely to cause a severe electric shock under any circumstances.

The Rain and Your Motor

Surprisingly, the motor is unlikely to be heavily impacted by the rain unless it becomes completely saturated. The thick cardboard tube that holds the motor and the clay nozzle and plug do a decent job of keeping out incidental moisture.

If the propellant inside the motor became wet, it would be very dangerous to launch it.

If you’re motor is professionally made and you are loading your rocket under cover, the propellant is unlikely to get wet.

If you’re launching with any rocket that is not commercially made, the chances are higher that moisture will get into the propellant and cause the motor to CATO. Save your experimental motors for a dry day.

The Rain and Your Rocket

Your rocket could also become damaged by the rain. Most model rockets are made out of paper tubes similar to the kind you find inside of a roll of paper towels, but there are some that are made out of plastic. The fins and nose cone are usually made out of wood or plastic.

If your model rocket is made out of paper, you’ve probably had to apply a paint job to the outside of your rocket. A well sealed paint job will go a long way to protecting your rocket from the rain before you launch, but after the nose comes ejects off and the recovery system activates, the rocket will be open to the rain.

Rain pouring into the inside of the rocket will cause significant water damage.

Additionally, after the rocket lands in the wet grass, there is a high likelihood of more moisture entering the inside of the rocket’s body both from the rain and the grass.

The water droplets will cause the paper to swell and damage your rocket from the inside out. Extensive water damage could render your rocket useless.

Wooden fins can also get damaged by rain if they have not been fully and expertly sanded and sealed. Water is not good for wood, especially thin pieces of balsa wood.

If your rocket is 100% plastic, then the rain will not damage the plastic, but it could still damage a paint job or ruin your stickers.

The Rain and Your Recovery Device

The rain will also cause problems with your recovery device, especially if that recovery device is a parachute.

A heavy rain could saturate the parachute which would decrease the parachute’s effectiveness, or a heavy rain could cause the parachute to cause it to partially collapse.

Either way, the rocket would plummet to the ground at a faster speed than you planned.

The Rain and Your Electronics

If you equip your rocket with a camera, altimeter, or other electronic device, you will also have to think about how they will operate in the rain.

A camera like the GoPro Hero 7 is waterproof and will not be damaged by any amount of rain, but the keychain camera is not that durable. Water can and will get inside of the body of the camera if the rain is heavy, and it could cause the camera to stop working.

Equipment installed in an electronics bay will be less likely to get ruined by the damp conditions as the electronics bay will do a good job of protecting the equipment.

The Importance of Visibility

For the most entertaining and safe launch of your model rocket, you’re going to want a sky of endless blue so that you will be able to see the launch, flight, and recovery. You will want to see that last moment when your rocket disappears from sight.

And then, you’re going to want to watch the model rocket reappear, observe the recovery system activate, and watch where the rocket lands so that you do not lose it and so that you are not unexpectedly in the way of it landing.

Keeping track of the model rocket to make sure that it doesn’t CATO or fly off course is essential to safety. The NAR safety code insists that a model rocket should never be shot into a cloud.

A rainy day is not going to have the same level of visibility as a fair weathered day. You may not be able to see if the model rocket suddenly veers off course or if its motor fails. You won’t know if you need to take cover or where you should run to get out of its way.

First of all, clouds will be covering the entire sky. You could easily lose sight of the rocket in the clouds. You won’t be able to watch the full launch or be able to look out for the consequences of any failure that occurs when the rocket is out of sight

It will also be darker. It will simply be harder to see the rocket. In addition, a streamer will not be able to catch the sunlight and glitter to show you where your rocket is.

Finally, and perhaps more importantly, have you ever tried looking up when it is raining outside? It is not a pleasant experience. A hand up above your eyes or a hat might help, but you are going to get water in your eyes for sure.

This will prevent you from being able to see you the rocket as it reaches higher altitudes and maintain eye contact with it as it descends. It is unsafe and does not make for a satisfying launch.

Dangers of Launching during a Storm

All of the reasons I’ve given for not launching in the rain are even more relevant for storm like conditions. Being outside during a lightning storm isn’t a great idea any way, and it is especially not a great idea to be standing in the middle of an empty field next to a pointy rod.

Lightning storms are dangerous and unpredictable. If there is a storm outside, you shouldn’t be outside at all, and definitely not launching model rockets into them.

How Wind Affects the Model Rocket

The rain is not the only thing you have to worry about when launching on a rainy day. Winds can cause the model rocket to weathercock during its flight or drift after its recovery system is activated.

Rainy days are potentially windy days, and you do not want to be launching on a windy day. The NAR prohibits the launch of any rocket if the wind speed is greater than 20 miles per hour because it is unsafe.

Many people avoid a launch if the wind speed is greater than 10 miles per hour because they don’t want to risk their rocket and waste a motor on a subpar launch.

Weathercocking

Weathercocking occurs when aerodynamic forces cause the model rocket to move into a horizontal position and fly into the wind. This is the same force that makes it possible for a weathervane to indicate which way the wind is blowing.

Weathercocking makes it very difficult to predict where and how the rocket will land. This is a potentially dangerous situation. You rocket could fly into someone on descent, and it would do it at higher speeds than normal because the recovery system will not operate as well in the rain.

Drift

Even if the wind does not cause the rocket to weathercock, it can make recovery unpredictable, especially if you are using a parachute recovery system. This is because the wind will cause the model rocket to drift unpredictably. It can go further away than you would expect, or perhaps closer and faster than you would expect.

A drifting rocket can be dangerous to bystanders, but it is also far more likely that you will lose your rocket. It can become stuck in trees or power lines that you thought were outside of your launch site, or you can simply lose sight of it and not be able to find it again.

What about Snow?

Snow will not be any better for your model rocket than rain. Snow turns to water when it falls upon something that is warmer than 32 degrees Fahrenheit, and like rain, snow usually comes with high winds.

If you’re launching in the snow, you would also have to worry about the cold temperatures impacting the motor’s performance, and plastic parachutes often have a hard time opening when it is cold, although sprinkling with baby powder can help this.

That being said, plenty of people launch in cold temperatures, but most people avoid a snowy day for all the same reasons they avoid a rainy day.

How to Launch in the Rain

A drizzling sporadic rain may not be enough to persuade you to cancel your launch day plans, and a little bit of rain won’t cause much trouble for your model rocket. The real question is whether launching is worth it to you. You’re more likely to have a better time and a better overall launch if you wait for a day that isn’t rainy.

If you decide to go ahead with your model rocket launch even though it is raining, there are a couple of measures you can take to help it go as smoothly as possible.

Create a Dry Area for Prepping

To avoid getting your rocket and launch equipment needlessly wet, be sure you have an area that is dry where you can work on your rocket before launching it. This could be under an outdoor tent, a pavilion, or a gazebo. Any place that will keep your rocket and your equipment out of the rain when it isn’t being used.


Set up a folding table where you can work on prepping your rocket so that you do not need to set anything on the damp grass.

Umbrellas and Ponchos

Bring umbrellas and wear raincoats or ponchos. This will keep you dry and comfortable, but you can also keep your equipment and rocket dry while you set it up by using an umbrella. You can use ponchos or tarps if you have them to cover equipment that is not being kept under cover.


The idea is that you want to keep the equipment as dry as possible for as long as possible. If you keep your launch remote under your coat or umbrella, it will be less likely to get damaged by the rain.

Use a Streamer

On a rainy day, especially if there is wind, you would be better off using a recovery streamer instead of a parachute. The streamer will allow the model rocket to reach the ground faster, and the model rocket will drift less.

This means you will be able to recover your rocket quickly and get it out of the rain as fast as possible.

Test Launch

It might be worth doing a test fight with a low powered motor to see how the rocket responds in the weather conditions without the risks involved in using high powered motors. This will allow you to see if the rocket will respond negatively to the rain or if the recovery system will be inhibited by it.

However, using a low powered motor in windy conditions is not a good idea as the likelihood of weathercocking or other irregular flight paths increases when the model rocket does not leave the launch rod at a fast enough speed to overcome the wind.

Low Altitude Launch

When it is raining and there is significant cloud cover, it is better to stick to low altitude flights. Launching your rockets to lower altitudes will help with those visibility issues I mentioned earlier.

You will be less likely to lose sight of your rocket among the clouds, and this will help make your launch safer.

Select your Rocket Carefully

In order to prevent your rocket from becoming damaged in the rain, select a model rocket that is made out of all plastic. Plastic rockets hold up to water much better than paper and wood pieces.

Also, don’t launch with your best model rocket or a model rocket that you really care about because it will be more likely to become damaged or to get lost on the way down. Save your favorites for a fairer weathered day.

The Takeaway

Launching a model rocket on a rainy day is not ideal. It is not as safe as launching in fair weather, and you won’t get the same enjoyment or quality launches as if you waited for better weather.

If you do launch in the rain, make sure you are prepared for it by prepping in a dry area, bringing ponchos and umbrellas, and selecting your rocket carefully.

No matter what it isn’t the best day to launch a favorite or brand new model rocket.

Build Your Own Launch Controller

Don’t forget! You can ditch the stock controllers and confidently build your own from scratch using our step-by-step instructions and exact materials list! We promise this will make your launch experience 10x better, and using our course License to Launch you can be 100% confident you’ll be able to finish this project and be super proud of what you’ve built! Here’s a sneak peek below.

Best Mounted Cameras for Model Rockets (With Examples of Footage)


There is nothing cooler than getting a video of your rocket’s launch from on board the rocket itself. To get the rocket’s eye view of what it is like to launch thousands of feet into the air is humbling and inspiring, but you wouldn’t want to just strap any camera to your rocket before launch.

So, what is the best mounted camera for a model rocket? The best mounted cameras for model rockets are spy cameras like 808 keychain cameras, U8 USB cameras, Mobius Mini cameras, or for a larger rocket and high quality video a lightweight GoPro.

While in theory you could attach any camera to your model rocket and launch it, it is not the best idea as the added weight could destabilize the rocket and you could risk losing an expensive camera as well as the rocket. Continue reading for all the details on cameras that can be safely used with model rockets.


Are you still using the standard Estes controllers for your launches?

We just built our own beautiful launch controllers that make launches SO much more fun, and we documented EVERY single step and item purchased and put it into a step-by-step course that teaches you how to do the exact same thing.

Click here to learn more about how you can build your own launch controllers!

Get the EXACT materials list along with easy to follow step-by-step instructions on how to build your very own launch controller and make launches 10x BETTER in our course: License to Launch

The Best Cameras for Model Rockets

The best cameras for using on a model rocket are small, lightweight, and durable. The smaller the camera the easier it will fit securely to your rocket, and the more lightweight it is, the less impact it will have on your rocket’s performance.

Durability is also an important factor as the camera will need to be able to land with the rocket without getting damaged.

Keychain Cameras

The most commonly used camera for capturing your model rocket’s flight are keychain cameras, also known as 808 cameras. These cameras are meant to be unassuming spy cameras that look like a key fob, but they work great for model rocketry.

There are many different makers of 808 keychain cameras. They are definitely not all the same quality, and knock offs are rampant. Buy from a reputable source to ensure that you are getting what you’ve paid for.

Keychain cameras often use a number rating system to describe the camera. The #16 is a commonly used 720p version, but with HD video becoming cheaper and cheaper to obtain many opt for the 808 #32 which offers full HD for a similar price.

The keychain 808 camera listed on the Apogee website has a resolution of 640 by 480 and captures at a rate of 30 frames per second. It costs under $30.

The Mate808 (link to read reviews on Amazon) offers full HD 1080p, wide angle video for a relatively low price. It weighs a little more than half an ounce, which means it can be strapped to a good number of model rockets without destabilizing them.

You can check out the video below to see what you can expect from the Mate808 attached to a model rocket. The video quality is pretty good considering the price point.

All keychain cameras require that you use a microSD card with them, and you will have to buy one separately. You can attach them to your computer with a micro USB cable and transfer the video from the camera to your computer.

You will also want to keep the manual handy as the buttons are not usually labeled, and it will take a couple tries before you get used to using it. In a world that is used to touch displays and intuitive technology, this can become frustrating.

U838 USB Stick Camera

The USB stick camera is a good alternative to the keychain camera. It is another spy cam, but this one is meant to look like a thumb drive instead of a key fob. The USB stick camera’s narrow, rectangular body makes it ideal for use with a slim model rocket.

Like the keychain cameras, the U8 USB stick cameras can be purchased at different levels of quality and there are plenty of knock offs that will not do the best job. Be sure to purchase from a reputable seller. All U8 USB stick cameras will require that you purchase a micro SD card separately.

The U838 USB stick camera sold through Apogee is tiny at only .67 ounces. It is 3.03 inches long, 1.05 inches wide, and .5 inches high. One of the advantages of this U8 camera is that the buttons are labeled which makes it much easier to use. It also takes HD video with a resolution of 1920×1080.

It costs $99.99, but other versions can be found through other retailers like eBay or Amazon at a price point closer to keychain cameras. Remember, however, that the cheaper a camera is, the more likely it will be that you are getting a lower quality product. It seems too good to be true, it probably is.

Here’s a sample of the U838 camera in action.

Mobius Mini

The Mobius camera (link to read reviews on Amazon) is a great lightweight option. Coming in at only 1.2 ounces it can still shoot full 1080P video with a two hour battery life. Considering its size that’s pretty impressive.

It is a little heavier than the USB stick camera, and it is shorter and wider. This may not make a difference to you, depending on the model rocket you plan to mount it on.

If you compare the videos of the keychain and USB cameras to the below video of the Mobius Mini, you can clearly see the difference in quality. The Mobius takes a much nicer video, but it also costs more than the cheaper versions of the keychain and USB cameras.

GoPro Cameras

GoPro cameras are the go to for action videos because they are small, relatively lightweight, highly portable, powerful, and rugged. These cameras offer something many of the other options don’t, and that is a reliable name brand.

A word of caution about GoPro Cameras for model rocketry: Even though GoPro cameras are lightweight compared to many other digital video cameras, they are the heaviest cameras on this list. For most small, entry-level rockets (basically any Estes rocket), these cameras will be too big and too heavy to safely mount on a rocket as it will significantly impact the rocket’s flight path. Unless you’re building larger rockets that you are confident can handle the weight, I’d stick with a USB camera as mentioned above, using our mounting advice below.

GoPro Hero7

The GoPro Hero7 Silver and GoPro Hero7 White (links to read reviews on Amazon) would both be suitable for larger rockets (see caution above). The higher end GoPro Hero7 Black is larger and heavier but could still be used on larger rockets if you really wanted to.

The Silver and the White Hero7’s weigh approximately 3.3 ounces, and they are both 2.44 inches long, 1.76 tall, and 1.11 inches wide. The dimensions are very similar to the Mobius, but obviously the Hero7 Silver and White are almost 2 full ounces heavier.

The advantage of the Silver is that is can take 4k video, while the White shoots in 1080p, but the Silver also costs more than the white. For something you’re about to launch hundreds of feet, maybe thousands of feet into the air on a cardboard tube, you might not be interested in investing at this level.

I couldn’t find a video of someone launching one of these specific models on their rocket’s because they were released recently (as of the time of this writing), but this video shows all three versions of the Hero 7 in action.

The image quality of the white and silver does not appear to be far from the Mobius cameras, but the benefit of the GoPro is that it is more rugged. On the other hand, it is also more expensive, so it is a hard choice.

GoPro Hero Sessions

GoPro doesn’t make the Hero Session anymore, but you can find refurbished or used ones for about half the price of a new camera.

The GoPro Hero Sessions is a great choice because it can shoot full HD video and it only weighs 2.6 ounces.

The session is the only cube shaped camera on this list. Each side of the cube measures approximately 1.5 inches. Because it is so small, it would install nicely inside some larger diameter rockets.

You can find refurbished GoPro Hero Sessions for around $80 online.

If you would like to check out the quality of the GoPro Hero Session, you can see a rocket launch with it in this video:

Estes Cineroc

Time for a little history lesson. If you’re getting into model rocket videography, this will probably amaze you as much as it amazes me.

Between 1970 and 1975, Estes introduced the Estes Cineroc, which was a rocket that had an 8 mm camera in its payload. There is some amazing footage available from this time period of rockets being launched before the digital age.

Estes even offered a processing service for the film, and you had to watch it on a projector. How the times have changed!

The Cineroc was highly sought after, as you can imagine, but Estes had to stop making due to an issue with a supplier. Many model rocket enthusiast still search for the Estes Cineroc today to add it to their collection.

This might not be the best camera to launch with today, but the Estes Cineroc is too cool not to mention.

How to Mount a Camera to a Model Rocket

Model rockets aren’t usually made with cameras in mind but mounting a camera to your model rocket can be as simple or as complex as you want it to be.

Before selecting a mounting method, consider what direction you want the camera to face. The simplest way of attaching the camera to the rocket work better with the camera pointing towards the ground, and you will see that this is the direction you see in most YouTube videos. Here is a video that employs this method:

If you intend on putting your camera inside the rocket, then the camera will most likely be pointing out in a horizontal direction. You can see what this camera direction looks like in this video:

Electrical Tape

One of the most common and easiest ways of mounting the camera to your rocket is by using electrical tape. Electrical tape is preferred because it is flame resistant, and you can usually peel it off the rocket and the camera without too much trouble.

Simply wrap the tape around the rocket and the camera without covering the camera’s lens, and you’re ready to fly.

It might not sound very secure, and it certainly doesn’t look pretty, but many a model rocket has flown with a camera attached this way. As mentioned above, this technique will likely only work with very small, thin, lightweight USB cameras and not something bulky like the GoPro. Use discretion when deciding how to mount your rocket camera, exercising caution to not jeopardize a stable flight path because you mounted a heavy camera on the side of the rocket.

Velcro Button and a Camera Hood

You won’t need as secure an attachment method if you are using a camera hood. Camera hoods are an aerodynamic plastic covering that protects the camera from the force of the air blowing past it. Apogee Components sells these clear ones for about $10.

To use this method, you would install velcro buttons on the rocket and the camera, attach the camera to the model rocket and then install the hood over the camera. The hood should be installed securely with tape. Use clear tape to allow your paint job to show through.

The hood cannot be installed permanently because you will need to open the hood to be able to remove the camera after the flight.

The hood will help make the flight more aerodynamic and will help protect the camera, but these premade versions can only fit certain sized cameras and certain sized rockets.

Alter the Payload

The only way to install a camera on your rocket without it adding drag is to put it inside the rocket itself. It will still add weight to the rocket of course, and if it is not installed in the center of the rocket, it can make unbalanced. Generally, if the rocket is large enough to accommodate a camera, this won’t make a huge difference to the launch.

If you purchase a model rocket that has a payload section, it is easy to modify that section and slip your camera into as long as it is big enough.

The main concern is securing the camera in the tube. You do not want the camera to fall out or shift into a position where it cannot see through the peephole you will create. However, you also cannot permanently affix in inside the rocket unless you don’t want to be able to use the camera in a different rocket.

The method that you use for securing the camera to the inside of the model rocket will vary depending on how large the rocket is and how difficult it is to fit your hand in the tube.

If the tube is big enough (or your hand is small enough) you could use tape to secure the camera in place, otherwise, you might have to get creative or try the avionics bay method.

Be sure to precisely drill the peephole where the camera lens will fit and smooth down the outside of the hole with sandpaper. This is best done before your paint job so that you don’t ruin your hard work.

Avionics Bay

The best way to secure your camera in the inside of the rocket would be to use an avionics bay, also called an altimeter bay or an electronics bay. These bays are made to fit below the nose cone of the model rocket and to securely hold and protect electronic equipment.

Here is a video of someone putting together an electronics bay, if you would like to get a clearer idea of what is involved.

You would need to attach the camera to the mounting sled inside of the avionics bay. This could get tricky if your camera does not fit snugly against the side of the rocket. You may need to build up the sled a little so that the camera sits flush to the rocket’s tube.

Once again, you will need to drill a precise hole where the lens of the camera will be inside the rocket.

Alternatively, this tutorial explains how to insert a camcorder (make anyone feel old?) style video camera through the body of the camera so that it sticks out at both ends. This method uses an avionics bay and Kevlar string to protect and secure the camera as well.

It isn’t the most aerodynamic or pretty, but this could be a great way of making use of an older model camera.

This method may cause an increase in drag, but it is an interesting way of getting a larger camera into the rocket.

No matter what camera you choose or how you decide to mount it, the footage you get will give you hours of entertainment. You’re going to need a bigger hard drive to store all of the model rocket launches you record.

Build Your Own Launch Controllers

Don’t forget! You can ditch the stock controllers and confidently build your own from scratch using our step-by-step instructions and exact materials list! We promise this will make your launch experience 10x better, and using our course License to Launch you can be 100% confident you’ll be able to finish this project and be super proud of what you’ve built! Here’s a sneak peek below.

Model Rocket Wadding Alternatives (Pre-Made and DIY Solutions)


Most aspects of model rocketry have reusable or DIY alternatives to help keep the costs of launching rockets low because no one wants to launch a rocket just once. Wadding isn’t expensive, but after several launches the costs can add up, especially for high powered rocketry.

What are some model rocket wadding alternatives? As an alternative to recovery wadding, you can use a baffle, fire resistant crepe paper or fire resistant cellulose insulation. There are also several DIY methods of making recovery wadding that cost significantly less than store bought wadding.

Not only will some DIY options for recovery wadding save you a few dollars here and there, it’s good to know what kinds of homemade options you might have for wadding in the event you run out but don’t want to cancel an upcoming launch.


Are you still using the standard Estes controllers for your launches?

We just built our own beautiful launch controllers that make launches SO much more fun, and we documented EVERY single step and item purchased and put it into a step-by-step course that teaches you how to do the exact same thing.

Click here to learn more about how you can build your own launch controllers!

Get the EXACT materials list along with easy to follow step-by-step instructions on how to build your very own launch controller and make launches 10x BETTER in our course: License to Launch

Alternatives to Model Rocket Recovery Wadding

Before we discuss the alternatives to model rocket recovery wadding, we need to understand the purpose of recovery wadding and how it works.

Recovery wadding is a thin, fire resistant tissue-like paper used to create a buffer between the ejection charge of a model rocket’s engine and the recovery system.

Without this buffer, the parachute or recovery system could become damaged by the hot gases issuing out of the motor. Additionally, the recovery system could catch fire and cause the rocket to catch fire or become damaged when it hits the ground if the recovery system is compromised.

Launching a rocket without recovery wadding or insufficient wadding is unsafe for the recovery system, the rocket, the flyer, and any bystanders.

To use recovering wadding, you simply ball up a few sheets and stick them into the rocket’s body before you put in the recovery system. The recovery wadding should create a barrier that is twice as thick as the diameter of the rocket’s barrel.

Shortly after the rocket begins its descent back to the ground, the recovery system is activated by an ejection charge located at the top of the motor. This ejection charge shoots powerful, hot gas through the rocket that causes the recovery system to be shot from the rocket.

The recovery system can then do the job of slowing the rocket’s descent and allowing it to hit the ground without damage. If you fly without recovery wadding of some sort, you won’t be flying rockets for very long.

Reusable Recovery Wadding

Reusable recover wadding, also called parachute protectors, have been around for some time. They cost between $5 and $10 depending on the size of the protector, but they can be used over and over again.

Many people prefer to use them, especially if they are launching high power rockets, as the amount of recovery wadding starts to add up on those higher diameter rockets.

Baffle

A baffle is a small device that must be installed in the rocket’s tube between the motor and the recovery system.

This device creates a buffer between the ejection charge and the recovery system, filtering out fiery particles and allowing the gas to cool before it reaches the sensitive recovery system.

This drawback of this alternative is that it is a permanent solution to one single rocket. Each rocket you use will have to be equipped with its own baffle. Depending on how many rockets you launch, this can be costly and time consuming.

Items You Can Use Instead of Recovery Wadding

Years of model rocket flyers trying to reduce the cost of their launches or finding themselves in a pinch without enough recovery wadding has led to some ingenious, and downright odd, alternatives to recovery wadding.

Before selecting an item to use in place of recovery wadding consider first the flammability of the item and its environmental impact. If it can catch on fire, it will not do its job. In addition, whatever you use will fall to the ground. Make sure it is biodegradable or very easily recovered.

Here is the list of items people have reportedly used for recovery wadding:

  • Cellulose insulation
  • Flame resistant crepe paper
  • Flame resistant paper pom pom decorations
  • Iceberg Lettuce
  • Cabbage
  • Repurposed welding jackets

Here is a list of things you should NOT use, that were proposed by people in various forums:

  • Pink insulation
  • Dryer lint
  • Cardboard
  • Any type of paper that has not been treated for flame resistance

Cellulose Insulation

By far the most commonly used alternative to recovery wadding is cellulose insulation. Cellulose is made from recycled paper and is treated with boric acid to be fire resistant. Boric acid is a natural substance, but it is also poisonous. Just be careful while handling it and don’t use it around children that might put it in their mouth.

Cellulose insulation can be purchased at any home improvement store, it is biodegradable, and it is cheap. You can buy 19 pounds of cellulose insulation for under $10, which is more than enough for hundreds of launches.

Crepe Paper

Crepe paper, like the kind used for party streamers is another popular choice. After a birthday party, many model rocket enthusiasts will save this stuff to use as recovery wadding. It can also be purchased inexpensively at most stores including the dollar store.

The only word of caution against crepe paper is to actually make sure it is flame resistant. Not all crepe paper has been treated for flame resistance. If you use the wrong stuff, your recovery system could get damaged, and your rocket could catch on fire.

You can test the crepe paper by putting a flame to a small piece of it in a safe location. It should smolder, but no flame should appear.

Do It Yourself Alternatives to Recovery Wadding

If you’re looking for wadding that looks and acts a little more like the wadding you buy at the hobby shop, then I have got some great alternatives for you. All of these methods work by taking some sort of thin paper and making it flame resistant.

The result is recovery wadding that is almost indistinguishable from the store-bought version.

Paper Towels and Baking Soda

The below video details the process for turning paper towels and baking soda, two commonly found household items, into recovery wadding. It even tests regular recovery wadding and wadding made through this method under flame so you can see how it reacts.

For this DIY alternative you will need…

  • Paper towels, preferably 2-ply
  • Baking soda (sodium bicarbonate)
  • ¼ cup measuring cup
  • 1 tsp
  • A clear bowl for mixing
  • A bowl for dunking
  • A way of hanging wet paper towel to dry like a clothes drying rack

If you plan to do a larger batch of DIY recovery wadding, you would need a large mixing bowl and larger measuring tools. The water to baking soda ratio will remain the same.

Step-by-Step Instructions

  1. Mix 1 tsp of baking soda into ¼ cup of water in the clear bowl until the baking soda is completely dissolved.
  2. Allow the baking soda to sit until the water becomes clear. There will be a little baking soda left in the bottom of the bowl that was unable to be incorporated with the water. This is expected, and desirable as it indicates that the water is saturated with baking soda.
  3. Dump the water-baking soda mixture into another bowl trying not to get that left-over baking soda into the bowl.
  4. Set aside the clear mixing bowl and dunk one paper towel into the water-baking soda mixture. Allow the water to soak all the way through the paper towel before removing.
  5. Hang the wet paper towel over something to dry. This can take up to 24 hours.
  6. Once the paper towel is dry, you can separate the 2-ply paper towel into two pieces and then cut them to a similar size as the wadding you are used to.

Toilet Paper and Baking Soda

This method is also shown in the same video as the method above. It will take longer before you can use the wadding in this method (about 2 weeks), but you will get enough to last you a very long time. Continue reading for the full instructions.

For this DIY alternative, you will need…

  • A roll of toilet paper
  • Baking soda (sodium bicarbonate)
  • 1 cup measuring cup
  • 1 tsp
  • Clear bowl for mixing
  • A container with a tight lid that can fit a roll of toilet paper

Step-by-Step Instructions

  1. Mix about 2 cups of water with 8 tsp of baking soda. There needs to be enough water to cover most of the roll of toilet paper.
  2. Allow the liquid to become clear. You will get some baking soda that does not dissolve into the liquid. This is expected.
  3. Once again, pour the water-baking soda mixture into the container without dumping the extra baking soda from the bottom into the container.
  4. Place the toilet paper into the water-baking soda mixture, and let it soak.
  5. After a few minutes, you should be able to pull out the cardboard center of the toilet paper and discard it.
  6. If your toilet paper is not completely covered by the liquid, you may need to tip it upside down for a few minutes and allow the other side to soak up the mixture.
  7. The toilet paper should get completely saturated to the point where there is still liquid left in the container, and it can’t soak up anymore.
  8. Put it on a dry surface like a plate where it can dry for a few weeks.
  9. When it has completely dried, you may have to peel off and discard the outer layer if it is crusted over with baking soda.
  10. Peel off a piece of the toilet paper beneath and it should feel a lot like the recovery wadding you are used to purchasing.

Toilet Paper and Borax

The toilet paper and borax method is almost exactly like the paper towel and baking soda method. The only difference is that you would replace baking soda with borax and paper towels with toilet paper, and you need to use warm or hot water and 4 teaspoons of borax to ½ cup of water.

The drawback of this method is that borax is poisonous, and many people do not have borax sitting around their houses anymore, at least not as many that probably have a box of baking soda stashed away somewhere.

The easiest, most foolproof, and cost-effective solution to traditional disposable recovery wadding is to purchase cellulose insulation. It is simple, you can’t mess it up, and it is inexpensive.

Build Your Own Launch Controllers

Don’t forget! You can ditch the stock controllers and confidently build your own from scratch using our step-by-step instructions and exact materials list! We promise this will make your launch experience 10x better, and using our course License to Launch you can be 100% confident you’ll be able to finish this project and be super proud of what you’ve built! Here’s a sneak peek below.