Build Your Own Launch Controller

Recent Posts

Model Rocket Engine Sizes and Classifications


When I first entered into the world of flying model rockets, I tried my hardest to research all of the different classifications and motors available. If you are not a complete aeronautics genius, and maybe you just wanted to get into a new hobby, the information available is mind-boggling. Equations and nomenclature that you might not have ever heard of before are thrown at you from all directions.

It’s important to have a deep understanding of how rocket motors are classified and what the various different types are so that you can successfully launch your rocket, know what to expect, and even compete in competitions with other rocket aficionados. But first, at a high level, what are the model rocket engine sizes and classifications?

Model rocket engines are classified by engine sizes A through O, with the higher letters being more powerful. The numbers associated with each engine letter describe the burn duration and delay before firing an ejection charge. Certain engine sizes require further certifications and licenses in order to use.  

Here’s a simplistic chart of the varying model rocket engine classifications:

You might have seen a similar chart like this before when researching model rockets, but what do all these numbers and letters really mean? In this article, I’ll walk you step-by-step on understanding the engine sizes, classifications, and nomenclature used.


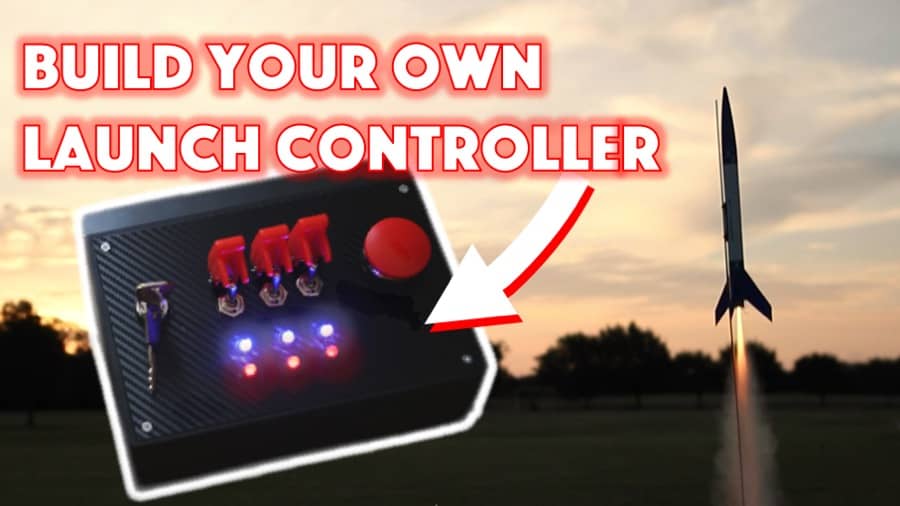
Are you still using the standard Estes controllers for your launches? Have you considered building your own custom launch controller? We just built our own beautiful launch controllers that make launches SO much more fun, and we documented EVERY single step and item purchased and put it into a step-by-step course that teaches you how to do the exact same thing.

Click here to learn more about how you can build your own launch controllers!

Get the EXACT materials list along with easy to follow step-by-step instructions on how to build your very own launch controller and make launches 10x BETTER in our course: License to Launch

What is a Total Impulse?

It does no good to review the total impulse of a rocket motor without first understanding what that number reflects, as well as it’s importance. Total impulse is obtained by taking the average thrust of the rocket and multiplying it by the total burn time of the motor. It can be measured in either newton seconds or pounds seconds.

Burn time is the total allotted time that the motor produces thrust altogether. It’s the time measured that shows how long the motor actually propels the rocket.

Average thrust is measured by dividing the complete thrust over the complete burn time of the motor. Thrust is the force the motor produces during its complete burn time. Finding the average thrust will help you determine how much weight a specific motor can handle.

Using burn time and average thrust in your calculation for total impulse will help you figure out the complete amount of momentum the motor can provide to the model rocket.

Thrustcurve.org offers a great visual chart of these calculations here.

Or, check out NASA’s official graph here for calculating model rocket engine designation.

How to Decipher the Motor Codes, What Do the Numbers and Letters Mean?

While figuring out the specific class of the motor is simple, and we’ve already gone over it’s relation to total impulse, you may have noticed that all model rocket engines being sold have designated numbers following the letter. What do these numbers mean?

For example, let’s look at the model rocket engine number A8-3. This is a commonly used single stage motor. What exactly does the, “8-3” mean?

The complete motor code is built from the following specifications:

Total Impulse (Letter) + Average Thrust in Newtons (First Number) + Time Delay in Seconds (Second Number)

An A8-3 motor, has a total impulse of 2.5 Newton Seconds, with an average thrust of 8 Newtons, and a Time Delay of 3 seconds.

Some A motors have a “1/2”, “1/4” or, “1/8” in front of the letter itself. This simply means that motor is exactly one half, one fourth, or one eighth the size of an actual A motor.

We’ve already discussed what total impulse and average thrust are, along with how they are calculated, but now you might be wondering:

What Is A Time Delay?

Rocket engines are constructed with a delayed charge mechanism that helps prevent the recovery system from deploying too early.  Each rocket engine will on average burn up its propellant in a designated time frame. This is usually about 1 second. However, even after the propellant is gone the rocket continues in an upward path, and you would not want the recovery system to activate.

Activating the recovery system this early would likely result in a failed recovery and the parachute would be rendered useless, thus leaving your model rocket to crash and become damaged. You’ll notice when the time delay charge has begun that it sends out smoke from within the rocket that you can visually track. This also helps you to see where the rocket is. Once the smoke is gone, the recovery is activated.
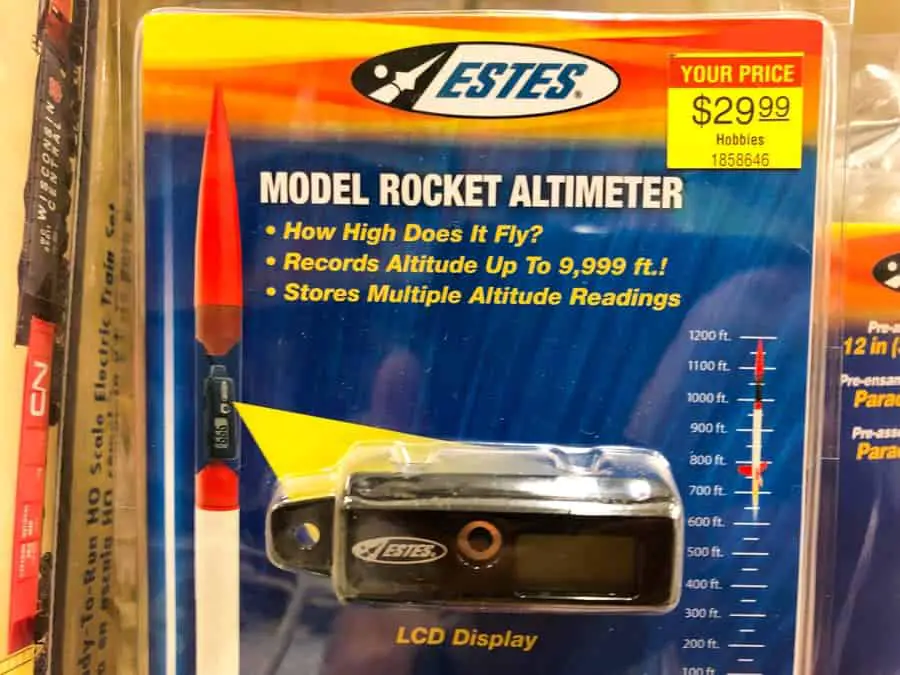
Altimeter

Larger and higher-powered rockets may be equipped with an altimeter. This device determines that altitude the rocket has attained and makes the determination based on this figure of when to activate the recovery system successfully. We put together a whole starter guide for Model Rocket Altimeters and Accelerometers if you’d like to know more about this topic and see some affordable options to adding these to your rocket.

Here’s a chart I’ve put together so you can have a quick visual of the common motors and their codes.

Motor Type Average Thrust (Newtons)Time Delay (Seconds)
1/4A3-3 3 3
1/2A3-2 3 2
A3-4 3 4
A10-3 10 3
1/2A6-2 6 2
A8-3 8 3
B4-2 4 2
B4-4 4 4
B6-2 6 2
B6-4 6 4
C6-3 6 3
C6-5 6 5
C11-3 11 3
C11-5 11 5
D12-3 12 3
D12-5 12 5
E9-4 9 4
E9-6 9 6
1/2A3-4 3 4
A8-5 8 5
B6-6 6 6
C6-7 6 7
C11-7 11 7
D12-7 12 7
E9-8 9 8

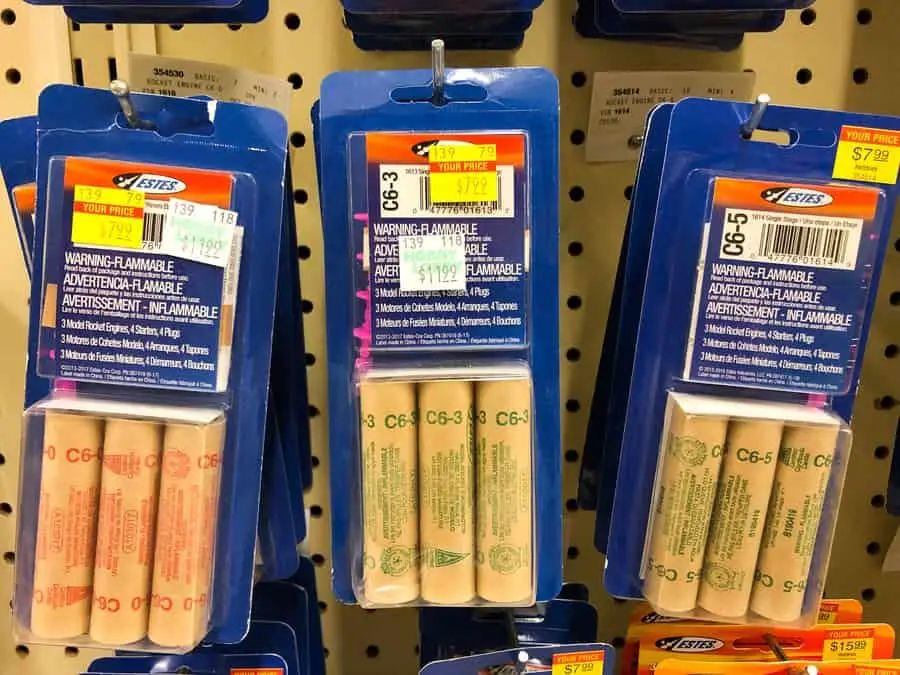
Black Powder Rocket Motors VS Composite Motors

There are two types of rocket motors that can be used black powder rocket motors and composite motors. Black powder rocket motors are the most commonly seen engines.

How Does A Black Powder Rocket Motor Work?

It may seem obvious by the name, but these little motors are stuffed with black powder propellant. They have an iconic brown paper-like shell in the form of a tube. Along with the propellant is the delay charge with smoke and the ejection charge. In front of the propellant is a clay-like material known as the nozzle.

When it comes time to launch the model rocket, an igniter will be inserted into the nozzle, and the launch device will use this igniter to effectively explode the propellant, resulting in a launch.

How Does A Composite Motor Work?

A composite motor works nearly the same as a black powder rocket motor except instead of utilizing black powder these engines are built with a composite propellant that is nearly three times as powerful as black powder motors the same size. This extra power is extremely beneficial as composite motors can be made much smaller and lighter but drive the same amount of power.

Composite motors are both sold as single-use and reloadable. The reloadable type features an aluminum casing that can be used multiple times and cleaned, helping the model rocket user save money and have the ability to build their own engine. Reloadable engines are seen more with high-powered model rockets.

What are the Different Sizes and is Bigger Better?

Larger engines can, in fact, produce greater average thrust volumes, and drag force which directly corresponds with how much weight the engine can pull and the maximum thrust that might be achieved. You’ll commonly find that large model rockets use large engines because they can pull more weight. That doesn’t mean they will fly higher than a smaller rocket that is using a smaller engine, though.

All things such as weight, drag force, average thrust, and maximum thrust should all be considered. A smaller engine could have a very similar maximum thrust and achieve the same height, but it may not be able to pull as much weight as a larger engine.

Here is a chart of standard sizes based on the motor class.

Note: These sizes are standard only, and many manufacturers may have different diameter and length specifications than what is listed on this chart. 

Motor Type Average Diameter (mm) Average Length (inches)
1/4A 10.5 1.5
1/2A 10.5 1.5
A 131.75
B 18 2.75
C 18 2.75
D 24 2.75
E 29 4.88
F 29 4.88
G 29 4.88

What are Multi-Stage Engines?

Some model rocket designs utilize two or possibly three motors in stages. There are single-use motors, and then there are multi-stage motors. Multi-stage motors will have a lower and sometimes intermediate stage motor that will show a value of 0 instead of a delayed time. This is because they do not have a delayed time mechanism; they only contain propellant.

The final stage or, “upper stage” engine will include the delay and ejection system. The lower and intermediate stages burn through the propellant that applies heat through the nozzle of the next stage successfully igniting it in succession.

Only black powder engines can be used in multi-stage rockets. Composite engines are designed with a propellant that requires high pressure to sustain burning. This need makes it difficult for the heat and flame to pass from motor container to the next motor container. Thus, they normally just burn out. 

The main benefit of having a multi-stage motor is that it will fly much higher. This also means though that it will drift further in the wind, so special consideration has to be taken when choosing the appropriately sized launch field.

Can You Build Your Own Model Rocket Engine?

You may run into some conflicts building your own model rocket engine if you have to ask permission for use of land to launch, or you have to discuss approval with your local fire marshal. If you don’t look like a professional who knows what you’re doing, it might rub a few local agencies in control of your park grounds the wrong way.

The main reason it can be an issue with obtaining approval from fire marshals and local agencies is that you can’t necessarily tell them how high or how far the model rocket may ultimately go. This makes it hard to figure out if you have the appropriately sized launch field to keep you and others in proximity safe.

In fact, in the state of California, you legally can not use an engine that is not certified by the NAR (National Association of Rocketry) first. California is officially the only state that has such a strict rule on model rocket engines and what is allowable. Not only do they have to be certified by the NAR, but they must also be certified by the state itself before use.

You’ll probably run into some conflicts if you plan to use the motor in a NAR competition or launch area as well, their safety codes restrict the use of any engine on a specified field that is not certified by their association. They also have a designated Range Safety Officer on every site that makes sure all model rockets being used are first certified and do not conflict with their safety rules.

If you plan to make your own rocket fuel, exercise extreme caution. The materials you are working with can be explosive and extremely dangerous. This website does not advise you to make your own rocket fuel.

If you’re curious, here is a good overview of someone else making rocket fuel. Again, exercise extreme caution if you plan to do this as it can be very dangerous.

Some commonly expressed tips were:

  • If using a pre-manufactured model rocket, you’ll have to build your engine to fit the stock engine mount your rocket comes with, or you’ll need to modify the engine mount to make it work.
  • Be prepared for failure, and maybe opt to use an inexpensive rocket or two for testing.

Model Rocket Engines That Require Certification

There are some model rocket engines that require certification, licensing, or permits in order to operate/use because they are considered high-powered. Here is a list of these certification levels and the corresponding rocket engine classifications they are assigned to.

Level 1 Certification

Level 1 certifications allow the purchase of motors that are in the H, and I total impulse category. These classifications have motors that boast total impulses of 320-640 Newton Seconds. On average the cost of these motors might run you anywhere from $40-$65.

Level 2 Certification

Level 2 certifications allow the purchase of motors that are in the J, K, and L total impulse category. These classifications have motors that have total impulses of 1,280-2,560 Newton Seconds. You cannot apply for a level 2 certification without at least obtaining a level 1 first. On average the cost of these motors might run you anywhere from $70-$230.

Level 3 Certification

Level 3 certifications allow the purchase of motors that are in the M, N, and O total impulse category. These classifications have motors that show total impulses of 10,240-40,960 Newton Seconds. This certification also requires that the model’s design and construction be thoroughly reviewed prior to flight. These motors will run anywhere between $300 to $1,000+.

FAA/AST Permit/License Required

P motors that have a total impulse of up to 81,920-newton seconds require an FAA/AST permit or license to purchase and operate. These rockets are considered “suborbital rockets.” Find out more information on the experimental permits required here.  

Largest Rocket Motor Used by Amateurs

Classified as the S motor with a total impulse of 655,360 Newton Seconds, this motor is the largest kind to be used by amateur rocket builders. The team behind the rocket that used the motor was known as CSXT they were the first entity to actually launch an amateur rocket in space. They did this on May 17th of 2004. We wrote an article covering the CSXT and if model rockets can reach space. Check it out!

How High Can My Model Rocket Go Based on The Motor?

So, we’ve explained the different model rocket motor classifications, sizes, types and what total impulse means, but in simple terms, maybe you just want to know how high the rocket can really go based on engine size.

How high the model rocket goes will depend on a few things:

  • The maximum thrust of the engine
  • The maximum lift weight of the engine
  • The weather conditions during the launch
  • The design of the model rocket body
  • Is the rocket using a multi-stage motor?

Model rocket engine manufacturers like Estes list out their maximum thrusts and lift weights on a helpful chart here. If you’re buying a complete assembly of a model rocket, it might give you a specific idea of how high the model rocket will travel. If you’re building your own, and simply purchasing a certified engine, you’re going to have a hard time determining beforehand how high it will really travel.

The most common model rocket engines can fly from 100 feet up to several thousand feet. I’ve put together a chart on the most common model rocket engine classifications and their average expected heights based on a few of the top manufacturers’ listed specifications. Again, be advised these are just average ranges and ultimately the model rocket body, weather, and more might change these figures.

Rocket ClassificationAverage Height
1/8A100 – 300 ft
1/4A 100 – 500 ft
1/2A 100 – 500 ft
A 300 – 800 ft
B500 – 1200 ft
C 500 – 1500 ft
D 700 – 1800 ft
E 1000 – 2300 ft
F 1500 – 3000 ft
G 1800 – 3200 ft

How to Select the Right Motor 

Selecting the right motor is not as simple as determining how high you want your model rocket to go. If you’ve already purchased a model rocket kit, most manufacturers will list the recommended engine for this rocket to have optimal performance and altitude.

If you’re building your own model rocket, it may take some trial and error in figuring out the right motor for use. These things have to be considered:

  1. The weight of your model rocket total and the maximum weight pull of the engine.
  2. The size of the engine compartment.
  3. The delay time your rocket will need for a successful recovery.

Apogee Rockets offers a great walkthrough guide on determining the best motor to use with your model rocket, read it here.  

You might also explore available rocket software like RockSim, which Apogee recommends in their walkthrough guide. This software allows you to design your rocket with different motors installed and the software will let you know your expected statistics and suitability based on your choices and design. This software does cost about $125, but they offer a free 30-day trial or your money back.

Learn more about RockSim, or purchase it here.

Exploring Model Rocket Kits for Purchase

The easiest way as a beginner to set out into the world of launching and flying model rockets is to buy one already designed and ready for assembly and launch. Usually, the manufacturer will even give you a pretty accurate estimate of how high the model rocket can go based on the recommended engines.

Let’s walk through a few of the popular model rockets being sold on Amazon right now (Note these kits do not come with the rocket model engine, but all of the rockets featured use one or multiple of the engines discussed above in this article, you’ll find these listed in the specifications):

Beginner Kits

Estes Alpha III Rocket Launch Set (link to read reviews on Amazon)

This beginner’s rocket kit is recommended for anyone 10 years and older. It’s very simple to put together and doesn’t require any painting.

Included in the kit is:

  • Launch Controller
  • Launch Pad
  • Rocket Assembly Kit
  • Orange Plastic Nose Cone
  • Body Tube
  • One-piece plastic tail fin unit
  • Decals for decoration

What’s not included:

  • Model rocket engine
  • Starters
  • Recovery wadding
  • Glue

Specifications:

  • Skill level: E2X, simple to glue, no painting required
  • Age Requirement: 10 years and up, adult supervision under 12
  • Engines Recommended: 1/2A6-2, A8-3 (first flight), A8-5, B4-4, B6-4, B6-6, C6-5, C6-7
  • Projected Max Altitude: 1,100 feet
  • Weight of Rocket: 1.2oz

Purchase the Estes Alpha III directly on Amazon here.

Estes 2452 Athena Flying Model Rocket Kit (link to read reviews on Amazon)

As one of the most popular beginner’s rockets from Estes, the Athena comes completely fully assembled, so you don’t even have to worry about the effort in putting it together, you can get ready for immediate launch!

Included in the kit is:

  • Fully Assembled Model Rocket
  • Parachute Recovery System

Not included in the kit:

  • LaunchPad
  • Controller
  • Model Rocket Engines
  • Wadding
  • Igniters
  • Igniter Plugs

Specifications:

  • Skill Level: Beginner, Already Assembled
  • Age Requirement: 8 years and up
  • Engines Recommended: A8-3 (first flight), B6-4, C6-5
  • Projected Max Altitude: 1,125 feet
  • Weight of Rocket: 1.4oz

Purchase the Estes Athena directly on Amazon here.

Advanced Kits

Estes 2440 Magician Flying Model Rocket Kit (link to read reviews on Amazon)

This incredibly tall model rocket (33.5 inches tall to be exact) is manufactured for use with D and E rated engine, and can soar nearly 1600 feet! The rocket is designed to have a larger than normal payload. The fins of the rocket are produced with laser cut wood fins, and the rocket comes with an 18-inch parachute that is already assembled.

Included in the kit is:

  • Body tubes
  • Laser-cut wood fins
  • Waterslide decals
  • Payload section
  • 18-inch parachute

Not included in the kit:

  • Building supplies
  • Finishing supplies
  • Model rocket engine
  • Launchpad equipment

Specifications:

  • Skill Level: Advanced, Assembly Required
  • Age Requirement: 18 years or older, adult supervision under 18
  • Engines Recommended: D12-5, E9-6
  • Projected Max Altitude: 1,600 feet
  • Weight of Rocket: 3.5oz

Purchase the Estes Magician directly on Amazon here.

Expert Kits

Estes Comanche-3 Shuttle Flying Model Rocket Kit (link to read reviews on Amazon)

For the expert model rocket enthusiast. The Comanche-3 features three stages, which mean it uses three engines to achieve its outstanding altitude! Assembly may take up to a day, but the wait is well worth the pleasing abilities of this model rocket!

Included in the kit is:

  • High-quality body tubes
  • Laser-cut balsa
  • Cardstock parts
  • Plastic nose cones
  • Waterslide decals
  • 24” preassembled parachutes

Not included in the kit:

  • Launch controller and pad
  • Tools, construction and finishes supplies
  • Recovery wadding
  • Model rocket engines

Specifications:

  • Skill Level: Expert, assembly required
  • Age Requirement: 10 years or older, adult supervision under 12
  • Engines Recommended:
    • 3 Stage Launches:
      • 1st Stage: C11-0, D12-0;
      • 2nd Stage: B6-0, C6-0;
      • Rocket: B6-6, C6-7
    • 2 Stage Launches (using 2nd and 3rd Stages)
      • 2nd Stage: C6-0
      • Rocket: B4-4, B6-4, C6-5
    • Rocket Only: B4-4, B6-4, C6-5
  • Projected Max Altitude: 2,250 feet
  • Weight of Rocket: 2.5oz

Purchase the Estes Comanche directly on Amazon here.

Build Your Own Launch Controller

Don’t forget! We recently built our own beautiful launch controllers that made the launch process SO much more fun! And we documented everything about it and put it into a super easy to follow step-by-step course showing you how to do the exact same thing! It’s called License to Launch and available here! Here’s an overview:

Model Rocket Altimeters and Accelerometers: Starter Guide


Launching model rockets can be a fun hobby. It could even turn into a competitive pastime. If you really want to put your inner rocket scientist to the test, you could add things like altimeters and accelerometers to the payload to gather data about each flight. I was eager to see what options were out there. After some research, this is what I came up with.

Should I purchase an altimeter and accelerometer for my model rocket project?

If you are interested in tracking the altitude or speed data related to the flight of a model rocket, you should purchase an altimeter and an accelerometer for your model rocket project. Be mindful of the weight, size, storage capacity, and data syncing methods when purchasing the altimeter that’s right for you.

The options for gathering data from your model rocket launches are infinite. You can add other instruments to your rockets, test different materials, use different sized rockets, and more. I learned about some options to play around with that you might find useful and entertaining.


Are you still using the standard Estes controllers for your launches?

We just built our own beautiful launch controllers that make launches SO much more fun, and we documented EVERY single step and item purchased and put it into a step-by-step course that teaches you how to do the exact same thing.

Click here to learn more about how you can build your own launch controllers!

Get the EXACT materials list along with easy to follow step-by-step instructions on how to build your very own launch controller and make launches 10x BETTER in our course: License to Launch

How Do I Pick An Altimeter For My Model Rocket?

An altimeter measures the height achieved during a launch, and a lot of factors go into picking an altimeter for your model rocket. Below are some ideas to consider when purchasing your own altimeter.

If you’re working with a rocket that’s smaller than most, you will definitely want to take into account the minimum amount of space you need for your altimeter. This will ensure it fits in the rocket. However, if you find out your altimeter doesn’t fit as it should, you can always modify the rocket like in this video:

These devices have different methods of installation. Some altimeters hook into the payload beneath the nose cone. On the other hand, some altimeters go in the payload of the rocket (with a small screw or wire), which might take up valuable space during launch.

Altimeters come in various shapes, sizes, and of course recharge in different ways. Some don’t recharge and simply need a new battery when you’re ready to launch. Others can be recharged with a USB plug. Pay attention to the instrument’s specifications before you purchase.

If you are new to model rockets, you might have concerns over cost for items such as altimeters. Rest assured even Amazon has affordable items like this altimeter. There are lots of options available.

You should also consider whether or not you are going to enter competitions with your rockets. If you do, smaller altimeters are the better choice because they reduce the weight of the rocket, which helps with performance.

What Kind Of Data Can I Collect From An Altimeter?

Altimeters collect the peak height of the rocket during its flight, so you can use it to find your highest altitude launch. However, there is a lot more you can do with the data as well—especially if you have multiple rockets.

  • Compare the altitude of rockets with different engines: Not all engines are built the same way, so it’s safe to say not all of them will propel a model rocket the same way. Try using the same rocket with a variable—the engine—and see what kind of results you uncover.
  • Compare the altitude of rockets with different weights: You could find out how much weight affects the altitude a rocket can reach by tracking your data and findings.
  • Compare the altitude of rockets that are different sizes: The variable in this experiment is the model itself. Are both altitudes the same? Or are they different?
  • Compare the altitude of rockets made with different materials: Some materials are lighter, sturdier, or more aerodynamic than others. How does this affect the peak altitude of the rocket?
  • Compare the altitude of rockets with different weather conditions: You might find the weather will play a factor in the peak altitude of your rocket’s flight. The direction of the wind—or how fast it was blowing—plays a part. But how?

You will also be able to compare the duration of these flights using similar variables.

If you track your data over several launches, you can learn how much the peak altitude changes due to variables like engine power, weight of a rocket, size of the rocket, materials used, and weather conditions. These are just a few ways you can look at the data you retrieve and track.

How Do I Retrieve Data From My Altimeter?

After your launch, you can retrieve data from your altimeter to keep track of or compare with other data you collected. The retrieval process will vary depending on the type of altimeter you use. The two examples provided are a micro version and a version from Jolly Logic.

Altimeters Like MicroPeak Altimeter

With micro altimeters, you can retrieve your data and upload it to your computer. This particular altimeter is designed for competition rockets because it is compact and lightweight for maximum altitudes. It records for 48 seconds after launch.

With this particular altimeter model, you need a few things to get started:

  • MicroPeak altimeter
  • Micro USB cord
  • Computer with necessary software
  • A receiver board to sync the data

Start by loading the software on your computer. On the top toolbar, select file, then download. Select “OK” in the pop-up menu.

At this point you should plug in your micro USB cord to the altimeter and your computer.

Turn on the receiver and carefully place the receiver close to the altimeter. Lights will indicate the signals are working between the boards. When the light turns blue, the data is syncing, and the data should appear on your computer screen with details of your launch.

Altimeters Like Jolly Logic Altimeter 3

The Jolly Logic Altimeter 3 (link to read reviews on Amazon) is a larger altimeter with a hook for attaching to your rocket. These are not usually used for competitions because they are heavier than micro options. However, you can sync data retrieved on your launch very easily. You will only need the following to get started before your launch:

  • A smartphone (either iPhone or Android work)
  • The Jolly Logic app
  • Bluetooth connection between the devices

The first step of retrieving your flight’s data is to prepare prior to the launch. To connect the devices via Bluetooth, turn on the altimeter. On your phone, go to your settings, then your Bluetooth menu. Select the Jolly Logic Altimeter 3. It is important to approve the pairing on both devices for a successful connection.

You are now ready to launch your rocket. Your data will appear on your app in real time while the Bluetooth is connected.

Other Altimeters

Sometimes the data retrieval process isn’t the same from instrument to instrument. You should look at the directions of your altimeter to make sure you know how to retrieve the data prior to use.

How Do I Pick An Accelerometer For My Model Rocket?

Accelerometers measure the force of acceleration your rocket achieves during launch. There are numerous factors to consider when purchasing one. I outlined some of the factors below.

Keep in mind that accelerometers are going require more work than the altimeter readings we covered above. There are lots of open-source accelerometers out there that are very affordable but will take some research to understand how to use them.

When you’re looking into purchasing an accelerometer for a model rocket, you need to take into account how much space you have in the payload of the rocket as well as the size of the chosen instruments. Sometimes you have to modify the rocket’s body or the configuration of instruments inside. There are countless videos about modifying rockets online.

Another factor to consider is how the accelerometer can be installed. Does it require a screw, wire, or both? Can it be attached with an adhesive like super glue (side note, see our post on the best model rocket glue – it isn’t super glue!) or simple double-sided tape? These questions are especially important to ask if you are competing with your model rocket because weight plays a factor in the performance of your flights; it also dictates if you can reuse the equipment.

Consider the differences between rechargeable and single-use batteries. The latter incurs extra expenses down the line, but this often makes devices like accelerometers lighter in weight. If weight is not a concern (as in competitions), rechargeable accelerometers might be a wise choice. Many plug directly into an outlet or computer via USB cord.

If the accelerometer cost is a concern, you might consider less technologically advanced ones. There are some that are similar to the MicroPeak Altimeter in the aspect that they need a receiver and other equipment to retrieve data, but an accelerometer chip is less expensive than professional options, which can cost $1,000 or more.

Sometimes storage capacity plays a role when you purchase an accelerometer. If you are looking to store more data, however, that also comes with a hefty price tag of several hundred dollars or sometimes even more. An instrument with 1 gigabyte of storage can hold up to 17 continuous hours of data, but model rockets don’t usually require this level of sophistication.

If you enter model rocket competitions, you are more likely to favor small, lightweight options for accelerometers and other instruments for your rockets. These, along with other factors, will help optimize your flights for goals like highest altitude, longest duration, and best craftsmanship.

Finding the right accelerometer depends on factors such as size, installation methods, and cost. Whether you enter competitions for rocketry (or simply like the hobby) will also influence your purchasing options. There is a lot to take into consideration.

What Kind Of Data Can I Collect From An Accelerometer?

Accelerometers track the acceleration of the rocket you launch. It collects data points throughout the flight and records them. With this collected data, you can:

  • Compare the acceleration of rockets with different engines/motors: If the rockets are exactly the same—aside from the engine/motor—this means the engine is the variable in the experiment. Compare the data points from the accelerometer to find out if one engine is superior to the other.
  • Compare the acceleration of rockets with different weights: As a variable, weight of a rocket will make a big difference in how fast the rocket is able to accelerate, but you can find out how large or small that difference is with the help of the data you collect.
  • Compare the acceleration of rockets with different sizes: The components are the same, but the rocket size is different. How will this affect your flight? With the data you collect from your accelerometer, you will be able to find out how this affects your flight.
  • Compare the acceleration of rockets with different adhesives: If you mount your instruments with adhesive, will that provide a different result than if you mount them with a screw? The data you collect from both flights will help you determine this.
  • Compare the acceleration of rockets with different wadding material: If you want to retrieve your rocket, you need to be sure the parachute deploys safely. This is achieved with flame-retardant wadding material. Does using different types of wadding material change the outcome of the flight? Compare these two flights to find out.

Flight duration can also be altered by variables like the ones above.

These are only a few ideas of experiments you can conduct with the help of an accelerometer and its data. Compare two or more flights to get started, but keep in mind a good experiment has several sets of data.

How Do I Retrieve Data From My Accelerometer?

You can retrieve data from your accelerometer in a number of ways. Here are two to get you started. Keep in mind, you should know the general method used to retrieve data prior to purchasing your accelerometer as this could influence what you should buy.

Micro SD Card

It’s easy to retrieve data from your accelerometer with a micro SD card that will be attached to your accelerometer circuit board. Here’s what you need to get started:

  • Accelerometer circuit board
  • Mounted micro SD card slot
  • Micro SD card
  • USB card reader (micro SD compatible)
  • Any software you have to interpret data
  • Computer

Before you launch your rocket, mount your accelerometer in the rocket and turn it on. This will allow you to collect data on the micro SD card during the flight.

After the flight, turn the accelerometer off. You will be able to remove the micro SD card and transfer the data to your computer using the USB card reader (along with software).

This step-by-step guide will help you retrieve the data points collected with the accelerometer in your model rocket. From here, you can learn a lot about this and other flights you might launch.

If you have any trouble with the micro SD card, try watching this video about how to use one with an accelerometer:

USB/Micro USB

If you have a larger accelerometer, you might be able to skip the Micro SD card and retrieve your data. First, you’ll need the items listed below:

  • Accelerometer
  • USB/Micro USB cord
  • Computer (with appropriate software)

Make sure your accelerometer is on during the flight so it can document data. After the flight, turn off your accelerometer to conserve battery and keep data limited to the flight record.

To retrieve the data saved, load the software needed to interpret the data. Then plug the accelerometer into the cord and computer. Follow prompts on the screen if necessary. Your data points will appear in a graph on screen with the results of the flight.

The data you collect over time will serve you well for any tests or experiments you conduct.

Important Notes

If you are unsure of how to retrieve data from your accelerometer, it’s best to ask the manufacturer how to do so. Ideally, you should do this before you buy the product to be sure you have what you want and need. The extra time and effort will be worth it.

What Are Model Rocket Competitions?

Model rocket competitions take place throughout the US. There is a sporting code here to learn more about the rules and regulations of the events as well as the three categories: altitude, duration, and craftsmanship.

Altitude

The rocket with the highest peak altitude (within the given power limit restrictions) wins this category.

It is important to take the model’s size and materials into account in this situation. For example, a small, less sturdy cardboard model might reach higher altitudes than its larger, sturdier plastic cousin. As long as the rocket can be recovered for the altimeter data, it doesn’t matter how damaged the rocket is.

Another factor in this competition is reducing drag. Drag, the effects of friction on the surface of the rocket, can be reduced by reducing the size of the rocket as well as using a more aerodynamic design. If the rocket reduces enough drag, the altitude will likely be higher.

Duration

The rocket with the longest flight duration (with a given recovery system) wins this category.

It is key to test out recovery system solutions before the competition. For example, not all parachutes will provide help with extending the duration of the flight. The ideal solution will have a lot of lift and allow the rocket to stay airborne for a longer period of time. You can see in this NASA diagram of a model rocket launch how a slow descent will extend the duration of the flight.

If you have a higher altitude after the powered ascent, you are more likely to have a longer duration for your flight. This will give you the upper hand sooner as well.

Launching your model with certain weather conditions could help lengthen the flight, too. Test out some ideas, such as launching into the wind or without any wind during launches.

Craftsmanship

In this category, the winner will have an aesthetically pleasing product to show off.

Crafting a model rocket that is pleasing to the eye is no small feat—especially considering the fact that they are judged after launch. Some things to think about include color, shape, and ability to fly well.

Keep in mind if the rocket is damaged during its flight, this will count against you, so don’t cut corners on cost in this type of contest—especially if it provides a more aesthetically appealing result. One make-or-break facet of craftmanship is how neat it is. Examples here include an even paint job and no visible adhesive.

Other Contests

The winner of a spot landing contest will have the nose cone of their rocket closest to the center of the spot designated for landing on. There are three different kinds of spot landing competitions, including:

  1. Open spot landing: Here you can use any recovery method.
  2. Parachute spot landing: You must use a parachute as a recovery method.
  3. Streamer spot landing: You need to use streamers as a recovery method (within given measurements).

The winner of the precision payload contest will have the best craftsmanship for the payload portion of the rocket. One idea includes landing a raw egg without breaking it. However, you cannot use devices on the rocket that measure altitude (altimeters) or duration during flight; this is considered cheating.

The winner of the research and development contest is truly advanced. However, the winner will help advance model rocketry technology with their findings. This is where experiments with rocket launches could come in handy because you can use the results of these experiments for the contest.

How Do I Find A Contest?

Each year, the National Association of Rocketry (NAR) has up to 27 events for model rocket enthusiasts to participate in. You can find their calendar on their website.

Some events take place each month, which is a nice touch for those who can’t attend one or others for various reasons. This also means you could meet some new friends with similar interests—consistently at that.

There are also some contests that take extra strides in being particularly family-friendly. They also have food available for purchase (among other things) at family-friendly events. It looks like a blast!

What Other Instruments Can I Use On Model Rockets?

There are additional instruments available to add to your model rockets. Here are a few examples.

Rocket Locators

Rocket locators are objects that will help you find your rocket after it lands. There are two types of locators: beacons and GPS locators.

Beacons project lights and/or sound to make your model easier to find. This is helpful if you launch in a smaller field with tall grass, for example. This has unlimited range after launch, which means you don’t need to worry about your rocket going out of range to find it.

GPS locators give you the exact location of your rocket for recovery purposes. Some point you in the right direction (using a device that comes with the GPS locator). The range the devices work together can vary. Some devices have a range up to 8 miles away so you can easily locate your rocket.

Cameras

Camerasare also available to add to your model rockets to get great aerial photographs or videos. They are great to record the memory of your first rocket launch—especially if rocketry becomes a hobby or career later on in life.

These cameras are small. Some are as small as a keychain!

Keep in mind cameras are definitely not ideal if you are participating in competitions, but can make great memories.

These are a few ideas of additional pieces of equipment you can add to your model rockets. Keep in mind during competitions these add-ons might not be practical because they add weight to your rocket.

Here is our recommendation on in-flight cameras for model rockets (with examples of actual footage).

Where Do I Place/Mount All Of These Instruments?

Each piece of equipment you purchase should have a recommended method of mounting or placing the instrument in the product description. Check these guidelines prior to purchase for the desired results, or improvise for some interesting data.

There are several ways to place or mount equipment in model rockets including:

  • Tape: This is common for hobbyists, especially with cameras. Double-sided tape is a good option for these projects.
  • Screw: A small, lightweight screw will ensure more expensive instruments remain in place—especially falling from such high altitudes. These are good for permanent setups.
  • Wire: Thin wires are helpful in securing instruments as well. This is a sturdy way to secure an instrument with a less permanent setup.
  • Adhesive: Some adhesives like super glue make a permanent hold. This is great for competition-worthy model rockets.
  • Hook: Some altimeters hook under the nose cap of the model rocket. Hooks are easier to remove than permanent adhesives.

It is important to consider how temporary or permanent the solution is when before you start—just in case you want to remove the equipment later.

If the equipment is in the payload, remember it is also vital to add recovery wadding to cushion the equipment for shaky landings. This will extend the life of the equipment and ensure it doesn’t catch fire.

Building and launching model rockets can be an awe-inspiring and educational hobby. You can even attach equipment like altimeters and accelerometers (among other things) to collect data about each of your flights. With events like family-friendly competitions all across the country, there’s no doubt there is something in it for everyone.

Build Your Own Launch Controller

Don’t forget! You can ditch the stock controllers and confidently build your own from scratch using our step-by-step instructions and exact materials list! We promise this will make your launch experience 10x better, and using our course License to Launch you can be 100% confident you’ll be able to finish this project and be super proud of what you’ve built! Here’s a sneak peek below.

How Do Model Rockets Work?


Model rockets are a popular hobby among users of all ages. They are exciting to launch, allow you to build specific skills, and provide scientific educational value. If you’ve never seen a model rocket being built, you may just think it requires pushing a button for launch. It actually is much more detailed, requiring great attention to detail and proper construction for success.

How Do Model Rockets Work?

After constructing a rocket using lightweight materials, an engine and recovery system are placed inside. An engine is ignited by electricity via a launch controller, creating thrust. The rocket is propelled into the air and reaches a peak altitude before a parachute recovery system is ejected from the rocket and returns the rocket safely to the surface.

Model rockets are fun and safe to use given that proper safety precautions are taken and construction is sufficient. This article dives into the components that make a model rocket, what typical flight looks like, navigating engines, and all you need to know about getting started with this hobby.


Are you still using the standard Estes controllers for your launches?

We just built our own beautiful launch controllers that make launches SO much more fun, and we documented EVERY single step and item purchased and put it into a step-by-step course that teaches you how to do the exact same thing.

Click here to learn more about how you can build your own launch controllers!

Get the EXACT materials list along with easy to follow step-by-step instructions on how to build your very own launch controller and make launches 10x BETTER in our course: License to Launch

How Model Rockets Work

Model rockets require similar knowledge to that of the large rockets you see NASA launch into space. While model rockets are much simpler, they incorporate similar scientific principles related to physics and chemistry. We’ll go through all the science you need to know when building your rocket, but in a simple way.

Components of a Rocket

Model rockets may seem to have a lot of parts, but they all serve important functions for a successful launch. For simplicity, let’s divide the rocket into three parts: outer structure, what we find inside, and necessary accessories.

Body Structure

Model rockets vary in design, but all have similar components that allow them to be aerodynamic:

  • Body tube: This is the long cylinder-like structure that makes up the majority of the rocket. It holds the engine and recovery system and is typically made of strong cardboards.
  • Nosecone: The nosecone serves to cut through wind and keep the rocket aerodynamic after lift-off. It is removable and connected to parachute lines for slow and safe recovery. Usually made of balsa wood or plastic, it is put in the body tube before each flight and can be solid or hollow.
  • Fins: They provide stability for the rocket and are usually made of balsa wood or plastic (plastic is typically used for more entry-level rockets). There is a direct correlation between the fin assembly and performance, as they must be secured and aligned.
  • Launch lug: Small cylinders that are attached to the outside of a rocket. They are used to hold the rocket along a rail or rod on the launch pad. This ensures safe and straight lift-off as you can control the angle of launch.

Inside the Rocket

The components inside the rocket are the most important as they are what is responsible for powering the rocket and bringing it safely back to the ground.

  • Engine: Model rockets use single use solid fuel engines for safety. They are made of fuel and an oxidizer, which combine to form a solid propellant. They burn to power the rocket once exposed to a heat source.
  • Engine mount: Does not move within the body of rocket and holds the engine firmly in place. This aims to separate the engine from the rest of the rocket and prevents engine from moving/destroying the other inner components.
  • Igniter: Usually thin wires that connect to the engine to conduct electricity from launch controller and then heat the engine.
  • Recovery system: Most commonly in the form of a parachute or streamers, they are ejected from the rocket after peak altitude to bring it safely back to Earth. They are usually made of thin plastic sheets.
  • Wadding: To protect the plastic recovery system from melting, toilet-paper like wadding material is used to separate the recovery system from the burning engine. 
  • Shock cord: Keeps all materials together during recovery. A cord is tied to the nosecone and the body of the rocket to ensure no parts are lost after the nosecone is ejected to initiate recovery system.

Necessary Accessories

The rocket itself must be supplied with energy to burn the engine. Model rockets are powered by electrical volts.

  • Launch Pad: With 3-4 legs for stability, it is a metal surface with a rod or rail centered on it. This rail is used to hold the rocket up and ensure upward flight. It also has a deflector plate to prevent damage to the pad once the engine ignites.
  • Launch Controller: Electricity-driven control that is connected to igniter in the rocket by wires and clips for engine burn. Electricity volts are supplied to the igniter to initiate burning process.

Building a Model Rocket

Before any flying can take place, most of the time spent on model rockets is reserved for building. Other than Ready to Fly (RTF) rockets, most require assembly. For beginners, Skill Level 1 rockets are best. As you become more experienced, increasing the level of rocket difficulty will impact the assembly and more advanced techniques needed to build.

Every rocket will be slightly different in construction, even across similar skill levels. Most beginner models should take you around 2 hours to construct, dependent on difficulty, and possibly more time to allow glue and adhesives to set.

  1. Have all necessary materials: Rocket kits should include body tube, nosecone, fins, parachute, and paint if required. You will need to purchase engine, starter, and wadding separately. Tools such as pencils, scissors, sandpaper, glues, and brushes will also need to be obtained. Kit instructions should detail necessary tools and items needed.
  2. Prepare Fins: Cutting and sanding may be required depending on difficulty. Practice aligning fins and marking placement on tube. Attach fins with glue.
  3. Place Engine Mount: Make sure engine mount is in place to hold engine. Glue edges to ensure security.
  4. Attach Launch Lug: If not already attached, place launch lug towards the top of the body tube.
  5. Attach Shock Cord: Glue shock cord inside of the body tube. Set heavy item over area to ensure tight hold during drying.
  6. Attach Recovery System and Nose Cone: Slip the designated loops on parachutes through nosecone for secure attachment. Then insert parachute cords through these loops to keep both attached. Tie shock cord to nosecone. All three will be attached during recovery.
  7. Insert parachute into body tube: Place 7-8 sheets of wadding in loosely, closest to engine. Then insert parachute by flattening it and folding in half. Roll the parachute from both sides carefully and wrap lines around this. It is important to keep parachute from tangling so it can easily release during recovery.
  8. Paint: If you wish you paint your rocket, save this for last. Let dry and then fly! See our article on Best Paints for Model Rockets.

Some models may require additional steps such as sanding. Expect to spend more time building and preparing for more advanced models rockets.

Flying A Model Rocket

Now that you know how to build the rocket, let’s fly! This is a step by step guide into the flight path so you know what to expect for a successful launch.

  1. Launch
  2. Powered Ascent
  3. Coasting Flight
  4. Ejection Charge
  5. Descent
  6. Recovery

Unlike large rockets, model rockets maintain their weight throughout flight as the burned material is not significant in relation to overall weight. Model rockets rely only on aerodynamics for stability because of the lower level of power used in their launches. This lowered level of velocity requires the use of a rail or rod to give the rocket greater stability and ensure straight upward launch. Launch should occur in open space for safety.

A rocket’s thrust from the engine will propel it into the air until the fuel is completely burned and it enters a coasting flight pattern. The period of ascent while fuel burns is called “Powered Ascent.” Then it enters “Coasting Flight,” this is still an ascent but is weakened in speed with no further thrust. During the coasting period, a “delay charge” burns in the engine waiting for the ejection charge to release.

The “Ejection Charge” phase begins the descent by creating high enough levels of pressure to release the nosecone and release the parachute or recovery method. Ideally, the rocket will go straight up and down, but the wind can often carry it as it loses speed transitioning from ascent to descent.

After the parachute is deployed, it will slowly descend to the ground and can be used again once the engine is replaced. The parachute prevents damage to the rocket for continued use.

Model Rocket Engines

Without an engine, there is no model rocket launch. Knowing all about the engine of your rocket will dictate the flying altitude and the power it possesses. This is also important information to know for safe and easy flying.

Sizes and Classification

Model rocket engines vary in size, dictating their power and therefore flight abilities. With a fairly straightforward classification system of letters and numbers, you will know exactly what type of power you are dealing with for your rocket.

When seeing model rocket engine options, they will typically follow this format:

LETTER NUMBER – NUMBER or for example: C11-3

Letters

The “power” in an engine is known as “total impulse” and it determines the amount of time that it takes for force to make a rocket fire. Total impulse is measured in Newton-seconds, or the standard unit of impulse.

Using the alphabet, the lower sized engines start at “A” and work their way up with increasing levels of power.

The “A” rocket engine has been set at 2.5 Newton-seconds and each ascending letter doubles this number. So, a “B” is 5.0 Newton-seconds, “C” is 10 Newton-seconds, and so on.

Mini engines can be smaller than A and are typically designated with a fraction before the “A.” The 1/8A engine has an eighth of the total impulse of the standard A and 1/2A has half the impulse of an A. 1/8A is considered a micro engine and both 1/4A and 1/2A are low power engines.

Numbers

The first number after the letter describes the thrust produced by the engine (in Newtons). Thrust is what is used to move the rocket through the air. This measure of thrust shows how quickly a motor can deliver its totally energy.

Different rockets require different levels of thrust for successful flight. Too much thrust on a smaller rocket may destroy it, and not enough may not allow the rocket to take off. Lower thrust produces more drag, which may slow down the engine too much if it is not powerful enough.

A higher number means more thrust in a shorter period of time. While you may have a “C” power engine, it may not be using its full potential with a lower thrust level. You can control power by limited the thrust.

The final number after the dash tells the time between propellant burnout and the ejection charge being fired (in seconds). When the motor fully burns, the rocket is still moving very quickly. The time delay represented by this value gives the rocket time to coast and slow down before the recovery system is ejected. Longer delays are better for lighter rockets as they tend to coast for longer periods of time. You do not want the rocket to fall during the delay period.

A higher number represents a longer delay time for the ejection.

Example

Lots of numbers and letters can get confusing, especially when we see them one after another. Here’s a quick explanation of the “C11-3” example we used above.

Letter: C (This is a C-class motor, giving 10 Newton-seconds of total impulse)

First Number: 11 (This rocket produces 11 Newtons of thrust)

Second Number: 3 (There is a 3 second delay between the propellant burnout and the ejection charge firing to initiate the recovery system)

Be sure to use the suggested engine size noted in the rocket instructions. This will ensure successful flight while others may not be compatible or too powerful for the designated rocket. Too powerful of rockets can be lost from sight in the sky and more difficult to retrieve.

Certification

For lower to mid-level rocket engines, anyone can use and purchase them. As you work your way toward high power rockets, certification is required for purchase and use.

Engine Size Power Level Certification Required?
A-D Low Power No, anyone can purchase and use
E-G Mid power Anyone can get E, some F and G require certification
H-O High Power All require certification for purchase and use

Certification is set in place to ensure safe use of rockets. Only those who are knowledgeable in model rocketry, rocket engines, and safety procedures are permitted to use rocket engines that require certification. Lots of paperwork and documents are needed in applying for certification. This must be showed as proof when purchasing.

Certification Levels:

  • Level 1 Certification: Some F and G engines as well as all H and I engines
  • Level 2 Certification: J, K, L engines
  • Level 3 Certification: M, N, O engines

One must obtain “Level 1 Certification” before they can move onto higher levels. High level rockets must have their design and construction reviewed by rocketry governing bodies before launch to ensure safety and accuracy.

Quick Calculations

If you want to determine some values related to your engine, here are some quick equations and shortcuts:

  • Thrust (in pounds): # of Newtons / 4.45
  • Average burn time of engine: Total impulse / average thrust

These values should be found on the packaging of your engine. Values may differ slightly between personal calculations and the given information as manufacturers sometimes round these values for simplicity.

The Right Power for You

Your experience level has a direct impact on the type of engine you should be using in your rocket. The solid engines used in model rockets today are much safer than those used in the early days of the hobby. People used to put themselves in danger by mixing fuels. Now, everything is done for you and you can eliminate the danger of early combustion without taking away the fun.

For beginners, it is suggested that engines be kept under “C” level. This will prevent you from losing the rocket to too high of altitude.

Using too powerful of engines with little experience can be dangerous as the rocket you build may not be able to handle the thrust forced upon it. Too much power may damage the rocket if it is not well-equipped.

For any model rocket user, no changes or modifications should be made to the engine. Any source of heat can ignite the engine and may cause serious injury. All engines used in model rockets must be commercially manufactured according the National Association of Rocketry (NAR) Safety Code.  

Recovery System

The recovery system is a crucial step in the model rocket flying process because it makes it possible for you to fly your rocket again. If there were no recovery system, the rocket would drop down to the ground at a high speed with a sharp nosecone to lead it. This could cause damage or injury to people and nearby objects – especially if the wind takes your rocket out of sight or it leaves the launch area.

How It Works

After the rocket has been launched, the engine will burn until it reaches maximum altitude. This then triggers the ejection charge, delaying the recovery system from releasing until all fuel is burned. Once the ejection charge releases, the parachute or other method of recovery will activate.

This occurs as the rockets coasts, reducing in speed and preparing to descend. The parachute will release from the body tube and slow down the rocket, taking away its ability to drop sharply.

As it nears the ground slowly, it may blow slightly in the wind, but the lack of speed should keep it within your launch range. This slow descent allows you to grab your damage-free rocket and launch it again.  

Types of Recovery Methods

The most common recovery systems are parachutes and streamers. These are typically found in most entry level model rockets. These systems can vary depending on the type of rocket you are using and personal preference.

  • Parachute / Streamer: The most common recovery system and very common in small model rockets. They can be used with larger rockets if the parachute size is much bigger than the rocket. Rocket deploys recovery system from inside and fire-proof material is put in between the motor and rocket to prevent recovery system from damage. For more reading see our article on parachutes vs. steamers: when to use and avoid each.
  • Featherweight: Simplest recovery for very small rockets as it lets the rocket float to the ground after the motor has been ejected.
  • Tumble: Another simple rocket recovery method, the rocket tumbles back to the ground. You want to use this on rockets that will not have a stable, straight flight back to earth for safety. Can put engine to the rear of the rocket to make it unstable and land unbalanced.
  • Nose-blow: Simple technique where the nosecone is released and takes away any aerodynamics, slows it down, and usually only works in lightweight rockets.
  • Glide: Wing deploys from motor and will enter a spiral glide to return safely to the ground.
  • Helicopter: Helicopter-style blades are used for the rocket to rotate slowly back to the ground.

Getting into Model Rockets

Model rocketry as a hobby has little barriers to entry and is valuable for all age groups. People enjoy the hobby for the ability to work with their hands, be creative, enjoy a finished project, get a thrill from launching them, and to learn something new. There is lots of value one can gain from getting involved in the hobby.

Why Should You Try Model Rockets?

  1. It is inexpensive: Most model kits will cost under $20, being affordable considering they are reusable. The separate purchases of engines and wadding are only a couple of dollars. One-use engines typically cost $2-3 per unit.
  2. It’s fun: Both small children and adults enjoy seeing a rocket blast off over 1,000 feet into the air. It is even better when you were the one to build it and see these exciting results.
  3. Educational: Many children are introduced to science concepts for the first time through model rockets. Many scientists attribute their career interests to this hobby in their childhood.

Best Model Rockets for Beginners

The best model rockets for beginners fall into specific categories based on skill. Skill levels range from 1-4 and increase with the difficulty of both the build and the launch. Beginners should use Ready to Fly (RTF), Easy to Assemble (E2X), and Skill Level 1 rockets. Skill Level 1 rockets are the most difficult of the three as they require more assembly, but are well-suited for those with little to no experience.

Children may benefit from the RTF and E2X as they require less assembly but still garner an interest in rockets. The limited assembly requires less manipulation and precision in construction. This is also a great option for those less interested in building and more interested in flying!

Estes in the market leader in model rockets and offers great rockets for all skill levels. They have an expansive selection of rockets for beginners as well.

Our favorite Estes beginner offerings:

Estes Alpha (1225)

This is one of the most popular Estes beginner rockets and has been on the market for a long time. It has a simple design, easy to follow instructions, and allows you to learn the craft of building model rockets. If you plan to progress to larger and more complicated rockets, the Alpha (link to read reviews on Amazon) is a great beginner kit. With more pieces to assemble than other models, it prepares one for even more assembly at higher levels.

Tandem-X Flying Model Rocket Launch Set

This set includes not one, but two rockets plus materials needed for launching. This is a great set for beginners who hope to progress onto larger rockets. The Tandem-X (link to read reviews on Amazon) includes an E2X and Skill Level 1 rocket as well as a launch pad and launch controller. You will not need to purchase the launch materials again and will have built up a nice rocket collection from the start. This set has great economic value compared to buying the items individually!

Model rockets require separate purchase of engines and wadding for each use.

For more reading and suggestions check out Best Model Rockets for Beginners.

Go Fly!

Model rockets intrigue people for their power and speed. They are able to blast through the air, providing us with excitement and thrills. This is one of the least expensive and most educational ways to achieve that rush. Building a rocket with your own hands and seeing it blast into the air is a step up from typical building and crafting projects.

Try one of the rockets we recommended and work your way up to more powerful and complicated designs. Mastering skills and working your way up to higher levels can be incredibly rewarding. With great attention to safety and details in building, you’ll be able to see your finished project make its way from the box and into the sky!

Build Your Own Launch Controller

Don’t forget! You can ditch the stock controllers and confidently build your own from scratch using our step-by-step instructions and exact materials list! We promise this will make your launch experience 10x better, and using our course License to Launch you can be 100% confident you’ll be able to finish this project and be super proud of what you’ve built! Here’s a sneak peek below.

How Do Model Rocket Engines Work?


Model rockets are fascinating to a lot of people because at least on a small scale, you can experience the same basic physics that have taken spacecraft to the moon and beyond. And it all starts with the engine.

How do model rocket engines work?

Model rocket engines contain a fuel and oxidizer mix (propellant) that is wrapped in a cylindrical casing. When ignited, the engine ejects exhaust gasses through the engine nozzle and propels the rocket forward. Depending on the design, the engine will usually have an ejection charge to deploy the parachute from the top of the rocket.

That’s the basic answer to “how do model rocket engines work?”, but the way your model rocket engine works will depend on which type of model rocket engine you use.

To learn more about engine styles, propellants, brands, power levels, read on below. I’ve also included some images and links to videos to help you better understand how a model rocket engine works.


Are you still using the standard Estes controllers for your launches?

We just built our own beautiful launch controllers that make launches SO much more fun, and we documented EVERY single step and item purchased and put it into a step-by-step course that teaches you how to do the exact same thing.

Click here to learn more about how you can build your own launch controllers!

Get the EXACT materials list along with easy to follow step-by-step instructions on how to build your very own launch controller and make launches 10x BETTER in our course: License to Launch

How a model rocket engine works step-by-step

Need a little more detail about how a model rocket engine works? Here’s what you need to know.

  1. Ignite your model rocket engine by inserting an electric igniter into the clay nozzle.
  2. The electric current ignites the propellant and it burns.
  3. As the propellant burns, it ejects high-pressure gas.
  4. The gas escapes out of the clay nozzle and produces thrust, propelling the rocket forward.
  5. Once the propellant is consumed, the smoke or delay charge, which lies behind the propellant, begins to burn.
  6. The delay charge produces a smoke trail to help you keep an eye on your rocket.
  7. The delay charge helps the rocket coast to its maximum height for a few seconds.
  8. Once the delay charge is exhausted, the ejection charge fires.
  9. The ejection charge pressurizes the rocket and ejects the parachute or similar recovery device.
  10. Your rocket floats to the ground. Time to go find it!

Are there different types of model rocket engines?

Most model rocket engines consist of a solid propellant, designed for one-time use. However, there are multiple types of model rocket engines.

To learn more about model rocket engines, you should explore single-use vs. reloadable engines, liquid vs. solid fuel, black powder vs. composite engines, and different model rocket engine brands.

Single Use vs. Reloadable

There are three types of model rocket engine motors: single-use, loadable, and reloadable. Here are the pros and cons to each of them.

Single-Use Model Rocket Engine

  • More expensive overall
  • Easier to assemble and use
  • Usually what you find in hobby shops
  • No age requirement or restriction

Loadable Model Rocket Engine

  • Close in price to single-use model rocket engines
  • Assembly required and trickier than single-use engines
  • Composite propellant only (more on this later)
  • Age 18+ only

Reloadable Model Rocket Engine

  • Lower cost per flight
  • Assembly required with more steps than other engines
  • Usually requires special order (not found in hobby shops)
  • Age 18+ only

Solid vs. Liquid Fuel

Does your model rocket engine utilize solid or liquid propellant?

In a “solid” rocket, the fuel and oxidizer combine to form a solid propellant, stored in a cylinder within the rocket body. The solid propellant burns when exposed to an external source of heat, like an igniter.

When solid propellant burns, the exhaust escapes and propels the rocket. A “flame front” moves into the propellant until it is all burned up.

Liquid-fuel propellants consist of fuel and oxygen in a liquid form, which are combined in a combustion chamber and then ignited. The rocketeer can actually control the amount of thrust produced. They can also manipulate the fuel flow and the engine itself.

Solid Propellant

  • Easier to handle
  • Rocketeer cannot stop the engine once ignited
  • Can sit for years without firing
  • Fuel and oxygen are pre-mixed
  • Cheaper
  • Less efficient and reduced control

Liquid Propellant

  • Heavier and more complex
  • Rocketeer can stop the thrust by turning off the fuel
  • Must be loaded immediately prior to launch
  • Must be mixed in a combustion chamber
  • More expensive
  • Rocketeer can control thrust, engine, and fuel flow

Source: NASA

Black Powder vs. Composite Engines

Simply put, black powder engines are powered by black powder propellant. Composite engines consist of both fuel and oxidizer mixed with a rubbery binder. The main component is Ammonium perchlorate.  

Black Powder

Black powder engines are the most commonly used engines in model rockets. They consist of a paper tube with a clay nozzle and a solid pellet of black powder propellant, according to lunar.org.

Black powder is also called gun powder, and consists of charcoal, potassium nitrate, and sulfur. It is cheaper than other propellants, but it does not create as much energy per kilogram of fuel, according to Apogee Rockets.

Black powder engines are:

  • Inexpensive
  • Easy to find
  • Ready to use

However, keep in mind that black powder engines have lower energy density than other engines. They are limited in size options and can only be shipped via HAZMAT shipping.

Composite

Composite engines consist of a fuel and oxidizer combination, which create a chemical reaction when mixed. You can find them in single-use or reloadable styles.

Composite engines are:

  • High energy
  • Available in virtually all sizes and power levels
  • Customizable when it comes to flame color

While composite engines have up to three times the power of black powder by weight, keep in mind that it is more expensive than black powder, can be difficult to come by, and is more advanced to use.

Various Model Rocket Engine Brands

You can find your model rocket in a hobby store like Hobby Lobby or Michaels. There are also plenty of online buying opportunities on sites like Amazon and Apogee Rockets. The brands available to you will depend on where you look.

Are you looking for a black powder or composite engine? What size and power level do you want? Here is some useful information to help you determine which model rocket engine is right for you.

Aerotech: Aerotech is popular and versatile. You can find them in single-use, loadable, or reloadable styles. They come in 18mm D size and up, according to Apogee Rockets. This is a high-power motor that is more accessible than other brands.

Estes: You can find Estes engines everywhere, no special online order needed. It is one of the best options for beginners. Most Estes engines use black motor propellant, but there are a few models with a composite propellant.

Quest: Quest engines are comparable to Estes, except they are known for longer tails and being even easier to use. However, Estes are usually easier to find. All Quest engines use black powder.

Cesaroni: Cesaroni models utilize composite-reloadable engines. They come with pre-assembled kits to make your composite engine experiences much easier.

These are some of the most popular model rocket brands available. You should choose your brand based on what’s accessible near you and the features you want in your engine.

I recommend Estes or Quest for brand-new rocketeers. For more reading check out our article Best Model Rockets for Beginners.

What are the parts of a model rocket engine?

To really get to know your model rocket’s engine, you’ll need to be familiar with the parts within the engine. Parts vary slightly based on power, size, and brand, but the typical parts of any model rocket engine include:

  • The nozzle at one end
  • The propellant behind the nozzle (black powder or composite)
  • A delay behind the propellant
  • An ejection charge at the other end

The engine burns and has a domino-like effect to make your model rocket soar.

When you ignite your model rocket, the propellant burns and produces gas. The gas escapes through the nozzle, and the thrust from the engine spurs the rocket.

When the propellant is all used up, the delay charge begins to burn. The delay charge does not create thrust, but it allows the rocket to coast momentarily to its highest point. The delay charge also creates a stream of smoke so you can better watch your rocket.

When the delay is complete, it ignites the ejection charge, which pushes out the nose cone and the parachute or streamer.

Here’s a great video showing the various parts of the engine:

What are the different sizes of model rocket engines?

Model rocket engines range in size from 6mm to 98mm in diameter.

“Mini” A engines are about 13mm in diameter and 45mm long.

A, B, and C engines are considered “standard” in size. These are about 18mm in diameter and 70mm long.

D and E power engines are about 24mm in diameter and 70mm long but can be even longer.

Mid and high-power engines can be 29mm, 38mm, 54mm, or larger in diameter. Lengths vary based on the brand you choose.

Classifying model rocket engines with letters and numbers

You’ve probably seen letters and numbers describing model rocket engines, and you may be curious about how to decipher these alien categorizations. I did a little research so I too could learn the mysterious language of rocketry.

Letters: Model rocket engines are categorized with a letter A-G based on the thrust, or impulse, that an engine generates. This value is measured in newtons.

An A engine can have an impulse between 1.26 and 2.5 newtons. A newton is the force necessary to accelerate one kilogram at a rate of one meter per second squared.

B engines can have power from 2.6 to 5 newtons.

C engines have an impulse from about 5.1 to 10 newtons.

D engines have a range of power from 10.1 to 20 newtons, and so on.

Basically, a B engine is twice as powerful as an A engine, and you continue to double your power from there.

Why does the power of your rocket matter? Obviously, the power of your rocket determines how fast and how high your rocket will fly.

Consider your goal for your model rocket experience and the location where you will be using your rocket. More powerful can become a problem when you lose your rocket on a stranger’s roof. (Make sure you’re launching in a safe and open place!)

Numbers: A letter isn’t the only way to classify a model rocket engine. You will often see a number following a letter, or even two numbers following the letter. For example, you may have heard of a C4 or a B6-2.

Nar.org published a “Standard Motor Codes” web page that helps us break this system down. A model rocket engine is classified by:

  1. A letter specifying the total impulse
  2. A number specifying the average thrust
  3. A number specifying the time delay between burnout and recovery ejection

The number directly after the letter is the engine’s average thrust in newtons. Thrust is determined by how fast the propellant burns. For example, a B4 engine burns slower, taking more time to use up its propellant than a B6, which uses all of its propellant in less than one second.

Remember: The smaller the second number, the slower the rocket will fly, because the slower the propellant burns.

The second number, or the number after the dash, is the time that the delay charge burns. If you read the “What are the parts of a model rocket engine?” section, you may remember that the delay charge burns after the propellant burns, and allows the rocket to coast up to its maximum height.

The second number is easy enough to decipher. A B6-2 indicates a two-second delay, whereas a B6-6 indicates a six-second delay, etc.

Here is a chart that will help you determine which type of model rocket engine is appropriate for your skill level:

Engine class Power Skill level
1/2A .63-1.25 Newton-seconds 1
A 1.26-2.50 Newton-seconds 1
B 2.51-5 Newton-seconds 1 & 2
C 5.01-10 Newton-seconds 1, 2, 3
D 10.01-20 Newton-seconds 2 & 3
E 20.01-40 Newton-seconds 3 & 4
F 40.01-80 Newton-seconds 4
G 80.01-160 Newton-seconds 4

Keep in mind:

  • A-G class model rocket engines are used in model rocketry
  • H-O classes are used in high-power rocketry and require certification
  • O-S classes require further certification and include the largest engines available to amateurs
  • S-AH classes apply only to professional rockets, which do not use this nomenclature

What’s my skill level?

Let’s touch on skill level, just in case you’re not sure what type of engine to buy based on your previous experience. For a really great resource with more comprehensive information on skill level, check out Apogee Rockets’ “Measuring Your Skill Level” page.

Keep in mind that your skills should build upon the previous levels’ skills, so if you have level three skills, you should also have all skills mentioned in level two and level one.

Should I use a low-power or high-power rocket?

“Low-power” rockets can include anything up to an E engine.

“Mid-power” rockets can include D and E engines, but certainly F and G engines.

“High-power” rockets include H engines.

If you’re a beginner with model rockets, pick up a kit at your local hobby store. Read the kit to find out which type or types of engines are suitable for your chosen rocket. You should probably start out with a low-power rocket.

After you fly your first low-powered engine, you can get a better feel for how high and far your rocket will fly, and what kind of engine you want in the future.

Information on restrictions and certifications

Yes, there are some restrictions and certifications when it comes to model rockets and model rocket engines. You might be surprised by how powerful some of these amateur engines are!

Here’s what you need to know about model rocket engine restrictions:

  • Anyone can purchase rocket engines classified A-G
  • To purchase and operate H or I engines, you must be certified level 1
  • To purchase and operate J, K, or L engines, you must be certified level 2
  • To purchase and operate M, N, and O engines, you must be certified level 3

How do you become certified as level 1, level 2, level 3, or level 4 to buy and fly some of these more advanced rockets?

To become a level 1 rocketeer:

Step 1: Become a member of NAR (National Association of Rocketry) or TRA (Tripoli Rocketry Association)

You have to become a member before becoming certified for flying H-class engines or higher.

Use the website links above to visit their sites and learn more about becoming certified with them. The first step is to complete the application online.

TRA charges $40/adult for their annual membership, or $50/family. You pay again each year to renew your membership. NAR offers a one-time fee of $1,000 to become a member for life.

Why sign up for NAR? NAR offers:

  • $5 million rocket flight liability insurance
  • Resources like The NAR Member Guidebook (a how-to book on rocketry) and access to “The Member Resources” website
  • Option to become certified for high-power rocketry
  • Access to clubs, reports, and six issues of Sport Rocketry magazine

Why sign up for TRA? TRA provides:

  • $3 million with primary rocket flight insurance coverage
  • Private and active forums where members can ask rocket-related questions
  • Access to certification courses so you can advance in rocketry

Step 2: Build your level 1 rocket

If you would like to become level 1, level 2, level 3, or level 4 certified, you must start with your Level 1 certification (and work your way up from there!)

Keep in mind that the rules are different depending on whether you are a member of the TRA or NAR. Here are the links to the TRA rules and procedures and the NAR rules and procedures.

Here are a few things you should know about building your Level 1 certification rocket:

  • You have to build your own – you cannot borrow a friend’s, and you cannot work in a group.
  • You can build your rocket from a kit or from scratch.
  • Your rocket must fly on an H or I engine. However, you may choose to first test your rocket with a G engine before your supervised launch.
  • Conduct a supervised launch.

You should acquire one H or I engine and set up an appointment with an official observer. You can find both your engine and your observer through your organization (the NAR or TRA). Check in with your observer before your appointment day to ensure you are both clear on the time and place.

The observer will watch you assemble and launch your rocket. You must then retrieve your model rocket and return it to your observer.

If you lose your rocket or it comes back with significant damage, you will not pass the certification test. If you successfully launch and retrieve your rocket, and it is still flyable, you will pass your certification. Your observer will send you your Level 1 Certification form.

Once you receive your certificate, you can buy and fly H and I category engines.

To become level 2 certified:

Step 1: Build your level 3 rocket

If you would like to become certified to buy and fly a J or K engine, it’s time to build a level 2 rocket and pass another certification test. James Yawn suggests that if you select the right rocket kit and engine, you can complete both your Level 1 and Level 2 certification with the same rocket!

Step 2: Study for a written exam

Before launching your level 2 rocket, you will need to pass a written exam. Your organization offers the guides with the answers you will need to know. As long as you study the given guide closely, you should be able to pass the test without difficulty.

Step 3: Conduct a supervised launch

Make sure your rocket and engine are ready, and your observer knows the right time and place. At the launch, assemble your rocket and launch it off the launch pad. Retrieve your rocket and show your observer that it is still in good condition.

To become level 3 certified:

Step 1: Design and build your level 3 rocket

Design your rocket and then acquire approval from your TRA or NAR technical advisor. You will have to do your research to design a rocket that can successfully fly on an M engine.

Step 2: Plan your launch

Complete your paperwork, such as your Certification Application and your Construction Package Affidavit. Set up an appointment with your TRA or NAR observer and confirm the date and time.

Step 3: Launch your level 3 rocket

The rules are the same as your previous launches, but keep in mind that your engine is far more powerful and the risks are higher. Be confident in the location you select for launch. You will need plenty of space so that you can successfully retrieve your rocket which has flown high and fast into the sky.

When you complete each new certification, a whole new world of rocket power will open to you! The way your rocket soars all depends on the power and size of the engine.

Build Your Own Launch Controller

Don’t forget! You can ditch the stock controllers and confidently build your own from scratch using our step-by-step instructions and exact materials list! We promise this will make your launch experience 10x better, and using our course License to Launch you can be 100% confident you’ll be able to finish this project and be super proud of what you’ve built! Here’s a sneak peek below.

Best Model Rockets for Beginners


Model rockets have been popular among children and adults since they were first invented in the 1950s. They act upon similar concepts and forces of the rockets you see NASA fly, but are much simpler and more accessible to people of all ages and backgrounds. Many attribute scientists’ interests in their career field to using model rockets as a child. Many factors should be considered when choosing your first model rocket as a beginner.

The best model rockets for beginners should be:

  • Easy to build
  • Easy to transport
  • Durable
  • Manageable in power (engine size)

This article gives you our recommendations for the best beginner rockets and how you should go about choosing your first one. Building model rockets is a fun and interactive activity that lets you work with your hands and learn a thing or two about the cool science behind it all. After reading, you’ll be ready to try model rocket building yourself!

If you’re buying a rocket kit, it’s going to come with a standard controller unit to control your launches.

And if you’ve ever used these before, you know how plain and boring they are. It doesn’t give you that “oomph” that the launch sequence should.

We just built our own beautiful launch controllers that make launches SO much more fun, and we documented EVERY single step and item purchased and put it into a step-by-step course that teaches you how to do the exact same thing.

Click here to learn more about how you can build your own launch controllers!

Get the EXACT materials list along with easy to follow step-by-step instructions on how to build your very own launch controller and make launches 10x BETTER in our course: License to Launch

Best Model Rockets

We’ve selected our favorite beginner rockets based on their ease of use and the introductory skill level required to successfully launch the rocket. Estes is the market leader in model rockets and provides a wide array of beginner model rocket options for consumers. We’ve chosen the best Estes model rockets that will be easy and fun to use.

Model rockets are divided into “Skill Levels” to guide different levels of builders on their purchases. It is recommended that all beginning rocketeers use “Skill Level 1” rockets or lower for their ease of use and simplicity. Users can progress in skill level once they have conquered the beginning levels.

The following rockets are either Easy to Assemble (E2X), requiring little assembly and plastic cement, or Skill Level 1, requiring sanding, gluing, painting, and extra time to assemble.

Estes Alpha (1225)

The Alpha (link to read reviews on Amazon) is a classic beginner rocket in their product line for its ease of use and simple design. Millions of people have used this as their first rocket for decades. This rocket is fairly easy to build with straight forward directions. It uses traditional balsa wood and cardboard, making it lightweight and high performance. After building, sanding, and painting the rocket, you’ll be ready to take it outside and fly! This is a great rocket if you are interested in building a traditional model rocket that requires full construction.

What We Like

  • Ready to fly after an afternoon of building and painting
  • Simple parachute recovery system for safe landing
  • Can fly up to 1,000 feet with a C-engine, making It a high performer

What We Don’t

  • Easy to lose sight of rocket with high altitude therefore needing more open space for landing
  • Doesn’t come with launch pad or control, need to purchase separately for use

U.S. Army Patriot (2056)

Based on the U.S. Army M-104 air missile, this scale rocket (link to read reviews on Amazon) is a Skill Level 1, making it great for beginners and those looking for traditional model rocket assembly. Requiring gluing, sanding, and painting, this rocket will take a couple hours to fully construct and launch. It can fly up to 600 feet in the air with standard Estes engines and comes with decals that replicate the real air missile.

What We Like

  • Cool design and easy assembly make this rocket attractive to users of all ages
  • Easy to follow instructions for successful build
  • Excellent for those looking to grow model rocket building skills

What We Don’t

  • Painting small and precise areas can be the most challenging part of assembly (speaking of paint, see our article on Best Paints for Model Rockets)
  • Requires additional purchases for necessary launch, recovery system, and engine

Estes Alpha III (1256)

The Alpha III (link to read reviews on Amazon) was the first rocket in Estes beginner series, built for its easy assembly and clean design. With a one-fin unit, it is ready to fly in a much shorter period of time than traditional rockets. This is definitely the rocket for you if you are looking for fast assembly and more instant gratification. Soaring up to 1,150 feet at peak altitude, this is a high performing rocket that has been enjoyed by users worldwide.

What We Like

  • Only requires household supplies and glue to assemble rocket
  • Sleek black and orange design makes it easier to see after launch
  • Easier for younger users to build and get excited about rockets

What We Don’t 

  • Not the best option for traditional model rocket building as it does not require the same skills

Bandito (803)

An Easy to Assemble (E2X) rocket, the Bandito (link to read reviews on Amazon) is classified as a mini rocket. It can fly over 600 feet, making it easier to keep track of its green and yellow body after takeoff. This is a great rocket for beginners that requires little to no assembly and is ready to fly in less than an hour. This rocket is recommended for users over 10 years old and those under 12 should be supervised by an adult. Most children can build this rocket with little to no assistance.

What We Like

  • E2X series rocket makes it incredibly easy to use and assemble: great for young users and those looking for simplicity
  • Great bonding tool for adults and children: many users really enjoy building this with their child or young people in their life

What We Don’t

  • Not the best rocket for learning traditional rocket building skills as there is limited assembly
  • Doesn’t fly as high as larger rockets in the beginner category

Estes Tandem-X Flying Model Rocket Launch Set

Our final recommendation is different from the other offerings in that it includes launch materials in addition to the rocket. This set comes with two rockets, giving you a great introduction to rocket building with an Easy to Assemble (E2X) rocket and a novice challenge with a Skill Level 1. The Tandem-X (link to read reviews on Amazon) is great for beginners and requires less additional purchases than simply buying individual rockets.

What We Like

  • Comes with a launch pad that can be used for all your future rockets
  • Provides easy assembly rocket and a more challenging novice rocket to build your model rocket skills for two unique experiences
  • Great economic value for two rockets and launch pad set compared to individual purchase

What We Don’t

  • While it comes with launch pad, an engine, wadding, and tools are not included

How to Choose Your First Model Rocket

There are many considerations to make when choosing your first model rocket. The goal of building a model rocket is to not only learn how to master the hobby, but successfully launch it. Rockets vary in level of difficulty as well as performance, making your decision important for success.

The best model rockets should be:

  • Easy to use
  • Durable
  • Portable
  • Powerful, but not too powerful

Let’s dive deeper into these categories so you know what you should be looking for in your first model rocket!

Ease of Use

Rockets have many components, varying in size and complexity for different functions and capabilities. For a beginner, it is best to work with a rocket that has the least complexity so you can learn how to use model rockets and build your way up to more difficult units.

Many model rocket manufacturers recommend sticking with Ready to Fly or Skill Level 1 for beginners. Model rockets are classified into different levels of difficulty to help users select one based on their experience level.

Model rocket skill levels:

  • Ready to Fly (RTF) /Almost Ready to Fly (ARF): Very simple assembly with little to no painting required. They use simple glue and generally more plastic than traditional models.
  • Skill Level 1: Easy to build, fly, and great for beginners and novices. They require very little assembly and simple decorating. They do not take more than a couple hours to assemble but be sure to use a glue that will dry fast enough for same-day use.
  • Skill Level 2: Some experience is required for successful Level 2 model rocket building. They have more complex fins and challenging assembly.
  • Skill Level 3: For advanced modelers, these models use complex materials, larger engines, and various types of adhesives.
  • Skill Level 4: Designated for “experts,” these rockets are recommended for adults. They require detailed modeling skills, complex construction, and advanced power.

There are many RTF/ARF and Skill Level 1 rockets to choose from. This article recommends our favorites for beginners to successfully fly their model rocket.

Skill Level Decisions

There is great variability not only between levels, but within them. Skill Level 1 rockets vary greatly in capabilities, power, size, construction, and ease of use. Choosing the best model rocket for your needs is a good rule of thumb. Not all rockets within the same level will be suited for a particular person’s skill set. The different rockets will also create for different experiences.

In choosing a particular model within a level, note these things:

  • Age: Is the rocket for a child or adult? Children may have shorter attention spans for more complex projects and lose interest.
  • Dexterity: Some rockets require precise construction with small parts, while others are easier to manipulate.
  • Intention: Are you looking to build a rocket in less than an hour and fly? Or do you want a more advanced assembly that takes more time and effort?

For young children, starting with a RTF/ARF rocket kit may be better. There is little assembly required (depending on the kit) and it may be easier for younger children to build and enjoy. This starting point can always be built upon with more complex rockets that require additional assembly and construction.

Older children and adults are better suited for Skill Level 1 rockets (although RTF rockets are fun for any age). These require more skill in building through measurements and different adhesive applications. They may require sanding and painting, which requires more specific motor skills and instruction. These rockets are a good starting point for working your way up to more complex and powerful rockets in higher power levels! 

Durability

Model rockets are made of lightweight materials for successful flying. This makes them very durable considering the elements they endure, but they are still somewhat fragile materials. Materials do not need to be heavy-duty or overly strong to handle winds or force during flight. Most model rockets are made of wood, cardboard, and plastics. Metals are avoided for smaller models and are typically only used in rare situations that require extreme strength.

Lightweight materials are used for successful flight as well as safety. Rocket manufacturers specifically make their materials durable for continued use. For smaller and beginner model rockets, materials such as balsa wood (strong and light) and cardboard (strong for body) allow for greater flight capabilities and are designed to lose durability in dangerous situations.

While these rockets will withstand strong forces of wind, they are designed to crumple on extreme impact with other objects. If a malfunction occurs during launch or recovery, it will cause less damage to objects and humans. The rocket will take the brunt of the impact opposed to injuring or damaging. Rockets that land at a fairly high speed after recovery are still often undamaged.

Ease of Transport

Model rockets, especially the smaller ones used for novice to intermediate users are incredibly lightweight. This makes them very easy to transport. They typically weigh only a few pounds (with the engine included), while the rocket itself only weighs a couple ounces. This makes them very easy to transport from build to launch site.

Ease of transport may only be slightly difficult if you are moving many rockets to a launch site and want to protect them. Many rocketeers use racks or storage boxes/containers to keep them separated from one another and safe from potential damage. Your rockets should be safe, but users take extra precautions.

Engine Sizes

Different engine sizes will provide varying levels of power and therefore altitude capabilities. Using the proper engine is important as to not damage or lose the rocket and to maintain safety standards. You want a strong enough engine for the launch to be exciting, but not too powerful that you may lose the rocket at too high of altitudes. Losing sight of the rocket will make recovery much more difficult and increase the chances of wind carrying it far beyond your launch area.

Choosing the smallest engine recommendation will decrease chances of loss. Using an engine that is not recommended will not ensure successful flight. Rocket engines are one-time use. Start with a smaller engine and work your way up as you become more familiar with your rocket’s capabilities.

Model rocket engines sizes are classified using a letter system to define the power capabilities of a specific engine. Lower letters are the lowest in power and ascend as the letter does.

Engine sizes:

  • A – D: Considered low power and anyone can buy them
  • E – G: Mid power engines, many requiring certification to buy and use (anyone can buy E engines)
  • H – O: High power rocket engines that require certification to use

It is recommended that beginners do not use engines more powerful than “C” to ensure safety and easy return of rocket.

With increasing power, some rocket engines require certification for use. Some F and G engines and all higher require certification as they are deemed “high power.” This can include two-stage motors (two motors are used to keep rocket powered) and engines used for much larger rockets. These powerful rockets are not designed for beginners as they are easily lost in sight and can cause more damage if misfired. Being an experienced rocketeer is required for these bigger and more powerful engines.

Additional Model Rocket Considerations

Now that you know what to look for in your first rocket and have your eyes on a certain one we’ve recommended, there are additional things to consider and note to ensure a fun and safe experience.

Safety

Flying model rockets is a safe activity given that you follow safety precautions and adhere to guidelines. Rockets are actually much safer and have fewer accidents and injuries than flying model airplanes.

The National Association of Rocketry (NAR) has established a set of guidelines to follow for safe rocket use.

The safety code states important information and rules to keep you and others safe during flight:

  • Materials: Must be lightweight and non-metal
  • Motors: Must be certified and commercially made with no changing or tampering
  • Launch: Must be launched using an electronic system, warn and countdown others before launch, test stability before flight, stand at least 15 feet away for D engines or smaller, must use a rod or rail to ensure upward flight.
  • Size: must weigh less than 53 ounces at liftoff and cannot exceed 320 Newton seconds
  • Conditions: Must use in clear and safe weather and space conditions
  • Recovery System: Must be used to return rocket safely without damage and do not try to recover rocket if it lands in dangerous places

These are the major guidelines that should be followed to ensure a safe flight. These are good to review before every launch to keep them fresh in your mind. Another important safety note is to make sure you carefully follow construction instructions and properly load/reload the body of the rocket with recovery materials and new engines.

Price

Building model rockets is fairly inexpensive once you have the proper tools and materials. With one time purchases of launch sets and rockets, the main costs are buying new engines, wadding, and glue. These are not very expensive and are dependent on the rate at which you build new rockets.

One-use engines are typically less than $2 per engine depending on their power and size. This is not incredibly expensive compared to other hobbies! Manufacturers produce engines that work specifically for their rockets.

The rockets themselves, especially smaller ones, are usually less than $20 per rocket and most are half of that. Price is something to consider before entering the hobby as you want to be aware of the costs associated with parts that need replacement.

Size

You would naturally think that larger rockets are more powerful and difficult to use, and in a lot of cases you would be right. But for lower level rockets, the larger rockets can actually be much easier to build and use.

Larger rockets generally mean larger parts, making construction much simpler. Tiny rockets use small parts that are difficult to manipulate and require much more detail. This can be challenging for those not familiar with building rockets or smaller children.

Small rockets appeal to many rocketeers because they can fly very high. The smaller size makes them more lightweight and aerodynamic, leading to higher maximum altitudes.

If you are looking for parts that are easier to work with, try a larger model rocket. You can decrease in size and increase in power as you become more familiar with building model rockets and successfully launching your first one!

How Does a Model Rocket Work?

Model rockets are made of lightweight materials and use small engines to launch themselves into the sky. While they travel nowhere as high as large rockets, model rockets are a great hobby for all ages and progress in difficultly as you become more advanced.

There is a fair amount of science involved in model rockets and their ability to fly so we’ve simplified how they work to introduce you to the topic. This includes what the rocket is made of and how it is able to make its way from the ground to the sky and back down safely.

Rocket Make Up

A model rocket consists of a tube (usually made of cardboard), fins for stability, and a nosecone to make the rocket aerodynamic. The tube holds the engine and recovery system necessary for power as well as safely landing the rocket. Fins are typically made of balsa wood or plastic and aid in the stability of the rocket’s upward direction. Nosecones are at the tip of the rocket to provide increased speed and precision through the air. These are removable and release during recovery to slow descent speed.

Here’s what is inside the tube of the rocket:

These are the major components of the rocket, allowing it to launch, reach maximum altitude, and recovery safely for continued use. The rocket parts are usually made of lightweight materials, such as cardboards, plastics, and balsa wood. The engines are commercially made, making them easy to use as well as safe.

Flight Path

It is important to know what to expect from your model rocket, especially to ensure it is operating correctly.

There are a couple key steps in the model rocket process you can expect:

  1. Launch: A model rocket will take off from a launch pad, which is connected to an electrical charge to initiate take off. The model rocket will be held by a rail or rod for stability and to ensure upward launch.
  2. Powered Ascent: The burning of the engine allows the rocket to propel into the sky and move at high speeds through aerodynamics.
  3. Coasting: Thrust from the engine is gone and the rocket is still able to ascend but at a slower pace. During this period, a “delay charge” is set into action, which gives a 2-8 second delay for the ejection charge to release.
  4. Descent: The ejection charge initiates the recovery system being deployed, which is usually a parachute or streamer system.
  5. Recovery: After the parachute is released, the rocket should slowly make its way back to Earth safely for repeated use.

Knowing the flight path will allow you to realize quickly if steps are missed or a certain part of the path does not occur. Most accidents or problems occur during the launch or recovery phase.

Final Recommendation

After reading this, you should have a solid base of knowledge about model rockets and what you should consider before buying one. Beginner rockets are easy to assemble, easy to transport, durable, and are not too powerful for new users. All of the recommendations we offer will provide you with a successful launch given instructions and safety precautions are followed. If you want to build your model rocket skills, we recommend the Alpha rocket. It is easy to use but also challenging enough for beginners to really participate and develop their skills.

Flying model rockets is a fun and safe activity that users of all ages can participate in. It is exciting and educational all at once, making it appealing to people with all sorts of interests! While having fun, it is important to follow the safety code to ensure a safe experience as well. Get out there and start building!

Build Your Own Launch Controller

Don’t forget! You can ditch the stock controllers and confidently build your own from scratch using our step-by-step instructions and exact materials list! We promise this will make your launch experience 10x better, and using our course License to Launch you can be 100% confident you’ll be able to finish this project and be super proud of what you’ve built! Here’s a sneak peek below.

Best Model Rocket Brands


Everyone is bound to have a personal favorite, but there are some brands that exist that simply create the best product in their niche. They’re the brands that have built their reputation around keeping their customers happy by delivering quality service. The same goes for model rocket brands; there are some that are okay, while others will blow you out of the water.

So, what are the best model rocket brands?

Estes is the main winner for pre-built kits and light assembly kits. If you want to start building your own, then Apogee is a good resource for buying the various components you’ll need to build a rocket.

It all depends on the type of kit you’re looking for. Whether you want a light-assembly or a pre-built kit, or if you’re going to build your own. There are brands that have been around for ages and others that are fairly new. Both have their benefits and make model rocket kits suitable for all types of builds. We’re going to cover both the big players and the newer startups here.


Are you still using the standard Estes controllers for your launches?

We just built our own beautiful launch controllers that make launches SO much more fun, and we documented EVERY single step and item purchased and put it into a step-by-step course that teaches you how to do the exact same thing.

Click here to learn more about how you can build your own launch controllers!


Get the EXACT materials list along with easy to follow step-by-step instructions on how to build your very own launch controller and make launches 10x BETTER in our course: License to Launch

What Are the Best Model Rocket Brands?

If you’re venturing into model rockets, you’ll need to take into consideration how high you want to go, along with whether you’re planning to make modifications to its build in the future.

There will also be the question of the age of the builder and intended use for the rocket. Some rockets are aimed at specific demographics, in terms of age and skill level. With the market growing, competition between brands has never been greater, so finding the right one for you has become even harder.

There is a specific model rocket out there that suits your needs. The hardest part of building one is identifying those needs to find the one for you. You have to consider every aspect of the project to determine what rocket kit you should purchase and dedicate your time to. Otherwise, it becomes a dropped hobby or a general waste of money and time.

The goal is to be able to enjoy the hobby by starting off right and finding the kit that is meant for you. Here are some of the considerations to have in mind:

  • Identify your wants
  • Determine your budget
  • Figure out what you want from a rocket
  • Get an idea of what each kit offers and what is included
  • Determine how user-friendly the kit is
  • Check out how elaborate the set up may be
  • Look for what the skill level is for different kits

These are the things to keep in mind as you to seek out the perfect rocket model kit to purchase for your needs.

You want to have a general idea of your own needs, as well as what each kit offers and what each brand is known for and how that affects the buyer.

Model Rocket Brands

There is only a handful of model rocket kit providers out there which kinda limits the brands that are available. That being said, there are plenty of brands that have existed for a while and have built a strong following and a good name.

Others have only recently popped up or only offer very few kits without any real background in model rocket building. The brands to look out for and to shop with include:

  • Apogee
  • Estes
  • Rocketarium
  • Odd’l Rocket
  • Dynastar
  • Quest

There are a few more lesser-known brands that only have one or two rockets available, but they have not been around long enough to have a reliable review on their durability and reliability.

Any of these brands can be good choice, depending on whether your choice is based on budget or you’re able to go all out. Or maybe you want a basic beginner kit that will give you the best base.

Estes

This is one of the best-known model rocket brands and for a good reason. Their rockets are reliable and have easy-to-follow instructions that are perfect for those who are just starting out.

Estes is the go-to brand for those who are in search of easy-to-build rockets in both pre-built kits and light-assembly kits. They even have a variety of different types and style rockets to choose from that are all beginner-level, so there is no need to be stuck with a basic model for your first or to help you along with the learning process.

Apogee

This is another well-known brand, except they specialize in another area. They’re better for those who are beginning to build their own rockets from scratch or for those who are beginning to modify their rockets.

Apogee is sturdy and well-built, making it a popular choice as it is more likely to last. They carry most rocket parts and are a reliable source for replacement pieces. They still offer pre-built and light-assembly kits in different levels, ranging from apprentice level to expert level.

The reason they are second to Estes is that they do not have the same detail or easy to follow instructions, making it slightly harder for beginners to get started.

Other Brands

The other brands are not necessarily worse than Apogee or Estes; they’re just not as well-known.

  • Rocketarium offers a few exciting rockets with a very basic design. The benefit is that they are affordable; you just have to remember that you get what you pay for.
  • Dynastar only has a few options of model rocket kits, but they are very intricate and interesting. The downside to them is that their rockets are pretty pricey and that they are not the best for beginners as their instructions leave much to be desired.
  • Quest also has a few options, but like the others are lacking in instruction and is a good option for those that are already established in their skills and do not require step-by-step instruction.

What Makes A Good Brand?

It is always hard to determine what to look for when searching for a brand to shop with. Companies will always try to make their product look the most appealing and model rocket kits are no different, if not even more so.

Each brand attempts to draw you in with their little tidbits, bragging about their knowledge, speed, design, and material. Take into consideration what the website is telling you because it is not all bad or nonsense, but keep an eye out for:

  • Ease of assembly
  • Good instructions
  • Durability
  • Availability of parts

Assembly

The first thing to consider when purchasing a model rocket kit is the ease of construction, and this is especially important if you’re a beginner. You do not want to find yourself in a situation where you’ve bitten off more than you can chew.

Remember that you’re a beginner, so if the rocket is unexpectedly tricky, you may find yourself hating a hobby that you have barely begun. The easiest way to determine this is by looking at the description on the website and how many pieces the kit has.

 Also, look at the parts that are already put together when you purchase the kit and that there are no complicated mechanics that you may or may not understand.

Instructions

The next thing you need to check for is if the company offers good instructions. Each kit is going to come with some type of guidelines meant to guide you in putting together the rocket, but not all are going to be easily understood.

 Make sure that the instructions they provide are clear and offer step-by-step guidance to ensure that there are no situations where you get stuck and are not able to continue without help. The goal is to be able to complete the model without assistance (or with little support) and learn so that you can build more intricate models in the future.

A bonus is when the company offers video instructions in addition to paper instructions, which is always something good to look out for.

Durability

One of the most important aspects of the model rocket kit is its durability. If the kit is not durable and the rocket falls apart in the first week or even month, you’ve wasted your time and hard work. You want to find a kit that has good durability and is proven to last, and if it doesn’t, then at least see if there are any warranties available.

The strength of the entire rocket will rely on the builder and the skills and efficiency at building it, but the parts should not fall apart or break during use. This includes the motor that usually comes in the different light-assembly and pre-built kits.

It should not fail after a few uses or burn up quickly, and it should be able to last without requiring replacement.

Replacement Parts

Last but not least is the availability of parts for the rocket that you’re guided to build. This is possibly the most neglected of the set as very few people think to check this. You may think you should be more concerned about whether or not your rocket will last, but everything is bound to fail eventually or need some type of maintenance.

Therefore, you should check and see before you buy what parts are available for purchase separately. If you make sure that the parts are available before you commit your time and money, you’ll save yourself a lot of headaches down the road.

You’re also able to keep your rocket going for a longer amount of time so that you won’t need to build a replacement until you’re ready.

Basic Builds Vs. Custom Design

As you immerse yourself into the world of model rockets, you’ll be able to complete higher-level kits and possibly begin to customize the designs. Eventually, you would be able to fully customize and create your rocket from scratch or by only buying certain parts, such as the motor.

There are plenty of kits that require different skill levels, familiarity, and creative input versus relying heavily on using the book the rocket kit comes with. The three types are:

  • Pre-built
  • Light-assembly
  • Custom-build

Some kits of different types may be modified in ways that others of the same type cannot be; it just depends on the kit.

Beginners: Pre-Built And Light-Assembly Kits

Pre-built and light-assembly rockets are meant for beginners who are just starting out. These rockets are simple to assembly and have larger pieces with little to no variation on the builders’ part.

The kits have easy to follow instructions that not only guide the builder on how to assemble the rocket but usually will provide additional information on building model rockets, in general, to allow the user to become accustomed to the hobby. This is the best for people who have never worked with model rockets or are looking to reintroduce themselves.

 The downside to these rockets is that they are normally unable to be modified or customized and will only function with the parts in the original kit. The best brand to shop for a kit for beginners is Estes.

Semi-Custom And Difficult Builds

Intermediate and expert-level kits are meant for exactly who they sound like, intermediate and expert level model rocket builders. The kits are more difficult to assemble and have more parts and pieces. The instructions are usually just as detailed but allow for the builder to take some personal liberties with the design and basic build.

The kits provide everything necessary and are capable of being customized by switching components, such as the motor or fin. Estes is still one of the best brands, but Apogee is another good option.

Experts: Custom Builds

Once you’ve become a pro at building model rockets, kits are not necessary. Most of the time, a kit will set the builder back as you would be able to achieve better results by custom-making the entire rocket. You are able to choose:

  • Shape
  • Fin size
  • Motor
  • And More

This allows you to (for those who are experienced) create a rocket that will perform better than those purchased as a kit. Unfortunately, there is not a specific brand to pick for rocket parts as the different parts are better from different places.

Overall, the best brand to choose when building a basic model rocket is Estes or Apogee. Estes has easy to follow instructions and Apogee lists the different levels and difficulties on their website for easy access. Custom-built rockets don’t have a brand; therefore, extra research is necessary.

Best Kits For Beginners

There are a few exceptional kits that do what they say and more, oftentimes allowing the builder to learn more about building rockets in general. The top three picks are:

They tend to encourage the builder to figure out how to put together the rocket while also providing detailed instructions on how it should be assembled and where you may get stuck. They also provide good height and are made for lasting use so that your first rocket (or rockets) last you a good long while whether for enjoyment or just to see how well your rockets will last.

Personal Favorite And Best

The best rocket, and a personal favorite, for beginners is the Estes Majestic Pro Series II (link to read reviews on Amazon), a model rocket kit that is capable of flying up to 2,000 feet in the sky. As it is an Estes, it is sold with easy-to-follow instructions for both the use of the rocket and it’s assembly.

The rocket is extremely simple to put together as well as having a Pro Series II Booster available for purchase so that you could add an extra 1,000 feet of flight. The rocket does require you to purchase finishing equipment as well as:

  • Controllers
  • Launch pad
  • Engine
  • Batteries

Although it is one of the nicest and best model rockets on the market, it is also the most expensive making it the hardest to get your hands on.

Quickest Kit Assembly

The quickest rocket to assemble is the Apogee Apprentice which is made for those at a beginner’s level. It includes all the necessary instructions that may be needed to educate a beginner and is even capable of teaching children how to prepare a rocket for flight. This kit includes all the basic materials in addition to:

  • Engines
  • Ingiters
  • Launch controller
  • Batteries

It is meant to allow the user to assemble and use the rocket immediately upon opening completely. As it includes all the extra pieces needed, it tends to be a quick assembly and a quicker take-off.

This rocket comes with an added bonus of a video-book that walks users through the assembly, launch, and later processes of the model rocket.

Longest Lasting Kit

Another Estes model rocket kit, the Estes Show Stopper (link to read reviews on Amazon) is a sturdy rocket. It does not go as high as the Estes Majestic Pro Series II, but it does allow the user to fly for longer periods of time. The kit comes with easy to follow instructions and is meant for those who are wanting to fly but are okay with accepting help from parents to assemble the rocket.

The Estes Show Stopper does not come with an engine, igniter, controller, or batters and requires you to purchase them separately. The best thing about the showstopper is that it comes in chrome and has the ability for a 15 parachute recovery which was not available with the other two.

Best Customizable Kits

If you’re looking for a little guidance while branching out towards making custom model rockets, then you’re in luck. There is no brand that is designated for the perfect parts and pieces, but there are two options when it comes to custom kits or pieces: there is the Estes Designer Special and the basic run-down provided you Apogee components.

Estes Designer Special

Estes has a kit called the Estes Designer Special (link to read reviews on Amazon) that consists of over 100 pieces, enough to build about eight model rockets. It comes with assorted size:

  • Body tubes
  • Engine mount tubes
  • Laser-cut centering rings
  • Green centering rings
  • Tub couplers
  • Parachutes
  • Streamers
  • Launch lugs
  • Engine hooks
  • Engine hook retainer rings
  • Engine blocks
  • Shock cords
  • Wood sheets for fins
  • Fin templates
  • Tube transitions
  • Plastic nose cones
  • Nose cone inserts
  • Clay for nose cone weight
  • Clear payload section
  • Model rocket technical manual

All of the models will require assembly and the kit does not come with tools, construction and finishing supplies, a launch system, model rocket engines, starter, and recovery wadding, they are all sold separately. Estes still considers this one of their level 1 kits and states that the kit is still perfect for beginners, although you may not want to try this one as your very first kit.

Apogee DIY

Apogee offers a more creative and individualized approach, and they provide a basic guideline for what parts and supplies that you may need to build your own and provide links guiding you to those products. They even have a section dedicated to making your own rocket motors and the basic tips to get a good height and make sure that your rocket withstands take-off.

Apogee then shows you the different types of products they offer that may help you build your own model rocket. This is a good option for those that are just getting started building their own custom rockets if they want to do it all on their own.

There is no instruction manual, and there are no step-by-step instructions to help guide you. There is only a general direction to follow, and the basic materials needed to complete your project.

Third-Party Builds

The last option is to find a model rocket kit that supports other parts and motors so that you can customize it to your satisfaction. This method is great for beginners as you can still rely on clear instructions and you have all the parts you need to build it, but you can learn how to adjust things by switching out the motor or the fin. You get to experiment with each of the different brands and discover your preference.

These types of model rocket kits are perfect to set you up for building your own custom model rocket, and it specifically allows you to know which parts you want beforehand without you having to go through trial and error on such a large and expensive project.

What To Look Out For

Just like you have to look out for certain must-haves when deciding on a brand or kit, you also have a few things you have to keep an eye out for. Not all brands keep their products up to a good standard and are only trying to keep their products selling. You don’t want to fall victim to one of their scams or suffer from their subpar rockets. The main things to check before buying (to prevent having your rocket fall apart in the future) are:

  • Company Bio
  • Age
  • Descriptions
  • Review

Company Bio

You wouldn’t want to buy food from a restaurant with a chef that has never cooked; it’s a similar situation for model rockets. If the people you’re shopping from don’t have any previous experience with model rockets, it wouldn’t be a good idea to purchase from them. When a company is familiar with its consumer base and the product they’re selling, they tend to have a better and well thought out product versus a company that doesn’t.

 You can usually determine this by visiting the company website and checking out their company bio. If the founders or owners have any experience, it would be mentioned in their introduction.

Company Age

While not as important as trying to determine whether the company has experienced, the age of the company still plays a part in the quality of the company. For the most part, when a brand has been around for a while, they have been able to work out the kinks in the products due to consumer feedback. If they have only been around for a short period, they have not had the opportunity to make these adjustments.

Product Descriptions

Always pay attention to the description of the product that you are purchasing, specifically if it is off of Amazon. Amazon is home to quick delivery as well as a wide variety of brands. The downside is that anybody can sell, so there is a chance to be sold a faulty product.

To avoid this, check the description for any strange wording or mistakes. The more mistakes there are, the more likely that the brand is not legit and may not be everything that they claim.

You also want to make sure that they describe the rocket in-depth and everything that the model kit comes with so that you won’t be left expecting something that it didn’t originally come with.

Customer Reviews

The absolute first thing that you should check before you do your other in-depth research is the reviews left by previous shoppers. These are the people who are interested in the same thing you are and were looking for a model rocket kit that suited their needs.

Check what the rating is and what the most common rating is. If there are one- or two-star reviews, read them and see if they are legitimate or if they are shoppers that just like to complain.

Also, check when the reviews were left to see if the brand has had enough time to fix the issues or if the reviews are too recent.Never buy a kit if a majority of the reviews are bad, you would be setting yourself up for disappointment.

Build Your Own Launch Controller

Don’t forget! You can ditch the stock controllers and confidently build your own from scratch using our step-by-step instructions and exact materials list! We promise this will make your launch experience 10x better, and using our course License to Launch you can be 100% confident you’ll be able to finish this project and be super proud of what you’ve built! Here’s a sneak peek below.