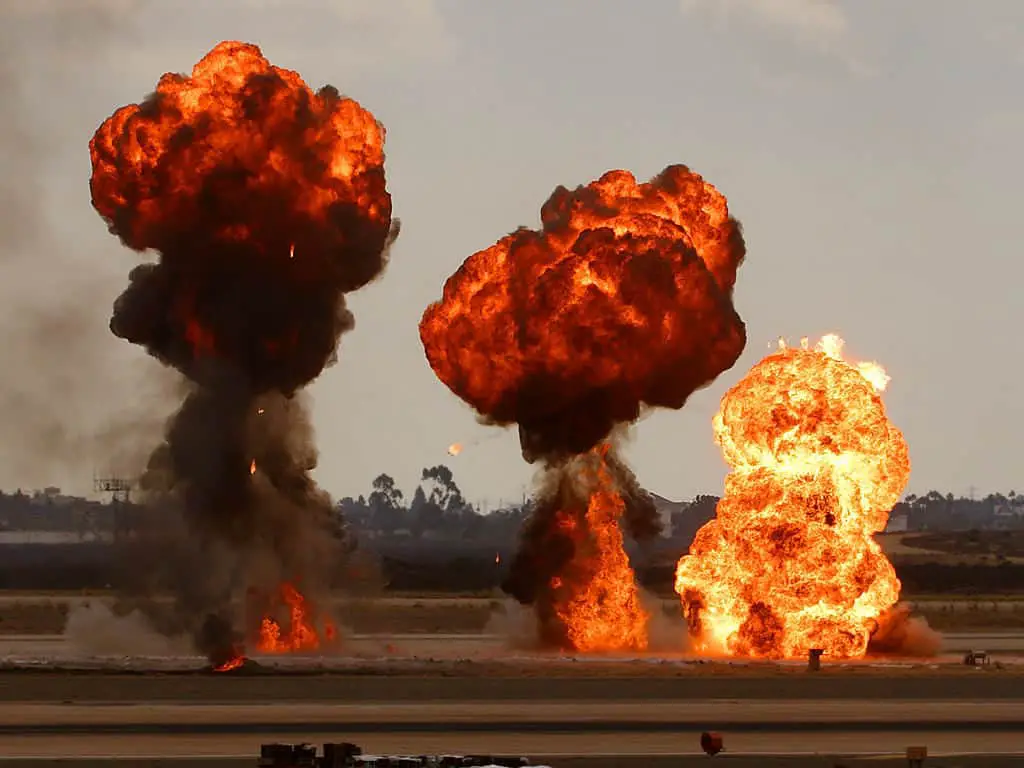
Flying rockets require the use of lighting a fuel-based substance on fire to launch a fairly sharp object into the sky. From first glance, model rockets may bring the question of safety into your mind. Don’t let this first image deter you as building and flying model rockets can be an incredibly enjoyable and safe activity. So are model rockets safe?
By following safety protocols designed by the National Association of Rocketry (NAR), model rockets are safe to use. The key to safe model rocket use is ensuring proper rocket construction, correct power use, appropriate environmental conditions, and heightened awareness on a launch site.
As model rocketry has grown in popularity, so has the attention to safe practices. The materials used in building rockets, the standards and code of behaviors, and the requirement of certification for high powered rockets have progressed and are continually updated over time to ensure the hobby remains fun and safe for all levels of user.
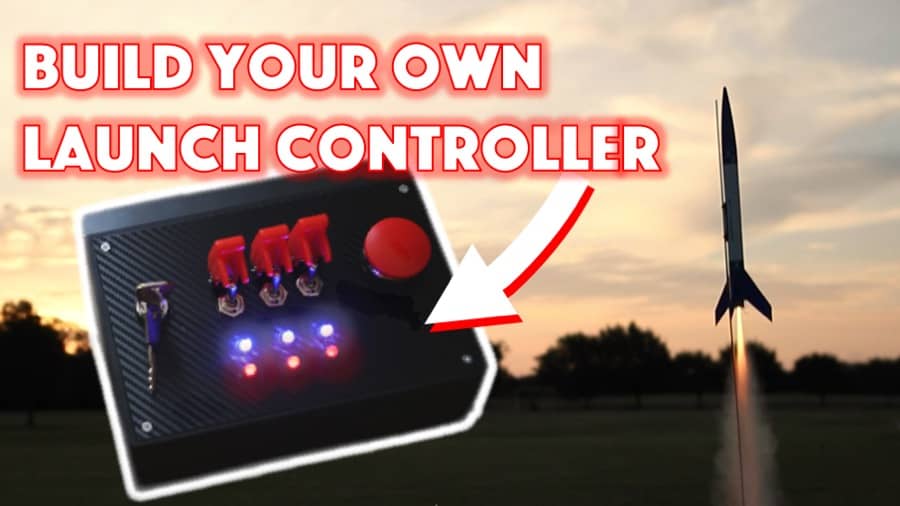
Are you still using the standard Estes controllers for your launches?
We just built our own beautiful launch controllers that make launches SO much more fun, and we documented EVERY single step and item purchased and put it into a step-by-step course that teaches you how to do the exact same thing.
Click here to learn more about how you can build your own launch controllers!
How Safe Are Model Rockets?
Advances in model rocket technology as well as greater awareness and focus on adhering to safety practices have made model rockets a fun and safe activity. As a comparison, flying model airplanes can be much more dangerous. The engines used in rockets are much safer than their equivalent in airplane fuel. The propeller on a model airplane moves much faster than a rocket, which could lead to possible dangers.
Model rockets are safe when the user takes the time and effort to understand safety precautions and carries them out throughout the rocket building and launching process.
Statistics
The NAR Safety Committee has compiled data on rocket sport safety, which includes all levels of amateur rockets. Some of these rockets can be quite large in size in addition to the smaller model rockets that beginners use. Given this, much of the accident data includes bigger rockets. These pose greater risk than smaller ones, making these results appear more unsafe than they would be for your beginner user.
After examining 6,169 flights, there was an 8.5% average flight failure. This is a very low number which includes the larger rockets. You can expect this to be even lower for small rockets. 75% of these accidents were related to the recovery system, making proper assembly and materials crucial for safe return of rocket.
D through G level engines were most likely to experience problems (C level and below are recommended for beginners).
The most common model rocket accidents:
- Recovery failure resulting in damage to rocket or colliding with foreign object
- Instability in launch phase leading to misfires or dangerous angles of flight
This data is helpful in recording safety findings, but is not substantial enough to rely on solely. The problem comes down to reporting, where data is not measured sufficiently. There is no strong statistical evidence to conduct legitimate risk analysis.
The NAR aims to continue building empirical evidence and encouraging users to report incidents so accurate records can be kept. This will help form more accurate conclusions about rocket safety and encourage proper precautions to be taken.
NAR Safety Code
The NAR Model Rocket Safety Code is the single most effective guideline to ensure safe model rocketry. While it is dependent on individuals adhering to the code voluntarily, its existence has had positive impacts on the safety of model rockets.
The code covers almost all areas you should be aware of in keeping your rocket experience safe, from construction to launch to recovering your rocket. Here are some of the most important parts covered in the code. Later on, you’ll see specific steps you can take to adhere to these and keep your flights fun and safe.
The code states:
- Materials: Should only be lightweight and no use of metal on outer body
- Motors: Must be commercially made and cannot be altered with or used for other purposes
- Launch Safety: Make sure everyone is aware that a launch is about to take place by counting down out loud and maintain safe distance from rocket
- Launcher: Must use launch pad and rail/rod system to ensure upward flight. Must be above eye level for eye safety.
- Size: Cannot exceed 53 ounces at lift off and cannot contain more than 4.4 ounces of propellant or 320 Newton-seconds of total impulse
- Flight Safety: No explosives in rocket and steer clear of objects in sky
- Launch Site: Must be outdoors in an open area
- Recovery System: Use a recovery system for safe landing. Wadding system must be fire proof.
- Recovery safety: Do not retrieve rockets from powerlines and dangerous places
Adhering to these guidelines has cut down on accidents related to operating and retrieving model rockets.
What You Can Do to Stay Safe
While the NAR code gives you instructions on how to avoid many of the problems that may arise when flying a model rocket, there are many concrete steps you should take to ensure safe flying.
Material Safety
The first topic mentioned in the code relates to materials. Using the correct materials is necessary for successful flying as well as making sure these materials are constructed properly within the rocket.
Proper Materials
Model rockets, especially low to mid power ones, should be made with lightweight materials. This is both for performance and safety. Heavy materials will create drag on the rocket and make their speed slower after launch. Lightweight materials are able to glide through the air much more easily. For safety, lightweight materials cause less damage upon return if the recovery system fails.
Materials for high performance and safety:
- Cardboards: Often used for the body tube of rocket
- Plastics: Can be used for nosecone and fins on many entry-level rockets
- Balsa wood: Lightweight and strong wood that is commonly used for fins and nosecone
Thicker woods and materials may be used as you work your way into high powered rockets, but these are the most common materials for amateur and beginning rocketeers.
All of these materials are used successfully on low to mid power rockets that are able to reach high altitudes and return safely for continued rocket use.
Proper Construction
Using the correct materials is the first step in material safety, but putting them together correctly is also important. Making sure your rocket is stable and secure will allow for a high-performance rocket that is safe to use.
- Fins: Significant contributors to stability in a rocket. There is a correlation between fin accuracy and placement and the performance of a rocket. Properly securing the fins will lead to flights that are straight and predictable.
- Launch lug: Make sure these are secure on the rocket. Launch lugs are responsible for connecting the rocket to the launch pad rods and rails. These make sure the rocket will launch in an upward direction to prevent accidents in low flight paths.
- Shock cords: These connect to the parachute and nosecone to ensure proper recovery. Make sure the shock cords are securely fastened to the nosecone and inside of body tube. If this is not secure, the recovery system will not be effective.
- Nosecone: The nosecone must be secure, but not too tight. If it cannot release from the rocket, it will maintain its ballistic flight path at high speed and engine may release rather than the recovery system.
We will dive deeper into the specifics of the recovery system later and the steps you will need to take to ensure safe rocket landing.
Use Wadding
What is Wadding?
The general definition of wadding is a soft, yet thick material used to protect fragile items. It usually has a wool-like or fleece texture. This definition is very close to the materials used in model rockets. Wadding is used to prevent engine material and heat from destroying the recovery system that is made of plastic. It not only blocks small burning pieces, but acts as insulation to prevent heat from melting the parachute or other plastic recovery method.
It is a thick, tissue paper-like material, but is chemically treated to make it fire resistant. It is easily malleable, allowing it to fit snuggly in varying rocket sizes.
To use, take multiple sheets of wadding and crumble them into balls. Place them in between the engine and the parachute. Packages of model rocket wadding typically last for upwards of 25 flights.
Types of Wadding
Not all wadding is alike. While traditional wadding used since the invention of model rockets resembles these tissues, there are other popular forms.
- Tissue wadding: Used since the early 1960s, this is similar to toilet-paper as mentioned above. It is doused in flameproof chemicals to keep the burning particles from damaging the rocket.
- Cellulose fiber: This is the most widely used wadding and is often times referred to as “dog barf” (mostly because it closely resembles it). This is insulation that you can find at any hardware store. It is made of paper fiber and a fire retardant. It is often used as insulation in your home. It is a cheaper alternative to tissue wadding.
- Nomex/Kevlar Heat Shields: These are fire-resistant materials that are often used in professions related to fire risk (firefighters, race car drivers, astronauts, military personnel). This can be more expensive, but is reusable if not damaged.
- Ejection baffle: Replaces the need for wadding with a mechanical device that traps burning particles. It is also able to slow down hot gases, allowing them to cool. This is an alternative to wadding and eliminates the need to replace after each launch. This is best suited for larger rockets that may require more wadding or if you use a rocket at a high rate.
Ineffective Wadding Alternatives
Users are often looking for alternatives for cost as well as availability. Some people have tissue materials laying around their house and decide to use it out of convenience. Some of these materials can be dangerous!
- Kleenex: While it has the same consistency as tissue wadding, it is easily flammable. It may be able to block some of the heat to prevent melting, but burning particles put this material at risk for fires.
- Cotton balls: These increase the insulation qualities of preventing heat compared to tissue, but are similarly flammable.
- Newspaper: This is incredibly flammable with the chemicals and ink present in the paper. This puts your recovery system in danger for both heat and fire exposure.
- Paper Towel: Without any fire retardant, paper towel is very flammable and could pose risks to the recovery system.
- Grass/Lettuce: This is a creative alternative because it is damp and will be unlikely to start a fire. There is little insulation with this alternative and if the material is in anyway dry it could cause fire risks.
Sticking with the acceptable forms of wadding (even if it may be slightly more expensive or inconvenient) is the safest bet that will preserve your rocket and prevent damage to people or objects upon landing. For further reading on this topic, see our post on Model Rocket Wadding Alternatives: Pre-Made and DIY Solutions.
Use Proper Engines
Model rocket engines are safe to use thanks to the advances in technology since the early days of model rocketry. Single-use manufactured engines are safe alternatives (and required) to the days of individuals mixing fuels themselves.
Steps for Safe Engine Use
Follow these guidelines to ensure proper engine use:
- Always use manufactured rocket engines: Trying to create your own or using a motor that is not designed for a rocket may lead to performance failures and pose risks of misfires, engines releasing mid-flight, or loss of rocket.
- Never tamper or modify engine: Any sign of heat could trigger an engine to ignite. Tools used to change the motor may be mistaken for a heat source and set off the engine a little too close to you.
- Use a manageable size: For beginners, stick with a level C motor or lower. Very powerful rockets may get lost in the sky and be difficult to retrieve. If you lose sight of the rocket and a recovery malfunction occurs, this can be incredibly dangerous and collision may occur.
Engine Sizes
Engines range in size based on performance and power. They are categorized by letter, starting with the least powerful “A” and ascending in letter as well as power. Each letter has double the power of the previous. This is a measure of “total impulse” and Newtons are used as the measurement unit.
- Engines A – D: Low power (Can be used by anyone)
- Engines E – G: Mid power (Some F and G engines require certification)
- Engines H – O: High power (Require certifications to use)
Your specific model rocket will suggest engines that are appropriate. Use the suggested engines for safety and to ensure a successful flight.
Engines are the most dangerous part of the rocket because they are what causes the potential hazards related to combustion and fire. Minimizing these risks with proper use and size will prevent other issues from being exacerbated by excessive power and force.
Recovery System Safety
When there are no obstacles in the way, launching a rocket into the air is a very safe activity. The risks of danger become greater when the rocket stops its ascension and heads back toward the ground. If left to its own devices, the rocket would coast and eventually descend at high speed back toward the ground with a sharp nosecone. This would pose incredibly risk to humans and objects on the ground. Thanks to the recovery system in rockets, this problem can be avoided.
How the Recovery System Works
After the engine burns completely in the rocket, an ejection charge is released to prepare for the rocket to descend. This ejection charge produces a pressurized gas that releases the nosecone and ejects the parachute or similar recovery system device. The nosecone is connected to the parachute and all are connected by a shock cord to keep all the parts together during recovery.
If this successfully ejects, the rocket should make its way back to ground at a slow pace and within the desired launch area.
Tips to Ensure Successful Recovery
By following these procedures, you will increase the likelihood of successful recovery drastically:
- Use effective wadding: Without it, your plastic parachute or other recovery method can melt and will be ineffective after ejection charge.
- Properly insert parachute: After every use, you will need to reinsert the parachute into the rocket for the next flight. It will become a problem if the parachute is not placed inside carefully. You must ensure that the parachute lines do not tangle or wrap around the parachute, which will delay or prevent release. Fold the parachute smoothly for quick release.
Launch Site Procedures
Now that you’ve properly selected all necessary materials and constructed them safely, there are important precautions you should take to ensure safety on the launch site. Rockets are powerful and they can easily present problems if not handled with care.
Safety Practices for Launching
When at the launch site, you must be vigilant to ensure safety for yourself and your surroundings. This includes the site itself, materials, the presence of other people, and what to do in the event of an accident.
Launch Day Conditions
It is crucial that the site’s conditions are conducive for flying your rocket. You should consider multiple things before launching your rocket:
- Clear Skies: Are there high levels of visibility? If I launch my rocket, will I be able to keep track of it before it descends? If yes, then it should be safe to launch. Do not launch into clouds as they interfere with visibility. For related reading see our article on Can You Launch a Model Rocket in the Rain?
- Wind: High levels of wind can take your rocket out of your desired launch area, increase chances of accidents, and potentially result in loss of your rocket. According to NAR, do not fly if winds exceed over 20 MPH. Wind direction is also important. Put spectators and yourself in the crosswind to avoid collisions. For more reading on this subject see our article on Maximum Wind Speed for Model Rocket Launch.
- Obstructions: Avoid powerlines and airplanes when launching your rocket. This will not only destroy your rocket but can pose great risk for fires and other damage related to collisions.
Launch Environment and Space
Launching a rocket should always occur outdoors in an open space. Many people choose to do this in an open field. Be sure there is no dry grass close to your launch pad that could create risk for a grass fire.
According to the NAR safety code, there are specific distances you should give for launch site and distance from people and obstructions. These are dependent on the power of the motor.
| Motor Type | Site Space (Feet) | Safe Distance (Feet) |
| A | 100 | 15 |
| B | 200 | 15 |
| C | 400 | 15 |
| D | 500 | 15 |
| E | 1,000 | 30 |
| F | 1,000 | 30 |
| G | 1,500 | 40 |
A good rule of thumb is to find a large enough open space that is at least half as long at the maximum height of the rocket once launched. Higher powered motors require more space for the launch site as well as distance away from things and people that could potentially be injured.
If you are with a group of people, make sure they are all at a safe distance and aware of their surroundings at all times. Counting down before launch is crucial so that all people are aware that the object will be in the air and coming down shortly after. Have every individual keep an eye on the rocket once it is launched so they can prepare for its landing in case something goes wrong.
Rocket Checklist
Before you launch, you should check your rocket and launch area to make sure everything looks secure and is ready for takeoff.
Take the time to look at these areas to ensure safety throughout the entire flight experience:
- Rods and rails are secure: Make sure the launch pad holds the rods securely and that they are strong enough to support your rocket. This is the main way that the rocket is able to maintain stability during launch. If these are loose, it could cause the rocket to shoot off in an undesirable direction (which is anything but up).
- Launch Pad Orientation: Make sure the launch pad is faced away from people and objects in case of misdirected launch.
- Nosecone tightness: Make sure the nosecone is secure but not too tight. If it does not release during the ejection charge, it will blow the engine out of the rocket and not release the recovery system. This may bring the rocket to the ground at dangerous speeds.
- Wadding is installed: Make sure you have enough wadding during each flight to protect the recovery system
- Clip igniters to launch controller: Make sure no metal is touching and that the safety lock is on the controller until ready for launch
- Step as far away as possible: Stand as far from the rocket as the launch controller cord will let you to prevent accidents that may occur up close.
If an Accident Occurs
If you have taken the proper safety precautions and properly constructed your rocket, you should not run into many problems. It is always in your best interest to know what to do if an accident or malfunction occurs.
Here are some scenarios that can occur and what you should do:
- If a person has been hit by a rocket, seek immediate medical attention. Call appropriate medical teams and try to help the person.
- If a rocket becomes caught in a power line, stuck in a tall tree, or left in a dangerous place, do not retrieve it. The loss of the rocket is much less serious than the risk you could put yourself at by trying to save it.
- If a misfire occurs and the rocket does not launch, do not approach the rocket. First engage the launcher safety lock or unplug the battery to stop electrical pulse. Then wait at least a minute after the last launch attempt before approaching the rocket.
Finally, if an accident does occur, you should take note of the incident for your own learning and report it to the National Association of Rocketry. The only way to gain helpful insight and collect data is through reporting. While it may seem embarrassing, it is helpful to improve safety standards and make model rockets safer to use.
Sharing your experiences will help educate other rocket users and prevent similar accidents or malfunctions from happening to many who could do the same thing.
Model Rockets are Safe
With any activity that involves a combustible device for operation, there will be risks. This article is meant to inform you of the risks you put yourself at if you do not follow very easy to follow safety procedures.
Taking the time to follow these procedures and stay alert when using a model rocket makes flying model rockets a safe and fun activity. Making these procedures a part of your rocket building process is an easy way to ensure you are operating the rocket to the best of its abilities. Full performance means safe performance as all the components are operating properly and you will be able to use your rocket over and over!
Build Your Own Launch Controller
Don’t forget! You can ditch the stock controllers and confidently build your own from scratch using our step-by-step instructions and exact materials list! We promise this will make your launch experience 10x better, and using our course License to Launch you can be 100% confident you’ll be able to finish this project and be super proud of what you’ve built! Here’s a sneak peek below.