Build Your Own Launch Controller

Recent Posts

How Do You Ignite a Model Rocket?


When I was younger, my father and I went to the local hobby store and bought model rockets to build and launch together. Assembling the rocket and heading over to a local field was so fun, but nothing could compare to the actual moment we’d launch the rocket. A lot of people wonder how this is done, but it’s actually quite simple.

How do you ignite a model rocket?

Generally, small use rockets use a battery powered launch controller that is connected to a metal igniter and placed inside of the rocket engine and fastened with a plug. When the igniter lights the engine, it forces the plug out and the rocket launches skyward.

Let’s cover in more detail the specific components of the rocket and hopefully the launch process with then make a little more sense.


Are you still using the standard Estes controllers for your launches?

We just built our own beautiful launch controllers that make launches SO much more fun, and we documented EVERY single step and item purchased and put it into a step-by-step course that teaches you how to do the exact same thing.

Click here to learn more about how you can build your own launch controllers!
Get the EXACT materials list along with easy to follow step-by-step instructions on how to build your very own launch controller and make launches 10x BETTER in our course: License to Launch

The Easiest Type of Model Rockets to Launch as a Beginner

Estes Rockets

Estes is a Colorado-based company that makes an excellent assortment of model rockets ideal for the beginner rocket enthusiast. Many of their rockets come pre-assembled (meaning not all model rockets have to be cut out, pasted together, or carved by hand.) Here is a list of our favorite beginner model rockets and why we love them. These kits come prepped with everything you need to easily set up, fire your rocket, and launch again (and again!)

The Components that Make Up the Rocket and Its Launch Set Up

First, it’s important to understand all the components that go into creating a model rocket, and the essential aspects of its set up that allow the rocket to launch into the air. Below is a brief description of all the things your Estes rocket kit should contain:

Starting from the top of the rocket and moving downward we have:

  • The Nose Cone (Payload) – this is a removable part of the rocket. You may have purchased a rocket kit that comes with an already formed nosecone, or you may have wood worked and sanded your very own cone. Either way, this is the very tip of your model rocket. Need payload ideas? Here are 16 model rocket payload ideas.
  • Launch Lug – on the external part of the rocket, about ¼ of the way down is the launch lug. This small cylinder (the circumference size of a straw, but about as long as a small pinky finger) is used to hold the rocket upright in place on the launching pad.
  • Shock Chord – this is an internal component that rests inside your rocket near the nose cone. This chord holds all the parts of the rocket together after it is deployed.
  • Parachute Lines & Parachute – this is another internal item inside your rocket. The lines are near your nose cone, while the parachute itself rest somewhere in the middle of the rocket. The parachute gets deployed by the engine of the rocket. When the rocket has completed its propulsion upward, and that part of the launch process is used up, the second stage of the engine sends a small charge up the rocket tube in the direction of the nose cone, releasing the cone and the parachute. But be sure not to pack your parachute too tightly or it won’t unfold and won’t be able to float down. Interestingly, sometimes streamers are used instead of a parachute, and there are situations where one can be better than the other. Check out our post on model rocket parachute vs. streamers.
  • Recovery Wadding – is inserted into the rocket body between the engine mount and the recovery system to prevent hot gas from damaging the recovery system. This item is typically sold with engines. In a pinch and don’t have recovery wadding? Here are some model rocket recovery wadding alternatives.
  • Engine Mount (fixed) – This is at the bottom half of the rocket and it holds the engine firmly in place. This is a super critical component of a model rocket (without this your engine will be loose and you’ll have an unsuccessful launch)
  • Rocket Engine (removable) – many model rocket engines are made of paper tubing with clay nozzles, and solid collection of black powder propellent, as well as a delay and smoke charge, and an ejection charge.
  • Fins – these are the wings that protrude out near where the engine is inserted. The fins help the rocket to glide through the air swiftly and successfully.
  • Igniter – this is the thin wire in the shape of a distorted, long ‘U’, with a small white and broad paper attached. This will be inserted into the engine, and then alligator clamps from the launch controller will be attached to provide the charge.
  • Igniter cap / plug – this small plastic item is used to hold the igniter firmly in place and plugs up the tiny hole at the bottom of the engine.
  • Alligator Prongs – these are the wire with fanged clamps at the end that are connected to the launch controller. They are meant to bite down on one of the two wires each on the igniter.
  • Launch Controller (reusable)- this is the handheld device you’ll use to launch your rocket. It usually has a key that you turn, and a button you’ll push to send the electricity to your igniter, which in turn heats up the engine and sets the rocket into motion. This is operated with normal lithium batteries, and the electricity that surges through the alligator wires comes from the energy of the batteries in this controller.
  • Launch Pad (reusable) – The pad is where set your rocket. The launch pad comes with a launch rod, which goes inside the launch log to hold the rocket upright and in place.

What is the Igniter and How Does it Work?

The igniter that usually comes with an Estes motor has two thick wires and then a very slender wire at the top, called the bridge wire. It’s fragile, so you don’t want to put the igniter in your rocket motor until right before you’re ready to launch. If you’re curious as to what the tiny knobby part of the bridge wire is, that’s glue, it helps hold it all together and make the bridge wire more durable when inside the rocket motor.

The bridge wire’s job is to supply heat to get the engine burning and going. This heat is created through electricity that is supplied from the launch controller alligator prongs that attach to the two thicker wires of the igniter. You attach each clip to one of the two legs of igniter. When you press the launch control bottom it sends energy to the two prongs, which then creates heat when they connect to the wires of the igniter. This heat ignites the rocket engine.

If you are more of a visual or auditory learning, I’d recommend watching This informative video by Apogee Rockets, featuring Tim Van Milligan, on how to ignite an Estes model rocket engine. It explains essentially all that I’ve detailed above, but with excellent visuals of the igniter so you can better understand the process of energy creating heat which is ultimately what allows the engine to ignite.

Troubleshooting Common Launch Malfunctions

If you experience issues during your launch (i.e. the rocket won’t launch), often times people will think something is wrong with the igniter, but that’s typically not the case – the malfunction can be in the launch controller. Checking the batteries is the first place I’d look, followed by ensuring that the safety pin is correctly activating the check light on the launch controller. If your light no longer works, you might have to test an igniter outside of a rocket engine to ensure that it is working properly. If it is, then the issue could be that the engine is bad or that the launch wires are connected improperly while on the launch pad.

Do not allow the lead clips on the launch controller to touch one another, nor the two wires on the igniter clip. Doing this when heat is applied to the igniter could short circuit the igniter. Instead of the energy moving up through the side of one wire, to the bridge wire, and out the other side of the opposing wire, it would move through the clips instead, never even reaching the bridge wire.

You can technically send energy to the igniter as much as you want till it burns out, as far as testing out your igniter to see if it works. But once the igniter is inside the rocket, and you move forward with the actual launch, the process of the launch will totally fry the igniter, make it no longer usable. In fact, it is extremely rare to find a model rocket igniter that can even be used more than one time. This is true of the engines, and igniter plugs as well (they are also not reusable.)

Fortunately, if you buy a pack of Estes engines, it will also come with multiple igniters as well as igniter plugs. 

Where Does my Igniter Go?

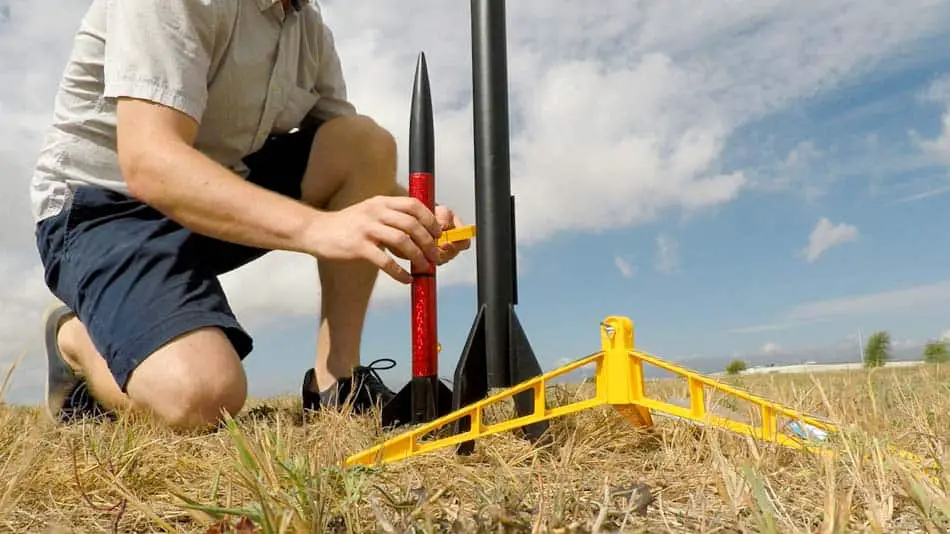
This part is fairly straightforward. As you are already familiar with all the components of your model rocket, you’ll now know the igniter goes inside the engine. You will place your igniter bridge wire side in, leave the two wire legs sticking out. At this point, you will take your igniter plug, and secure the igniter inside the engine by very literally plugging it in.

If you’ve purchased an Estes engine pack, your igniter plugs are likely a bright yellow, and all attached to one another still. You can very easily pull them apart from one another. If there is still a small plastic add-on protruding out the side of your igniter plug, that’s okay, you can just wiggle that part off. 

You’ll want to notice where your launch lug is located on your rocket, as you’ll want your igniter to be bend down on the opposite side as your launch lug. This is because when your rocket is on the launch pad, the launch rod that goes inside the launch log could interfere with the launch controller wires (alligator clips) that are meant to clamp onto the legs of the igniter wire.

So you’ll take your igniter, gently bend it to the opposite side of the launch log, and then take your igniter plug and push it in very firmly. You want to be able to lift the rocket up shake it around and the igniter to stay firmly in place. If your igniter plug is loose and falls out, it’s possible you have the wrong size igniter plugs.

Is it Safe to Ignite and Launch my Model Rocket?

In a word, yes. We did a whole post covering “are model rockets safe?

Igniting and launching your rocket is indeed safe, as by design you’ll be standing several yards away from the rocket with the launch controller. If your launch lug is secured, and your rocket is towards the sky on the launch pad, you are good to go.

If, however, you notice something strange about the way your rocket is positioned (like it is pointing directly at you or other, um, obstacles) then do not launch your rocket. Re-adjust your rocket to sit upright, or re-secure your launch lug (whatever you deem to be the problem, fix it before daring to launch).

Take Away

The process of igniting and launching your rocket is easy, and Estes model rocket beginner kits have everything you need to get started! Now that you’ve well-versed yourself in how to ignite your rocket, you’ll be able to avoid simple pitfalls (like being able to tell if your launch controller is low on batteries or is malfunctioning), and bending your igniter to the correct side so it doesn’t interfere with the launch rod when inserted into the launch lug. You can also rest assured that launching your rocket will be safe

Build Your Own Launch Controller

Don’t forget! You can ditch the stock controllers and confidently build your own from scratch using our step-by-step instructions and exact materials list! We promise this will make your launch experience 10x better, and using our course License to Launch you can be 100% confident you’ll be able to finish this project and be super proud of what you’ve built! Here’s a sneak peek below.

Can You Light a Model Rocket Engine with a Fuse?


Model rocket engines are usually easy to ignite, but can you light one with a fuse instead of your standard Estes starter? This is a question many people have asked when they realize their starter has disappeared.

Can you light a model rocket engine with a fuse? Yes, you may be able to light your model rocket with a fuse, but it’s safer and more likely to work if you use the igniter intended for it.

Furthermore, just how would you do that? Have you ever even thought about how you normally light one of them? We’ll delve into how it could work and how it could not work, or things that may cause it to fail. Finally, we’ll wrap up with some safety tips to keep in mind.


Are you still using the standard Estes controllers for your launches?

We just built our own beautiful launch controllers that make launches SO much more fun, and we documented EVERY single step and item purchased and put it into a step-by-step course that teaches you how to do the exact same thing.

Click here to learn more about how you can build your own launch controllers!

Get the EXACT materials list along with easy to follow step-by-step instructions on how to build your very own launch controller and make launches 10x BETTER in our course: License to Launch

Lighting a Model Rocket with a Fuse

Model rockets come with a starter/igniter, but what do you do when you lose it, or the factory messed up, and yours isn’t there? One way you could light it with a fuse, but do so at your own risk. Because model rocket engines are designed to be started a certain way, you risk the fuse not working.

You also risk your safety and the safety of everyone around you if you aren’t very careful.

This is an easy way to light a model rocket if you don’t have a starter handy or it won’t work with the traditional starter, but you have to use caution when dealing with it. We’ll cover how to be safe when using a fuse or just in igniting model rockets in general in the last section.

PLEASE NOTE WE DON’T RECOMMEND YOU DO LIGHT MODEL ROCKETS WITH FUSES. ALWAYS FOLLOW THE MANUFACTURER’S GUIDANCE FOR SAFETY OF USE.

How Do You Light a Model Rocket Engine with a Fuse?

First, you’ll need to find your fuse. There are several kinds of fuses, but you want something that will burn on the slower side of things, giving you time to get away from the rocket. You’ll also need something reasonably thin and probably want to stay cheap.

A good starting place is some basic model rocketry hobby fuse (link to Amazon). It’s inexpensive and you usually get several feet of it which can be cut up into various lengths as needed. There are different colors offered which coincide with how quickly they burn.

I would HIGHLY recommend that you cut off a few feet of test fuse first and ignite it to measure how many inches per second it burns. From there you can estimate how long of a fuse you want to use for igniting your rocket.

If you’ll be buying a fuse specifically to try this, just pick your standard safety fuse. Make sure and read the instructions to be able to cut a proper length, as most of these will tell you how many seconds a centimeter of fuse will give you to get away. This should be inexpensive, as you won’t need much.

Now, to actually use the fuse with the rocket, you’ll simply need to stick the fuse up into the rocket’s engine. You can cut it before or after, however, if you cut before, make sure to compensate for those few centimeters up inside the powder that may not burn.

Lighting a model rocket engine with a fuse is also commonly called the “old school” way to do it. If you’d like to watch someone actually do this, check out this father and son duo lighting up their rocket with a fuse.

Why Would You Light a Model Rocket Engine with a Fuse?

Experimentation

Are you bored of using the standard igniters? For some people who have been playing with model rockets for a while, it can get boring, and you may wonder about different ways to do it. Though this isn’t an ideal way to do it, it can be a fun experiment if you’ve never tried it.

This is also how a lot of model rockets used to be ignited. If you want to experience how your parents may have played with their model rockets or simply want to relive your own childhood, go ahead and try this! Just be safe when you do.

Learning

If you’re curious about how things work, including model rockets, this can be a great learning opportunity. There’s no better way to learn than firsthand. It can also be a great thing to teach your kids or grandkids!

Necessity

We’ve all lost igniters. When you can’t find your igniter, don’t give up hope. As long as you have some fuse, you can quickly rig it up to still blast off just the same. If you’re feeling really brave, this may also help you fire a rocket that doesn’t want to go off. Be especially safe if you’re doing this.

How to Be Safe When Lighting a Model Rocket Engine with a Fuse

Obviously, you need to take safety into consideration when lighting your model rocket engine, regardless of how you’re lighting it. But there are a few specific safety concerns you should consider before attempting to light a model rocket engine.

  • There’s an open flame
  • You’re unable to tell when the rocket engine will ignite
  • An Estes engine isn’t usually designed to be lit with a traditional fuse

How are each of these a danger, and what can you do to protect yourself and anyone you have with you? We’ll delve into each one deeper, as well as how to handle the risk safely, in the following sections.

How to Be Safe with the Open Flame of Lighting a Model Rocket Engine with a Fuse

This is where we apply basic fire safety. Don’t allow children to light rockets by themselves or play with unattended lighter or matches.

Always be aware of your surroundings. If you’re in or near dry grass, be watchful over flying sparks that may cause a fire. Don’t wear loose clothing, which is easier to set on fire without realizing it.

How to Be Safe When You Can’t Tell when Your Model Rocket Engine Will Go Off

If you think you may have a dud, you have to be careful before approaching it. What you may assume is a dud may actually be a delayed fire, which could explode just as you reach it. This would cause severe damage to you or anyone near you.

If your model rocket hasn’t gone off after ignition, watch it for a couple extra minutes. It may simply take a bit longer than you expected, especially if you’re lighting with a fuse, which can have variable burn rates.

After the first couple of minutes, you can assume it’s either a dud or a very delayed start. You should wait a full ten minutes before approaching the rocket, though after the first couple, you don’t have to watch it so intensely.

Leave it there until you’re comfortable approaching it. You should be safe to pick it up and remove the engine, but be cautious. If you think at any point it may still be lit, you should carefully put it back down and back away.

General Safety Tips When Lighting a Model Rocket Engine

Whether you’re using a fuse to light it or some other way, be with a starter or another trick, you need to always be aware and safe when dealing with model rocket engines. They are technically explosives and can cause injury or worse if they aren’t handled correctly.

When you’re lighting a model rocket engine, make sure you’re aware of your surroundings. Don’t ever point a model rocket at another person or animal, as you never know when some may cause it to suddenly go off.

Keep open flames away from any explosives, especially your model rocket engine. If you aren’t using your model rocket engine, keep in a cool, dry place out of the way. Don’t drop them, as they do contain black powder, which can explode if it hits from a high enough distance.

In the case where the rocket goes off before you’re expecting it, you may be injured if you are too close. This is why after you’ve ignited a model rocket engine, you should quickly move away from it. You should also check the visible area for any airborne vessels or animals.

Build Your Own Launch Controller

Don’t forget! You can ditch the stock controllers and confidently build your own from scratch using our step-by-step instructions and exact materials list! We promise this will make your launch experience 10x better, and using our course License to Launch you can be 100% confident you’ll be able to finish this project and be super proud of what you’ve built! Here’s a sneak peek below.
Best Glue for Model Rockets (It isn’t super glue!)


Building a model rocket can be an exhilarating and hands-on way to learn about the forces of a rocket and dream of space. Like any airplane or model car, it will need to be created mimicking the realistic design of its model, matching the aerodynamics of the real-deal. You can’t accomplish this using the wrong glue though and will need to take steps to increase your skill.

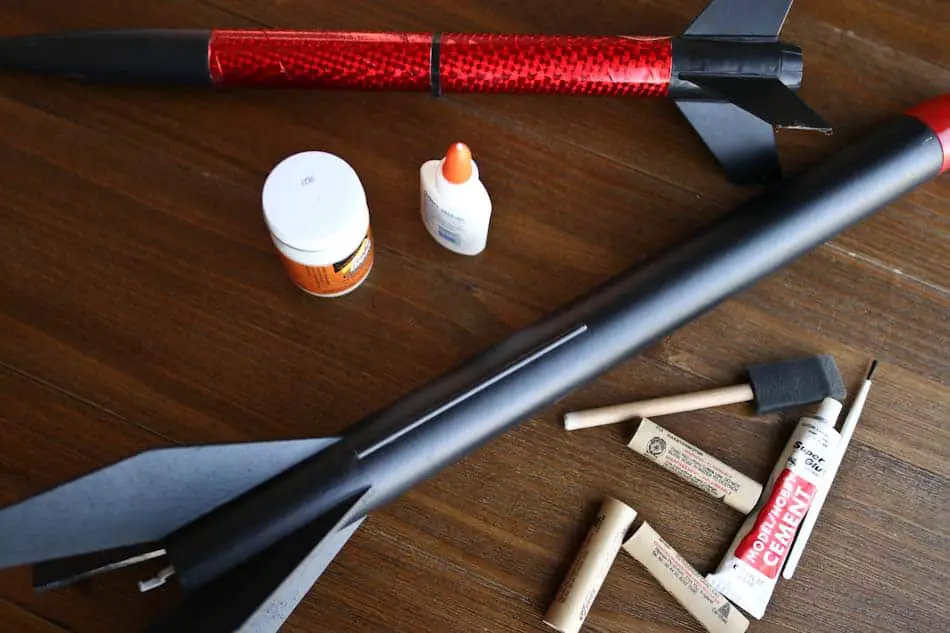
What is the best blue for model rockets?  These glues are among the best:

  • Carpenter’s Glue
  • Elmer’s White Glue
  • Elmer’s Carpenters Wood Glue
  • Titebond Ultimate Wood Glue
  • Testor’s Cement for Plastic
  • E6000® Permanent Craft Adhesive
  • Gorilla Condition Clear Multipurpose Adhesive

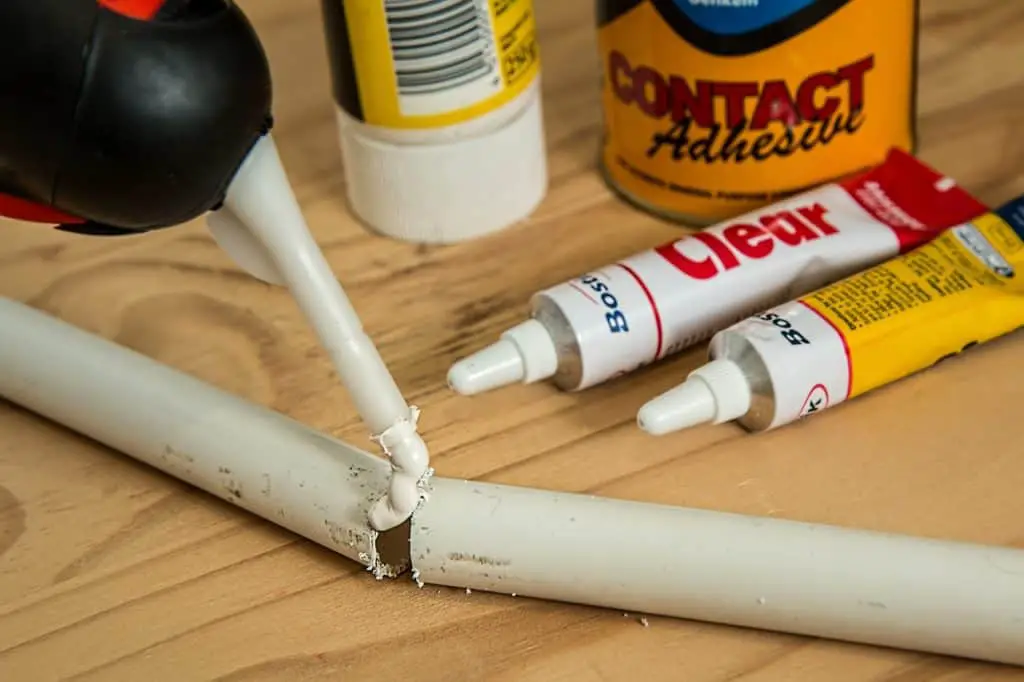
The key will be to use the proper glue for the materials you are working with (meaning – do not place plastic glue on wood, or wood glue on plastic). Not only will they not hold together but may deteriorate, crumble, and/or compromise your entire model rocket design.

Super glue may seem like the obvious answer, but you want to seek out white or yellow glues or adhesives that will not grow brittle when exposed to oxygen for long periods of time. The reason that super glue does not work is because it will grow weak when exposed to oxygen, causing components to break off more easily and ruin your hard work. This guide will be your go-to source for all things on what glue to use, dry times, what reviewers have to say, as well as great resources on how to build your model rocket! 


Are you still using the standard Estes controllers for your launches?

We just built our own beautiful launch controllers that make launches SO much more fun, and we documented EVERY single step and item purchased and put it into a step-by-step course that teaches you how to do the exact same thing.

Click here to learn more about how you can build your own launch controllers!

Get the EXACT materials list along with easy to follow step-by-step instructions on how to build your very own launch controller and make launches 10x BETTER in our course: License to Launch

Best Glue for Model Rockets (Tip: It’s Not Super Glue!)

When designing your model rocket, you can truly have some fun with the individual parts and assemble it in whatever creative way you see fit. Your collection of models should speak to your personality and be something you can display with pride.

Most kits will give you directions that you can follow precisely or play around with experimentally. There is no ‘one-right-way’ to build a model rocket, so you can even mix different kits together if you’re able to keep track of what part attaches to where.

As far as the glue, there’s really no wrong answer as long as you’re utilizing the proper glue type for that material (as outlined above, wood glue on wood, plastic glue on plastic, adhesive should work on all), but do NOT use super glue. Super glue will destroy your design and crumble it in a matter of years.

A word of caution: exposure to glue and its fumes can cause irritation to your eyes, skin, and lungs. Be sure to exercise caution when interacting with these materials and work in a well-ventilated area.

Keep your safety in mind throughout the entire process of building, launching the rocket, and enjoying the fruits of your labor. You won’t be able to enjoy it if you poke an eye out or glue your hands together, so take your time, think before acting, and move with focused intention.

Now for the moment you’ve all been waiting for! To cover each of the following glue brands in depth, here are the top 7 most recommended glue-types for building model rockets:

#1 Carpenter’s Glue

This product works for wood projects and is very rapid-drying. This 8-ounce bottle (link to read reviews on Amazon) should last you for the entire project leaving some to spare.

Why this product is so versatile and useful to have in your crafting-artillery is because you can easily warp it, sand down the glue, and work with the wood as you could without any glue. This makes it a very valuable addition to your toolbox if you work mostly with wooden-materials.

There is no mention of how fast it dries as this may be dependent on how much you use, how well it is secured in place, and a variety of other factors.

The product does boast a nearly perfect rating out of 15 purchasers. One reviewer says, “This is by far the best craft glue I’ve used. I use it instead of mod podge. Now if only they made it in gloss finish.”

#2 Elmer’s Glue All 1 Gallon Bottle All-Purpose

You can read the forums for yourself to realize that some model-builders respect a classic. Many model-fanatics lean towards the tried-and-true quality of Elmer’s. A gallon of this affordable glue should last you for a plethora of creative projects!

It is a nontoxic and quick-drying formula that will work on all of the following materials:

  • Paper
  • Ceramics
  • Leather
  • Fabric
  • Wood
  • And more

A great tip from a reviewer you can keep in mind for your craft studio is, “If you use a lot of glue, this is way cheaper than always buying the small bottles. I just use a funnel and refill the small bottles that I already had. I mean, what’s not to love? It’s a GIANT thing of glue.”

#3 Elmer’s Carpenter Wood Glue

If you’re using a wood model kit, this is the glue I would personally recommend (link to read reviews on Amazon). Not only is it waterproof, stainable, heat-resistant, and sand-paperable, but it’s also MADE for carpentry.

Constructing a model made entirely of wood will require a specific wood-glue brand, and Elmer’s is one of the most reputable companies you can find.

Some other key features about this product you may find useful are that it is nontoxic, anti-molding, and mildew resistant.  They list the dry time as: “20 to 30-minute clamp time, 24 hours to full bond.”
With a nearly perfect 5-star review out of 250 reviews, it seems unanimous that the variety for this wood-adhesive is nearly limitless.

Pro tip from Elmer’s

“As with any wood glue, pre-wet the wood surface to be glued with water, allow to set a few minutes, dab off excess water then apply glue with a paint brush. Clamp up and allow to set. I always allow 48 hours. Pre wetting the wood opens up the pores of the wood, allowing for better penetration of the glue. Slightly cheaper than Titebond-III, but every bit as good.”

Essentially, you always pre-wet your wood surface to allow the pores to expand. As it dries, the adhesion will be even tighter through this method.

#4 Titebond Ultimate Wood Glue

Comparable to the Elmer’s wood glue, this is slightly more expensive. That does not always mean better quality, although many could argue that you get what you pay for. With over 350 reviews and an actually perfect 5-star review (link to read on Amazon), the verdict may be unanimous that the Titebond investment is worth a few dollars more.

Some of the key features of this product includes that it is waterproof and claims to have ‘superior strength.’ Able to be used for indoor or outdoor projects, it is unaffected by the finish so long as it is being used on its intended target of wood.

This product is ranked #2 in wood glue, only behind Gorilla’s Wood Glue. Feel free to experiment with all three of these wood glues (Elmer’s, Titebond, and Gorilla’s) to see which finish you prefer, and which product is your favorite.

#5 Testor’s Cement for Plastic

If your model rocket is made of plastic, this is the brand that comes most highly recommended. This is rated the #1 best seller under hobby glues, and they even include 4 narrowed glue tips to filter the glue with precision in a thinner line.

This brand has been around for decades and is viewed as a real staple to model makers that have been using this product for all their lives. Do note that some people gave it a lower review due to it coming out a bit runnier than they were expecting.

One great remedy for this from a reviewer is, “don’t squeeze it when removing and replacing lid. I always open it over a folded paper towel. If too much comes out, the towel catches it, and I simple use a toothpick to apply it to model.”

There is no mention of the dry-time on their page but stick with the recommended 24-48 hours of setting time.

#6 E6000 Permanent Craft Adhesive

This is your go-to multipurpose glue that will work on any material you may be using including:

Many model-makers really gravitate towards these multi-purpose adhesives, especially if their design features multiple materials, and they are seeking a consistent aesthetic in the glue.

By this, I mean, you don’t want some glue lines to be tinted yellow for plastic, while other parts on the same model rocket are glued together with a tinted white glue. Keep consistency in the glue you’re using so the piece doesn’t look odd.

This set includes precision tips to allow you to create the pencil-thin lines. They also include a cap, so it won’t dry out on the precision tip and spoil the bottle (as happens to many-a-superglues).

Another perk to this glue type is that it will dry clear and be resistant to extreme temperatures. Not that you’ll be washing your model rocket, but if you for some weird reason decide to – it’s also washer/dryer safe!

With a 4-star review out of 288 ratings, one purchaser says, “This size of E6000 is THE BEST to work with. It comes with the tips which make it super easy to put down small amount of glue rather than worry about a “big glob” of it coming out onto your piece.”

#7 Gorilla Ultimate Adhesive Multipurpose Construction Glue

Last but absolutely not least, the highly reputable brand of Gorilla Glue is a wonderful option for all of your craft/glue needs.

The reason we saved possibly the best for last is really based on the dry time for this product. The company claims, “Instant Grab – Holds in 0 seconds.” It is one of the fastest drying glues on the market (link to buy on Amazon).

It will be mildew and mold preventative and work in interior or exterior environments.

This product will bond with almost anything.

And perhaps the real selling point for model-fanatics – you can paint over this glue within 30 minutes of application. Sold!

Other Supplies You May Need

Some purchases you may need to get started in your rocketry passion will be:

And of course, the glue you’ve selected based on materials from the above recommendations of top glue brands for model rockets.

Tips on Constructing Your Model Rocket

Some hacks you may or may not be aware of to get you started in your model rocket building are:

  • Open your kit and check that everything is inside as it ought to be. Contact the manufacturer if something is missing or you need a part replaced.
  • The ends of your tubes will be the weakest part of the rocket. Some rocketeers will secure the entire body of the tube with their preferred glue before beginning.
  • Experiment with the amount of glue you like on something less important than your rocket kit. You’ll need to get a feel for the flow of that brand, how quickly it rushes out, if it’s runny or thick, etc. You’ll want to use enough glue that the rocket parts will stay in place without using too much that it expands and breaks. Again, this may take some trial and error with any brand of glue you select.
  • If, after all of your work, the nose doesn’t fit on your model rocket, this is where the sandpaper comes in. Don’t sand too hard or low, but slightly smooth down the surface and test if the fit is closer to accurate. Do this in minimal sanding increments as to not sand too much away. You can always sand the rocket down more, but if you’ve gone too far – there’s no getting it back.
  • Any knots you create or tying pieces together, secure with a bead of glue, regardless of if that’s mentioned in instructions. This will simply secure your work as you go and set each knot from loosening.
  • Lastly – NEVER use super glue.  The super glue will expand and stiffen parts of your model rocket that you don’t want stiffened. It is always recommended to use a white or yellow glue.

Resources to Get You Started

Many of you may already be keen on the rocket-building process and simply be seeking a new glue brand.

In that case, these resources may not be useful to you. But I’m a firm believer that there’s always something new to learn and I’m sure there’s something in the process you could use a fine-tuning or refresher-course on.

Here are some resources we have found or put together that should help get you started:

I hope this guide has been useful to you in building your rockets with the best quality glue possible.

Choosing the right materials will allow you to enjoy your model rocket for many years to come. You will be able to look at your craft with pride, knowing you truly created something of quality.

Build Your Own Launch Controller

Don’t forget! You can ditch the stock controllers and confidently build your own from scratch using our step-by-step instructions and exact materials list! We promise this will make your launch experience 10x better, and using our course License to Launch you can be 100% confident you’ll be able to finish this project and be super proud of what you’ve built! Here’s a sneak peek below.
Where Can I Launch My Model Rocket?


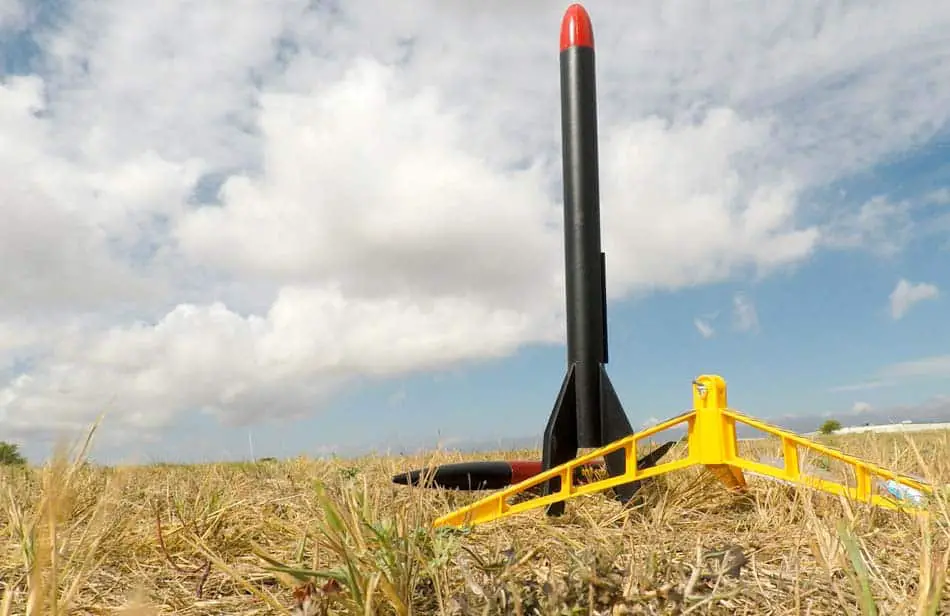
Due to the increase in popularity of rockets, since the 1950s launch of sputnik, more regulations and rules have made it difficult to find an ideal model rocket launch site. Building and launching your own rocket, especially if you are an amateur, is not so simple though. You’ll run into a few legal roadblocks, restrictions, and rules that you need to abide by.

All of these restraints leave many enthusiasts questioning, where can I launch my model rocket? You can find a model rocket launch site in two direct ways:

  • Searching for a rocket club near you that may already have access to a designated launch site.
  • Looking for your own plot of land that meets the needed attributes, requirements, and laws for launch and gain permission to use the land and/or airspace if needed.

In order to help you find a launch site for your model rocket fast and efficiently, we’ve outlined the steps you can take in either direction.

Disclaimer: This article does not constitute legal advice and is simply a summary of our own experience and the information we found online. Use your discretion and decision making to comply with all local laws for launching model rockets.


Are you still using the standard Estes controllers for your launches?

We just built our own beautiful launch controllers that make launches SO much more fun, and we documented EVERY single step and item purchased and put it into a step-by-step course that teaches you how to do the exact same thing.

Click here to learn more about how you can build your own launch controllers!

Get the EXACT materials list along with easy to follow step-by-step instructions on how to build your very own launch controller and make launches 10x BETTER in our course: License to Launch

How to Find a Model Rocket Club Near You

The easiest approach to obtaining access to a launch site is to join a club that’s in your area (or relatively close). Chances are, this club has already gained use of a launch site of their own. These clubs are organized with the help of the National Association of Rocketry and are referred to as NAR Sections.

Aside from being able to use a launch site without worry, you’ll enjoy many other benefits from being a part of a NAR Section.

  • Your equipment and assets are protected by a 5-million-dollar liability insurance policy that each NAR section is covered by.
  • Sections host regular competitions, conventions, activities, and launches that you can take part in.
  • The section you join might be the next host of the NARAM, NSL, or NARCON event.

How to Become a Member of NAR

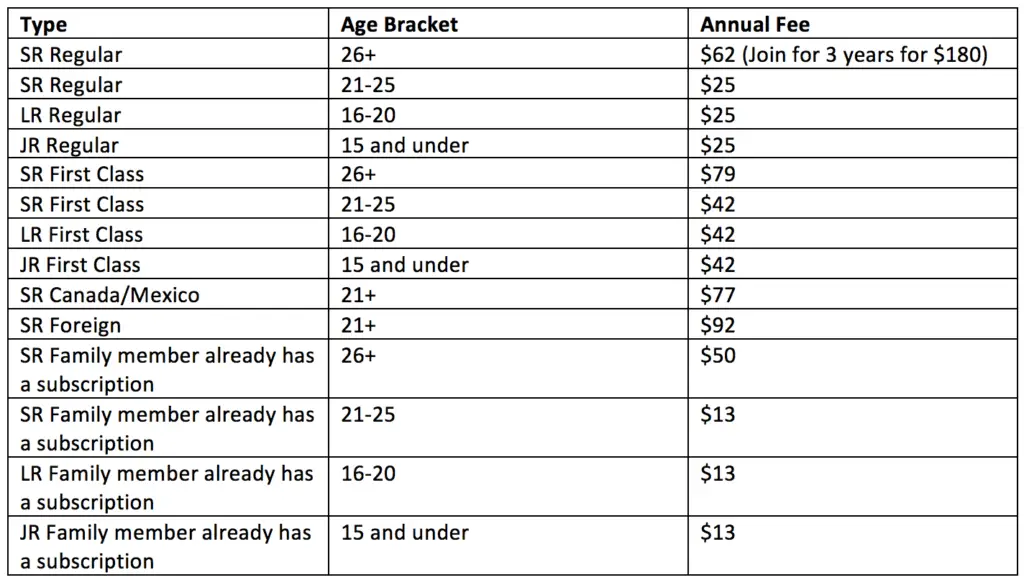
In order to become a part of a NAR section, you’ll need to be an official National Association of Rocketry member. You can expect the following benefits from becoming a member of the NAR per the official website:

  • Six issues of Sport Rocketry magazine;
  • The NAR Member Guidebook—a 64-page how-to book on all aspects of rocketry;
  • $5 million rocket flight liability insurance;
  • Access to the “Member Resources” website; and
  • Access to NAR technical reports, high-power certification, and clubs

This paid membership charges annual fees based on a few different options you can choose from. Refer to the below chart on how much it might cost you.

Regular Type = Normal Postage for Magazine Subscription
First Class = First Class Postage for Magazine Subscriptions

Formally apply to become a NAR member on the National Association of Rocketry’s website here.

If there is no NAR section near you, you can also apply to create your own, find out more here.

Finding Your Own Launch Site

If you’re not interested in a paid membership with the NAR and you simply want to experiment with model rocket launching on your own, you can try to find your own launch site so long as you follow laws and regulations accordingly in your state.

What Class Is Your Rocket

In order to determine the requirements and regulations, you’ll need to abide by for a launch site you first need to determine what class of rocket you fall into.

Class 1 – For standard amateur model rockets that: use 4.4 ounces of propellant or less and is slow-burning, is constructed of breakable plastic, paper or wood, has no large metal parts, and weighs 53 ounces or less with propellant.

Class 2 – High-power Rockets that are amateur rockets propelled by a motor(s) having a combined total impulse of 40,960 Newton-seconds, or 9,208 pound-seconds. 

When You Need FAA Authorization for Launching a Model Rocket

The main difference in regulation between class 1 and 2 rockets, is that a class 1 rocket does not require a waiver from the FAA for launch, whereas a class 2 rocket does. If you have a class 2 rocket, you’ll need to apply for a Certificate of Waiver of Authorization from the FAA which will give you permission to operate your rocket in the specified airspace.

You’ll then have to notify the FAA contact you are assigned 24 hours before launch so they can appropriately send out a NOTAM (Notice to Airmen) in the assigned area. You’ll need to apply at least 45-60 days ahead of the launch.

The National Association of Rocketry provides a great walkthrough on how to fill out Form 7711-2 which is needed to apply for the waiver, view this walkthrough here.

How to Determine a Suitable Launch Site

Your first idea for a potential launch site might be a recreational park nearby or an empty field you know of. While these are great options for model rocket launches, you should avoid areas that have these particular features:

  • Tall surrounding trees that would be close to your launchpad.
  • Power lines in the vicinity.
  • Close and occupied buildings.
  • A large amount of dry brush and grass.

For high-power rocket launches, you’ll have to be wary of the above while also adding in, a 1500 feet minimum distance between the site and any occupied buildings. The site also can not contain any highways that have traffic of more than 10 cars per hour.

Your launch site must correspond in size based on installed total impulse (N-sec) of your model rocket and the motor type. Use the below table to determine what size your launch site should be.

(N-sec) Motor Type Minimum Size of Launch Site (ft. from obstacles)
0.00–1.25 1/4A, 1/2A 50
1.26–2.50 A 100
2.51–5.00 B 200
5.01–10.00 C 400
10.01–20.00 D 500
20.01–40.00 E 1,000
40.01–80.00 F 1,000
80.01–160.00 G 1,000
160.01–320.00 Two Gs 1,500

Potential Launch Site Ideas

If you’re stretched for ideas on where to set up your launch site, you might consider the following ways to look for an ideal area:

  • Reach out to a local agency who has control of open and available land in the area. For example park management, school districts, farmers, etc.
  • Use Google Maps in an aerial view to try and find open plots of land with ideal conditions. You’ll want to visit these potential areas on foot though to assure they meet the conditions thoroughly for a launch site.
  • U.S. Geological Survey Maps can help you to outline where trees, power lines, and buildings are located. These are all of the things you want to avoid having at your launch site, so it would be a good idea to try purchasing one and using it in your investigation for a potential launch site.
  • If you’ve narrowed in on specific areas that could be suitable for launch, check out the zoning maps of these areas to make sure that they are zoned properly for recreational use.
  • Obtain a Plat Book of your county that will help to show you the boundaries of the areas you are interested along with owner information for a contact.

Who to Contact for Permission

Once you’ve determined the perfect area(s) for launch, you’re going to want to contact a few people to further clarify that you are allowed to launch your model rocket in these areas and that you meet all restrictions and regulations based on your local county, state, and federal laws.

Contact the Landowner First

If you’re looking into launching at a park, or land owned by a local agency, you’ll want to get some kind of written approval from them first. If it’s privately owned residential land, you’ll want to contact the owner for approval as well. You want to approach these entities in a professional manner concisely and accurately stating:

  • Your complete and thoroughly researched plan for launch.
  • The specific times and duration for launch.
  • An example of what they can expect from the launch.
  • If you’re a NAR member, obtain an insurance certificate to present to the owner which protects them.

Contact the Local Authorities

Once you have approval from the landowner, the most fail-safe way of making sure you are ready to launch is to get in touch with the fire marshal who oversees the launch area. A lot of jurisdictions require the written approval and notification of the fire marshal before launch.

Even if your jurisdiction does not require this, your marshal will be able to discuss with you the specific fire and safety codes associated with your launch. These officials can also make you aware of any other requirements specific to the area that you were unaware of. Obtaining this kind of a direction from a local authority can prove to be invaluable for the safety and liability of yourself and others.

When You Need an Explosives Permit

You no longer need a federal explosives permit to fly a rocket based on the motor. However, there are certain types of igniters that will require such a permit. If you plan to use cans or other types of igniters that use large amounts of black powder, you’re going to want to obtain a Federal Low Explosives User Permit from the Bureau of Alcohol, Tobacco, Firearms, and Explosives (BATFE).

You must 18 years or older to apply for this permit and have no record of felonies while also passing a background check. You’ll also have to be personally interviewed by a BATFE agent.  Be advised that using an explosive ignition system as opposed to electrical might deter some local agencies and landowners from allowing you to use their property for launch, even if you have the proper permit.

Can I Launch a Model Rocket During a burn ban?

When air quality becomes degraded, government officials might order a mandatory burn ban that helps to manage air quality and safety. These commonly happen the most during the fall or winter and can last anywhere from a week up to a month. During these bans, citizens are restricted from using wood stoves, fireplaces, or outdoor methods of burning.

For children, adults, and elderly folks with respiratory and heart diseases, inhaling the fine particles and other carcinogens from the burning of wood or wood-based products can be harmful to their health. There are actually two stages of a burn ban.

Stage 1: Stage 1 bans happen when weather conditions and pollution levels directly affect the air quality, and a prediction is set that based on these factors, an impending violation of standards will occur.

Stage 2: Stage 2 bans take place once the fine particulate pollution levels exceed a level set by the state’s law.

In both stages, any device that generates visible smoke is prohibited. In stage 1, the device must be certified. In stage 2, certified devices are even restricted.

A burn ban is another great reason to consult with the local fire marshal in the area. Different counties and states will have their own rules on what is allowed and not allowed during a burn ban. The best way to know is to contact them directly to find out if you can launch your rocket during one.

You can use the U.S. Fire Administration’s website to search for the contact information of your local fire marshal.

Keep in mind why it’s pretty important to consult with your local marshal first, those who violate a burn ban in their area will be assessed penalties anywhere from $500 to $15,000 dollars. It’s not worth the hole in your pocket to take the risk without first asking.

Is There a Minimum Age Requirement for Launching a Model Rocket?

While there are some age restrictions for purchasing specific rocket motors that are above the ‘F’ power class, there is no specific minimum age requirement for launching a model rocket. Most manufacturers recommend supervision for children who are under 10 years old, but it is not legally required.

The NAR has a great guidebook that covers in detail all of the basic steps you should take for determining where you can launch your model rocket based on laws & regulations. You can read it in detail here.

Does Your Model Rocket Meet the Specific Safety Codes?

There are two sets of safety codes that the National Association of Rocketry sets for model rockets and high-powered rockets. Before you attempt to launch your rocket at any site, you should make sure that your rocket thoroughly meets all of the outlined specifications in the corresponding safety code.

If you can outline and check off these safety codes and provide them to the local agency or owner of the land you intend to use, it can further improve your standing with them and help them to assure that you know what you are doing and following the appropriate requirements. Use the below checklist we have put together to help you make sure your model rocket meets these requirements.

Code Requirement Check
Is your rocket manufactured from lightweight, non-metal parts? This pertains to the body, fins, and nose of the rocket.  
Is your rocket motor authentic and certified without any added tampering after manufacture?  
Do you intend to use an electrical launch system with motor igniters that are also electrical?  
Does your launch system include a safety interlock and return to the off position after release?  
If your rocket misfires and does not launch, will you follow proper protocol by removing the safety interlock or disconnecting from the power source, and waiting 60 seconds before approaching the rocket?  
Will you count down prior to launching your rocket?  
Do you intend to notify everyone of the launch and be sure that they are all paying attention and aware of the launch taking place?  
If you are using a D motor, will you maintain a safety distance of at least 15 feet for yourself and all spectators? Or if you are using a larger rocket, maintain at least 30 feet distance?  
Do you plan to use a launch rod, tower or rail that will be pointed within 30 degrees of vertical so the rocket’s trajectory is straight up?  
Will you have a blast deflector in place to prevent exhaust from hitting the ground?  
Will the launch rod be above eye level and capped off when not in use to prevent eye injury?  
Is the combined total of your rocket with propellant 53 ounce or less?  
Will you ensure that your rocket does not exceed the 4.4 ounce maximum of propellant?  
Will you take precautions to make sure that your rocket is not set up to launch at targets, clouds, or aircraft?  
Is your rocket free from flammable or explosive payload?  
Is your rocket launch site the appropriate size based on N-Sec and motor size?  
Do you intend to ensure there is no dry brush, grass, tall trees, or buildings near your launch site?  
Will you only launch in safe weather conditions where the wind speed is 20 miles per hour or less?  
Does your rocket have a streamer or parachute for safe return and recovery after launch?  
Is your recovery system wadding flame-resistant or fireproof?  
If your rocket lands on a power line, tall tree, or dangerous area, will you contact a local authority for help instead of trying to obtain it yourself?  

Participating in or Holding Contests

The NAR holds various contests every year, and if you join a local NAR Section, they might even hold their own chapter competitions you can participate in. You can find contests directly on their website here. Again, in order to participate in their contests, you’ll have to become an official member.

You can be assured that participating in the NAR sanctioned contests will require that your rocket also meet the specific safety codes we already addressed. You’ll also find though that they have Launching requirements that must be met as well.

Do You Meet Standard Launching Requirements?

Explained and outlined by the NAR the US Model Rocket Sporting Code describes the recommended launching requirements for all model rockets that are participating in the competition. If you plan to launch your model rocket in competition with the NAR it might be good to brush up on them.

If you plan on hosting your own competition separate from the NAR these are still great requirements to abide by, and you can take ideas from the code to fit your own.  

The below requirements are summarized from the outlined sporting code from NAR which you can read in detail here:

Section 5.1 Make Sure You Have A, “Range Safety Officer,” Assigned.

The National Association of Rocketry describes in section 5.1 that a launch requires an assigned, “Range Safety Officer,” (RSO). The RSO is to be the authority figure for any launching or flight operations of model rockets and assures all safety measures are met and precaution is taken to provide optimal performance.

This officer has to be in the very least, in great standing with the NAR to be assigned this title. The RSO has the ability to also assign a Deputy Range Safety Office who assists as needed with partial authority. An RSO is also not allowed to leave the flying field without relinquishing duties and responsibilitys to another high-standing or senior member of the NAR that can take on the title of the RSO.

Section 5.2 Check The Flying Field Conditions

In section 5.2, the importance of a flying field that meets specific safety requirements is described. The NAR specifies that the shortest dimension of the flying filed should be one fourth minimum the maximum altitude that is expected of the rockets being launched. The official launch area should be at minimum 10 meters from any boundaries of the field.

The field should also be inspected for high voltage lines, highways nearby, buildings that could be occupied, or other potential problems like dry brush and grass or tall overhead trees.

Section 5.3 Perform A Thorough Safety Check

The Range Saftey Officer as described in section 5.1 is assigned with inspecting all model rockets that will be launched and flown on the field. All model rockets should meet the specific Safety Codes of the NAR, and the RSO will use their authority and judgment to make the determination on whether or not the model rockets meet these codes.

Section 5.4 Requirements of Launching Devices

There are specific requirements that have to be met for all launching devices. These requirements are explained in section 5.4 by the NAR. Here they are in bulleted and summarized form:

  • All launching devices have to assure a vertical path for the model rocket until enough height has been attained by the rocket that the flight can be deemed predictable and safe. The launching angle should be no more than 30 degrees from vertical.
  • If the model rocket is light and/or using a motor with 20 Netwon-seconds of impulse or less, it’s suggested to use a rod that is approximately 1/8” diameter and one meter in length.
  • If the model rocket is heavier and/or high-powered you’ll need approximately 3/16” or ¼” diameter rod that is also one meter in length.

Section 5.5 The Height Of The Launcher

It’s declared in section 5.5 that the aft of the rocket can not be more than 2 meters above ground when preparing to launch.

Section 5.6 Attributed Momentum

In Section 5.6, it’s explained that all velocity and momentum of the rocket can only be contributed to from its own motor. The launching device can not attribute to any increase in velocity or momentum.

Section 5.7 Expectations for Launch

The NAR explains in 5.7 the expected steps and responsibilities the person launching must take prior to launch, and that is:

  • Conducting the launch and ignition of the model rocked only by remote electrical devices, and from a distance outlined by the safety code.
  • Having complete and full control of the launching/ignition device.
  • Advising everyone within the launch site that they will be initiating the launch.
  • Provide a minimum countdown that is audible of no less than 5 seconds.

How to Launch a Model Rocket Safely

While the main focus of this article has pertained to where you can launch a model rocket, some focus should be drawn on how to actually launch the said rocket, and do so in a safe manner. If you’ve purchased a kit, you should be supplied with proper instructions on how to launch the model rocket. If not, here’s a helpful video from Apogee that will walk you through your first rocket launch:

Remember to Have Fun

Whether you use a NAR launch site or your own, it’s important to have fun while also remaining safe. Remember to follow by the safety codes, regulations, and requirements discussed in this article so that you can find the best launch site while keeping yourself and others safe to enjoy your new or continued hobby of model rocket launching.

Disclaimer: This article does not constitute legal advice and is simply a summary of our own experience and the information we found online. Use your discretion and decision making to comply with all local laws for launching model rockets.

Build Your Own Launch Controller

Don’t forget! You can ditch the stock controllers and confidently build your own from scratch using our step-by-step instructions and exact materials list! We promise this will make your launch experience 10x better, and using our course License to Launch you can be 100% confident you’ll be able to finish this project and be super proud of what you’ve built! Here’s a sneak peek below.
What Makes Up a Model Rocket?


Whether trying to get a better understanding of how a model rocket works or if you’ve considered building and designing your own, it’s worth your while to know what makes up the true anatomy of a model rocket. These rockets, whether used for research, a hobby, or in competition, spark joy in American hearts and remain a staple of the culture since the early 1950s.

Have you ever wondered though, what makes up a model rocket? A standard model rocket is comprised of these basic components:

  • Nose
  • Body Tube
  • Fins
  • Engine Mount
  • Engine
  • Shock Cord
  • Shroud Lines
  • Parachute and Wadding

In this article, we’ll go over all of the different parts and how they might be made of an array of materials or different shapes to benefit the entire composition of a model rocket.


Are you still using the standard Estes controllers for your launches?

We just built our own beautiful launch controllers that make launches SO much more fun, and we documented EVERY single step and item purchased and put it into a step-by-step course that teaches you how to do the exact same thing.

Click here to learn more about how you can build your own launch controllers!

Get the EXACT materials list along with easy to follow step-by-step instructions on how to build your very own launch controller and make launches 10x BETTER in our course: License to Launch

Parts of A Model Rocket

While these all seem like standard components, there is a science behind the construction and materials used to make any of these, which can directly affect the performance of the model rocket itself.Let’s start from the top down and go over each one.

Model Rocket Nose

The nose is the leading factor in the aerodynamic ability of the rocket itself. It also plays a significant role in detaching during the recovery operation so that the parachute can glide out and provide a safe trip back to the ground for the rocket. The most important aspect that the nose attributes is the drag.

What Is Drag?

Thrust is what propels the rocket up vertically and on its way, but counter-intuitive to that is a drag. Drag is created based on how the surrounding air molecules react with the surface of the nose. If the surface of the nose is turbulent as opposed to smooth, it allows the air molecules to move with freedom around the surface.

When this happens, molecules may speed up in certain areas of the nose surface and slow down in others. This is counterintuitive and creates what is known as a drag, slowing down the thrust of the rocket. When the surface of the cone is smooth, instead of the air molecules moving around with freedom on the surface, they flow in a formation called laminar flow that increases in velocity the further away the molecules are from the surface. This reduces drag.

Check out this awesome YouTube video from SmarterEveryDay explaining how Laminar Flow works, especially as it pertains to rockets:

What Are The Different Types Of Noses That Can Be Used On A Model Rocket?

There are 5 main types of noses commonly used when designing a model rocket, and they all serve a different purpose based on their design and construction. Let’s go over each of them.

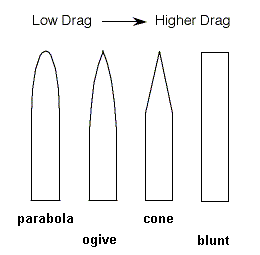
Nose shapes tested on a model rocket
Source: aerospaceweb.org
Parabolic Nose

 A parabolic nose is known for its ability to have the least amount of drag over other rocket nose types. This can sometimes be confused as an elliptical nose, but it is not the same. A parabolic nose is created by locating the latus rectum of a parabola and rotating a segment of the parabola parallelly to create the full shape. This nose is very rounded yet still features a sharp tip.

You’ll find an array of familiar aircraft that utilize this shape for a nose such as a Boeing 777 or Tomahawk cruise missiles. This is because it is the most ideal shape for aircraft that fly at subsonic speeds. Subsonic speed is a speed that is less than the speed of sound.

Ogive Nose

There are three different types of ogive noses:

  • Tangent ogive
  • Spherically blunted tangent ogive
  • Secant ogive

The tangent ogive is the type most commonly used on model rockets. The reason many utilize a tangent ogive nose on their model rocket is due to the fact that it is very simple to construct as opposed to the other types since it is circular in nature.

Check out this newsletter issue from Apogee Rockets that walks you through designing a Tangent ogive nose.

Cone Nose

The conic nose is the most simple to manufacture nose. It performs as fourth-best when it comes to all of the other cone shapes due to its contribution with drag. Many might believe that a sharp and pointed nose on a rocket would be the most beneficial, however, aerodynamically it’s just not the truth.

Elliptical

An elliptical nose is also known as a prolate hemispheroid. This is because it is comprised of a full rotation around the major axis known as the prolate spheroid. It’s most commonly seen on more subsonic aircraft, and it’s also widely used in model rocketry. It’s not popular in professional rocketry as it cannot reach the higher velocities required.

Blunt

I doubt you’ve seen any if at all, model rockets dawning a blunt nose. I’m sure it’s possible for those out there experimenting but this is probably the most extreme of noses, added for the sole purpose of explaining that this would be the worst nose for reducing drag. A model rocket dawning a blunt nose is likely to have a near 100% increase in drag. I would only recommend this nose for research purposes.

What Materials Are Rocket Noses Made Of?

The most commonly used materials for model rocket noses are:

  • Plastic
  • Balsa Wood
  • Hardwood
  • Fiberglass
  • Styrofoam

The material chosen for model rocket noses is based solely on desired weight, durability, and strength. Most commonly small or mass-produced model rockets feature a plastic or wood nose cone, while fiberglass is the more expensive but durable option. Styrofoam is mostly seen from those building their own rocket and looking for the most lightweight material.

Estes actually sells an array of nose cones on Amazon here that you can test out.

Model Rocket Body Tube

The main facet of the model rocket is, of course, the body tube. This part is responsible for bringing all pieces of the model rocket together such as the nose, fin, engine, and recovery system. The size of the body you choose will be dependent on the engine you intend to use, the cone size, and the weight you are trying to achieve.

What Is a Rocket Model Body Tube Made of?

The body of a model rocket is typically produced from the following materials:

  • Spiral-wound paper tubing (most common)
  • Fiberglass
  • Plastic

When designing your model rocket, you’d choose the material that is both lightweight, yet durable enough to fit your flying specifications. Higher-powered model rockets may be best suited with thicker material for the body just for stability and strength.

Check out this youtube video from Stephen Moulen on how to make a paper rocket body tube:

Or purchase an assortment of already made rocket tubes here on Amazon.

Model Rocket Fins

Model rocket fins are essential in keeping the center of gravity and center of pressure in check on the rocket. Without fins, the model rocket would be unable to keep a stable and linear flight path. Environmental factors like the wind, gravity, and aerodynamic forces interact with the rocket itself during flight, and the fins prevent all of these things from being able to take control.

What Are The Different Shapes of Model Rocket Fins?

There are 5 main shapes that can be utilized as model rocket fins.

  • Elliptical
  • Trapezoidal
  • Square
  • Rectangular
  • Clipped Delta

Many enthusiasts will argue that the elliptical shape is the best shape for the fins of a model rocket because they have the lowest induced drag since they help orient the lift much closer to the body of the model rocket. Meanwhile, the worst shape of a fin would be ax-shaped. Ax shaped fins would produce the most amount of drag.

Read this newsletter issue from Apogee Rockets the describes the reasoning more in-depth behind ellipticals being the superb fin for a model rocket.

How Many Fins Should You Have On a Model Rocket?

The recommended amount of fins for a model rocket is three. Limiting the fins to three is known to contribute to at least 25% less drag. However, it is common to design or purchase a rocket with more than three fins.

What Materials Are Rocket Fins Made Of?

Model rocket fins are most commonly produced of any of the following materials:

  • Wood (commonly Balsa wood because it is strong and lightweight)
  • Plastic
  • Fiber Glass

Much like with the nose and the body tube, you’ll choose the material that is best for the overall weight of the rocket and the durability. High-powered rockets might benefit from a more durable material like fiberglass or wood.

Model Rocket Engine and Engine Mount

Inside of the model rockets body will be an engine mount that can be in the form of a kit that includes engine tube, centering rings, and an engine hooks all of which stabilize the engine in the center of the rocket body tube. Less complex model rockets will simply just feature an engine hook as opposed to a complete engine kit.

Types of Model Rocket Engines

Model rocket engines are designated by their classification (defined by total impulse in newton seconds), average thrust in newtons, and their time delay in seconds.

Here is a simple to chart to provide a brief view of rocket motor classifications.

Rocket Engine ClassificationTotal Impulse (Newton Seconds)
1/8A 0.3125 NT Seconds
1/4A 0.625 NT Seconds
1/2A1.25 NT Seconds
A 2.5 NT Seconds
B 5 NT Seconds
C 10 NT Seconds
D 20 NT Seconds
E 40 NT Seconds
F 80 NT Seconds
G 160 NT Seconds
H 320 NT Seconds
I 640 NT Seconds
J 1280 NT Seconds
K 2560 NT Seconds
L 5120 NT Seconds
M 10240 NT Seconds
N 20480 NT Seconds
O 40960 NT Seconds

Black powder engines are the most commonly utilized in model rocketry however there are composite motors available that are nearly three times as powerful as black powder engines the same size. Composite motors are also sometimes produced in reusable capsules but this is more commonly seen with high-powered model rockets.

Sizes of Model Rocket Engines

Model rocket engines come in an array of sizes based on their classification. However, just because the engine is bigger doesn’t necessarily mean it’s better. Larger engines typically are capable of pulling more weight, so it’s not uncommon to see a small model rocket with a smaller engine achieving the same altitude as a large model rocket dawning a large engine.

Here’s a table showing some standard sizes based on classification.

Motor Type Average Diameter (mm) Average Length (inches)
1/4A 10.5 mm 1.5”
1/2A 10.5 mm 1.5”
A 13 mm 1.75”
B 18 mm 2.75”
C 18 mm 2.75”
D 24 mm 2.75”
E 29 mm 4.88”
F 29 mm 4.88”
G 29 mm 4.88”

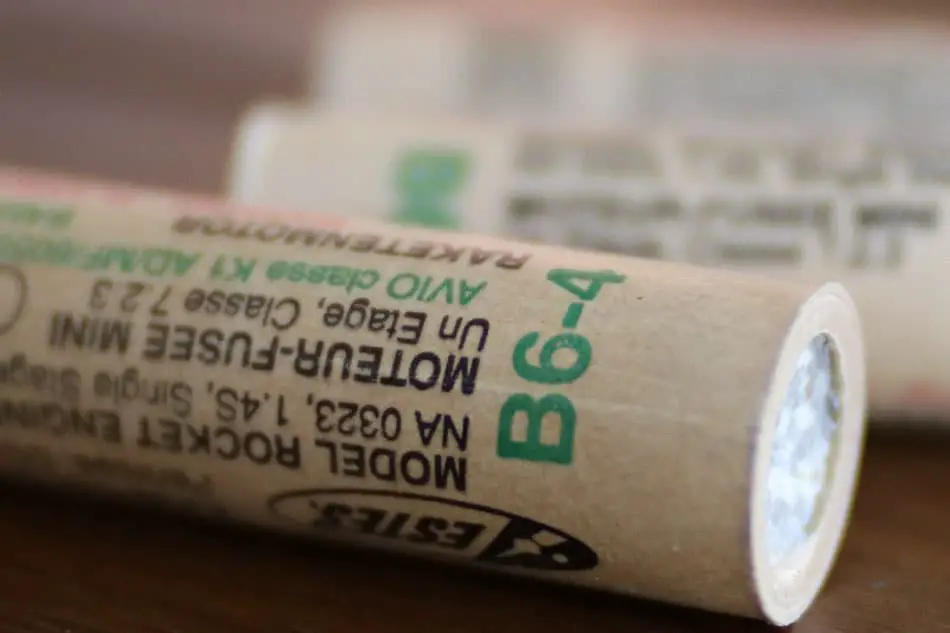
What Do The Model Rocket Engine Codes Mean?

You might notice when browsing around for model rocket engines for purchase that the motor types are typically followed by a series of digits. This motor code is put together by utilizing the following:

Total Impulse (Letter) + Average Thrust in Newtons (First Number) + Time Delay in Seconds (Second Number)

Here’s a chart of the most commonly sold engines from Estes and their codes dissected.

Motor Type Average Thrust (Newtons) Time Delay (Seconds)
1/4A3-3 3 3
1/2A3-2 3 2
A3-4 3 4
A10-3 10 3
1/2A6-2 6 2
A8-3 8 3
B4-2 4 2
B4-4 4 4
B6-2 6 2
B6-4 6 4
C6-3 6 3
C6-5 6 5
C11-3 11 3
C11-5 11 5
D12-3 12 3
D12-5 12 5
E9-4 9 4
E9-6 9 6
1/2A3-4 3 4
A8-5 8 5
B6-6 6 6
C6-7 6 7
C11-7 11 7
D12-7 12 7
E9-8 9 8

What Are Multi-Stage Engines?

Black powder rocket motors can be used in a multi-stage setup. In this setup, you can choose to use just a lower stage engine and a final engine, or include an intermediate engine to provide a three-tier setup.

The lower and intermediate engines are commonly referred to as booster engines and they will not include a delayed time. Instead, they will simply be filled with black powder propellant that heats up and inhibits the ignition of the next engine. The final engine will include the delay time and recovery initiation for the engine.

Model Rocket Shock Cord

When a model rocket enters into the recovery stage, the nose will be ejected from the top of the model rocket. The parachute is attached to the nose of the rocket which will deploy. In order to effectively keep the nose and the body of the model rocket together during this process, a shock cord is installed. While the parachute is safely bringing the rocket down to the surface, the shock cord holds onto the body of the model rocket.

Shock cords are typically an elastic and fire-resistant rope. Great care needs to go into properly fitting the shock cord to what is referred to as a shock cord mount within the body. It should be affixed sturdy enough to maintain a hold on the rocket’s nose and body after it has been detached.

Estes actually sells shock cord packs on Amazon that include mounts and instruction here.

Model Rocket Parachutes and Wadding

Of all the pieces of the model rocket, this probably needs less describing. Your model rocket parachute is what is going to bring your model rocket down to the ground safely and with little to no damage. It would be a huge bummer to spend so much time designing your model rocket only for it to come crashing down into a pile of unusable rubble.

What Size Parachute Do You Use For A Model Rocket?

Many folks try to determine the size of parachute they need based on the weight of the rocket itself. The truth is there are many mathematical equations for determining the parachute size for your rocket based on factors such as:

  • Force of gravity
  • Drag force (wind resistance)
  • Intended velocity descent

If you’re like me and prefer to avoid all of the mathematics and obtain a straightforward estimate based on weight and speed alone, try Rocket Simulators online calculator here.

Depending on the size you need you can find some great rocket parachutes for purchase on Amazon here.

What Are Model Rocket Parachutes Made Of?

Model rocket parachutes can be made of canvas, dacron, silk, Kevlar, and nylon materials. Most commonly though they are produced of ripstop nylon.

If you intend to make your own rocket parachute, try watching some of these helpful videos on people who have successfully made parachutes from random household materials.

Watch this how-to video from Mr. Kryzer on making a parachute:

https://www.youtube.com/watch?v=yYm1_nedVu0

Here’s a video from The King of Random making plastic table cover parachutes for rockets:

What Is Model Rocket Recovery Wadding For?

Model Rocket Recovery wadding is a material that is fire resistant and aids in protecting the parachute from the recovery charge if the model rocket engine. The hot gases released from the engine could damage the parachute, so the wadding acts as an interceptor for the parachute. Additionally, the wadding can aid in the successful ejection of the parachute.

Alternatives For Model Rocket Recovery Wadding

Many rocket manufacturers like Estes will sell flameproof tissue wadding, but they can be a bit overpriced. For those looking to save money, you can take a trip to your nearby hardware store and purchase some cellulose fiber insulation. It’s also a recyclable and friendly alternative. For more reading see our post on Model Rocket Wadding Alternatives.

What Makes a Model Rocket High-Powered?

Now that we have gone over the components that make up a model rocket, you might be wondering what exactly makes a model rocket, “high-powered.”

High-power rockets feature all of the following attributes:

  • A total weight that is equal to or greater than 3.3 lbs
  • A motor that holds more than 4.4oz of propellant
  • A motor that is rated at more than 160-newton seconds of total impulse or a sustained average thrust of 80 newtons or more

Software To Help Design Your Model Rocket

If you’re curious about designing your own model rocket, there are a few services you can actually try that will help you accurately design it to perform at its best.

Free Available Software

OpenRocket

OpenRocket is a 100% free model rocket simulator that will guide you through the design stages of your model rocket and perform simulations before you actually spend the time and resources building it or flying it.

Features of OpenRocket are as follows:

  • Uses CAD technology to replicate your model or design. Choose from a catalog of numerous existing components and materials, or you can design your own with the program. This technology will even let you export the drawing to a PDF that you can print to help you build.
  • Performs reliable simulations that use over 50 different variables.
  • Artificial Intelligence assistant that can assist you with adjusting specific characteristics to help optimize your design helping your rocket to fly higher and longer.
  • Provides real-time data feedback that details the center of pressure, maximum altitude, maximum velocity, the center of gravity, and stability while you design. You will instantly have access to your model rockets statistics as you build it.
  • If you plan to have a multi-stage, dual deployment, or certain event trigger in your design this software will let you cluster them together so that you can properly design and test your motors.
  • The database includes motor information compiled by ThrustCurve which will flag you if a specific motor might not be suitable for the design of your model rocket.

Learn more about OpenRocket, or download it here.

RasAero

RasAero is another completely free software that is fine-tuned to provide strikingly accurate aerodynamic analysis and flight simulation for model rockets, high-powered rockets, amateur rockets, and sounding rockets.

Notable features and benefits of RasAero:

  • They have a noted altitude prediction error margin of 3.38%
  • With 78.8% of their flight simulation altitude predictions, they were within +/- 10% of the actual flight data. 42.4% were within +/- 5%.
  • The authors use actual flight data to fine-tune the algorithms within the software for continuous improvement of accuracy.
  • The aerodynamic prediction methods are calibrated directly against NACA and NASA wind tunnel model data, sounding rocket data, missile aerodynamic data, free-flight model data, and professional engineering method missile aerodynamic analysis programs.

Learn more about RasAero, or download it here.

Paid Available Software

RockSim

RockSim is designed and sold by Apogee Components. For around $125, you can take advantage of this software that helps you to design your own model rocket and make sure it performs at peak quality. This software is actuals educationally certified and is utilized by many teachers, aerospace engineers and several famous manufacturers of model rockets like Estes, Aerotech, PML, LOC, Semroc, and more.

Features of RockSim that stand out from other competitors:

  • The ability to design custom fins for your model rocket along with tube fins and ring-tail arrangements.
  • You can create asymmetrical designs that violate the Barrowman Stability equations which say you must have three identical fins for every set of fins.
  • View your designs in 3D and rotate them.
  • The software will explicitly tell you if your rocket is safe to fly or if you can expect it to crash if you try to launch it.
  • Sophisticated launch simulations and provide dynamic stability analysis.
  • Test your model rocket’s ability to fly within the software based on wind and weather conditions, or what will happen if launched at an angle.
  • Utilize a free 30-day trial to determine if the software works for you and get your money back if it doesn’t!

Learn more about RockSim, or purchase it here.

SpaceCAD

SpaceCAD is a cheaper alternative to RockSim and is developed by a team of software engineers located in Germany. For a low price of $80, you can enjoy some of the same features found on RockSim.

Notable features of SpaceCAD:

  • The interface is known to be very user-friendly and simple to navigate for those who are beginners.
  • Design your model rocket from components and elements already pre-loaded in their vast library, or build your own from scratch.
  • As you design, you’ll have the ability to see instant stability analysis that includes the center of gravity, the center of pressure, and weight measurements.
  • The editor features a simple drag and drop method that allows you to easily undo recent changes.
  • Choose to view your model rocket in either a 2D or 3D Design from both the top and bottom.
  • You can save the fins you design and centering rings as an SVG file that can then be used for printing with a laser cutter at high precision. This helps you build your rocket much faster and simpler.
  • Enjoy the simple flight prediction interface that shows a complete display graph of your rockets estimated trajectory.
  • The flight prediction will also provide you with a recovery prediction and ability to test recovery systems to be sure that your rocket remains safe and less prone to breakage.

Learn more about SpaceCAD, or purchase it here.

Build Your Own Launch Controller

Don’t forget! You can ditch the stock controllers and confidently build your own from scratch using our step-by-step instructions and exact materials list! We promise this will make your launch experience 10x better, and using our course License to Launch you can be 100% confident you’ll be able to finish this project and be super proud of what you’ve built! Here’s a sneak peek below.
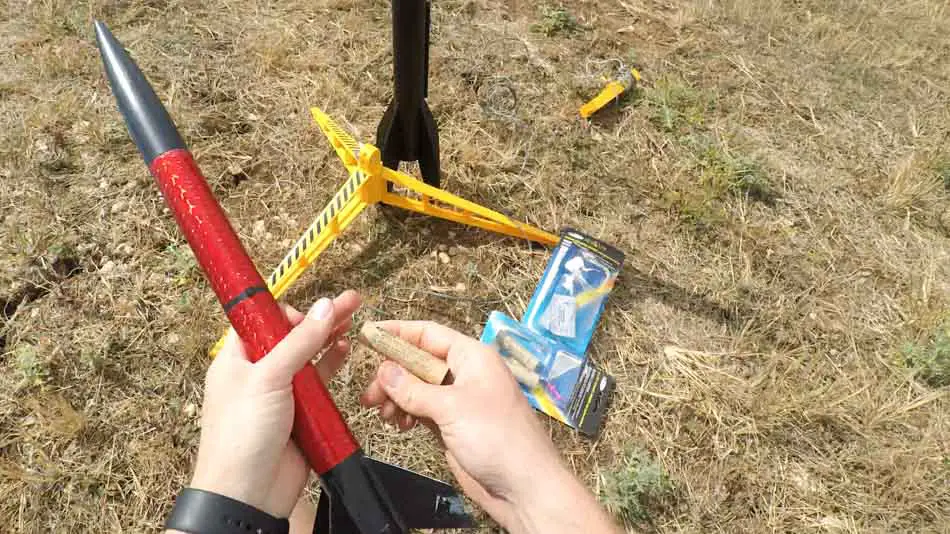
Best Materials to Make Model Rockets


Is today the day you’re designing or constructing your first model rocket? When you use the best materials, making a model rocket can be a rewarding and low-stress experience. What is the best material to make a model rocket?

Small model rockets are best made from cardboard or plastic for the body, balsa wood for the fins and nose cone, paper or cardboard for centering rings and bulkheads, cotton coated elastic for shock cords, cardboard for launch lugs, and nylon and Kevlar string for the parachute.

Don’t forget other supplies like engine hooks, sandpaper, and glue.

These are a few of the best materials for making a model rocket, but there are other suitable materials as well. We’ll list some of your other options below. We will also discuss why we have selected these particular materials, where you can find these rocket-building materials, and how you can put your materials together to form a model rocket.


Are you still using the standard Estes controllers for your launches?

We just built our own beautiful launch controllers that make launches SO much more fun, and we documented EVERY single step and item purchased and put it into a step-by-step course that teaches you how to do the exact same thing.

Click here to learn more about how you can build your own launch controllers!

Get the EXACT materials list along with easy to follow step-by-step instructions on how to build your very own launch controller and make launches 10x BETTER in our course: License to Launch

What are some other appropriate materials for making a model rocket?

There are plenty of different materials that you can utilize when building your model rocket. It is important to keep a list like this on hand during the building process. If one of your materials doesn’t work the way you thought it would with your unique rocket, you can give something else a try.

Here are several material selections, part-by-part, that can produce a successful model rocket.

Part/Supply Material Options
Body Cardboard, thin plastic, manila folder, commercial tubes

Thicker wood or composite materials for higher-power engines
Nose cone Plastic, balsa wood, hardwood, fiberglass, Styrofoam
Fins Balsa wood, plastic, fiber glass  

Plywood or 3-D printed fins for higher-power engines
Centering rings/bulkheads Wound paper, plywood, cardboard, balsa wood
Shock cord Commercial Kevlar shock cord, sewing elastic, rubber, nylon
Launch lugs Cardboard, paper, plastic, brass, commercial launch lug
Engine hooks Flat wire from old window wipers, spring steel, commercial engine hooks
Parachutes Pre-made parachute material, trash bags, plastic shopping bags, mylar, nylon
Glues Wood adhesive white glue, yellow glue, plastic cement (for plastic parts), hot glue

Why are these the best materials to make model rockets?

What makes some materials preferable to others in model rocketry? To learn more about the reason why we recommend the following materials for your model rocket, here’s a great resource by Phil Charlesworth.

Cardboard or plastic for the body: A model rocket must be lightweight to fly, but flimsy materials would be destroyed in flight. High-quality cardboard or a sturdy but thin plastic would work well for the body tube.

Balsa wood for the fins: If you’re getting into model rocket building, it’s important for you to learn that balsa wood will be your best friend. It is durable but still thin and lightweight, making it a great choice for the rocket fins.

Balsa wood for the nose cone: You will find that if you browse commercial nose cones, many of them are made with balsa wood. This wood can be molded into a round aerodynamic shape to form the perfect nose cone for your rocket. Note that there are also pre-made plastic nose cones widely available from sites like Apogee.

Cardboard or paper for centering rings and bulkheads: It’s important to remember that many of the materials you choose will depend on the power level of your rocket. For lower-power beginner rockets, find a good quality card or paper for your centering rings and bulkheads. For medium-power rockets, you’re better off with plywood.

Cotton coated elastic for shock cords: We recommend elastic because not only is it cheap and widely accessible, but it can be used to create a reliable shock cord. Be aware of what substances your elastic is coated in – cotton coated elastic is your safest bet.

Cardboard for launch lugs: For a small model rocket, cardboard is perfect for the launch lug. For mid-size model rockets, you will probably want to procure a stronger material. Plastic or brass would be the next step up from the cardboard.

Nylon and Kevlar string for parachute: Even if you are using a kit to construct your model rocket, you might consider doing a DIY parachute.

According to Phil Charlesworth of UKRA (The United Kingdom Rocketry Association), “the parachutes that come with model rocket kits … are not good quality and tend to burn or tear easily.” You could simply grab a plastic shopping bag to design your parachute, but for a truly reliable chute, we recommend windproof nylon and Kevlar string.

Concerning DIY materials for building the rocket itself, this is a helpful list, but keep in mind that this isn’t an exhaustive list of everything you will need to build your model rocket. Explore the list under the next section, “What are the parts of a model rocket?” to make sure you’re not forgetting anything when you go model rocket supply shopping.

What are all of the parts of a model rocket?

If you need to purchase materials for your first model rocket, it is important to have a thorough understanding of all the parts of a model rocket. Check out this NASA illustration for an image depicting all of the parts of a model rocket:

File:Model rocket parts.gif

The Nose Cone

The nose cone is usually a rounded or parabolic shape. For larger and faster rockets, the nose cone should be slender and conical. The purpose of the nose cone on the tip of the body is to make the rocket aerodynamic, and to release the parachute.

The Payload Compartment

The payload compartment is just an extension of the body, and it is optional. It can carry experiments, cameras, etc. It is separated from the body by a bulkhead or centering ring.

Bulkhead

The bulkhead keeps hot gases from leaking into the payload compartment. The bulkhead protects the payload within.

Centering Rings

Your centering rings are used to center smaller tubes, such as your engine mount, inside the body tube.

The Body Tube

This is the body of the rocket, which contains the parachute and shock cord. The body tube is usually a cardboard cylinder.

Fins

Fins are little wings attached to the body tube to make it more stable during flight. They help the rocket to fly straight.

Engine Mount

The engine mount, or motor mount, lies within the back of the body tube. It contains the engine, the engine hook, and the centering rings.

The Launch Lug

This hollow tube is glued to the rocket around the point of balance. It encourages the rocket to accelerate upwards.

Shock Cord

The shock cord is an elastic connected between the nose cone and rocket fins. It allows the rocket to decelerate after launch, and it helps free the parachute. The shock cord also prevents various parts of the rocket from colliding during launch and descent.

Recovery System

The recovery system is the parachute, streamer, or other recovery device. Of course, the purpose of a parachute is to slow the fall of the rocket, while a streamer will help the rocketeer keep track of the rocket as it floats to the ground.

Other tools you want on hand while making a model rocket

Whether or not you have a good grasp on the parts and function of a model rocket, you’re going to want a list of practical supplies for when you begin the building process.

You may not need every one of these supplies, but most of them are highly useful, if not totally essential to your model rocket building experience.

Sanding block

You will absolutely need a sanding block throughout the construction of your model rocket. Every component of your rocket should be sanded into an aerodynamic shape.

You will use your sanding block on the rocket fins, the body tube, and the nose cone. You will probably also find other practical uses for it throughout your project. It is especially helpful for shaping balsa wood.

Of course, you will need sandpaper with your sanding block. Find out what your sanding block holds and buy the appropriate sandpaper.

400 grit is a dependable paper for building a small model rocket. If you are using plywood or other heavier-duty materials, you may be better off with a 320 grit or rougher.

Masking tape or painter’s tape

You can really use any kind of tape that works best for you while you paint your model rocket. Make sure your tape won’t peel off the base color, but still gives you a noticeable line so you do not paint over it.

Glue

Glue is obviously a necessity for putting your model rocket together. What type of glue is best for constructing a model rocket? See our post on the best model rocket glue – it isn’t super glue!

You want to pick a glue that you are comfortable with. Super glue can be frustrating in inexperienced hands. It’s important to note that super glue can also become brittle over time.

A regular white glue can be all you need to build your model rocket. You might also use a yellow glue, or a plastic cement if you are using plastic materials. And don’t forget about that airplane model glue that you can find in hobby stores.

Knife and blades

A hobby knife and blades are critical tools for building a model rocket. A standard hobby knife will work just fine. You want to have some blades on hand to make sure your knife is sharp and effective.

Ruler

Precision is key while building a model rocket. Have a straight edge ruler on hand. We recommend a ruler with some kind of grippy material on the back so that it will sit still while you take measurements.

Wood Filler

Carpenter’s wood filler can help you make the most of your balsa wood and shape your parts exactly how you envision them. It also preps the wood for paint. Mix some of your wood filler with water until you get the consistency you need for your project.

Damp cloths

Have a few wet rags on hand. You’re going to find them extremely useful for removing glue and paint from your hands and your rocket as you put it together!

Scissors

Don’t forget to pull out your endlessly useful scissors. They can assist with much of your model rocket construction, such as cutting out the shock cord mount.

Writing utensil

Pencils are preferable as you mark points on the rocket during construction.

Source: nar.org

Where to find the best model rocket building materials

You can find all of these model rocket building materials at Hobby Lobby or other hobby supply stores near you. Other viable hobby stores that may be closer to you include Michaels, HobbyTown and JOANN. Many towns have their own local hobby stores as well.

Many of these materials can be found at Walmart and other stores with hardware, craft, and outdoor sections. Outdoor specialty stores like Ranch & Home or Lowe’s will also carry some of the supplies you will need.

Of course, in this world of convenient online shopping, you can also find 100% of your model rocket building materials online. This can be helpful if you want to compare your options and prices before buying.

Use this Amazon Shortcut link to pull up search results for model rocket building supplies and explore the model rocket materials Amazon has for sale. There are also other rocket-exclusive sites you can find with a quick Google search.

How to construct a model rocket using the best materials

Building model rocket kits are the easiest way to do your first rocket, but if you are doing your DIY rocket with the aforementioned materials, here’s some help to send your model rocket flying!

  1. Design your rocket. Use someone else’s model rocket instructions or design your own. Designing your first model rocket is another topic entirely, but don’t forget to ensure the Center of Pressure is below the Center of Gravity.
  2. Do the prep work. Here are the basic steps that you should complete before you begin building.
    1. Choose your body tube and nose cone size. Smaller rockets will use BT-20 or BT-50, medium rockets need BT-50 or BT-55, while large rockets require BT-60 or BT-80. Choose wisely to guarantee your rocket’s stability.
    2. Select your recovery system. Small rockets should utilize a streamer – there’s really no need for a parachute to slow it down upon descent. Medium rockets can use a parachute or streamer, and large rockets should always have a parachute.
    3. Consider the rocket fins. Rocket fins are another important factor in the stability and success of your model rocket. Place the fins close to the bottom and think about how far they should come out from the body of the rocket. Fin span should be about 1x the tube diameter, but you may choose to use a model rocket design simulator to guarantee your rocket fins will produce a stable result.
    4. Go shopping. Write up your shopping list based on your particular model rocket. If you are doing a DIY rocket, remember that you may already have some of the materials and supplies you need at home (such as elastic, glue, cardboard, and shopping bags).
      1. Get an idea of a basic list. If you need a starter model rocket shopping list, check out our final section below: “Complete shopping list for building a model rocket.”
  3. Create your body tube. Cut out your cardboard, paper, or manila to the correct length and roll the sheet into a tube. Make sure it is smooth and wrinkle-free. Tighten the tube until it is exactly the right size to accommodate the rocket engine.
    1. Start gluing. You can use tape or rubber bands to keep your rocket bodily momentarily together, but then use glue to permanently seal the rocket body. We recommend using a paint brush or another applicator (you could even tape some paper to the top of a pencil to form a brush) to distribute the glue with accuracy.
    1. Dry and clean up. Mark the bottom and the top of your body tube so you know which way is “up” later. Allow your rocket to dry overnight. Once dry, you should clean up its shape with your craft knife, ensuring it is aerodynamic.
  4. Create the engine mount. Take your engine tube and measure out where you should cut your slits according to your design. Use your craft knife to make slits around the tube based on your markings.
    1. Insert the engine hook. Apply glue and insert the right angle of the engine hook into the correct slit, then slide your elastic or other shock cord over the engine mount tube and engine hook. Apply glue inside the engine mount, on the opposite side of the hook, and insert the engine block into the tube.
  5. Prepare your centering rings. Cut the centering rings out and slide them over the engine mount tube. Apply glue to both sides to secure the centering rings.
  6. Build your rocket fins. Cut your rocket fins out of your balsa wood based on your design measurements. Sand down rough edges with your sanding block.
    1. Attach the fins. Mark the sides of your body tube, glue your fins together, and attach them to the rocket carefully using your glue brush. Hold tight with your fingers, or recruit some help. Sometimes it may feel like you don’t have enough hands to build a model rocket!
  7. Place the engine mount. Apply glue to the edges of the centering rings, then slide the engine mount through the bottom of the body tube. Add some glue between the rings and the tube to secure placement.
  8. Adhere the fins. Practice aligning your fins correctly with the rocket body first, then bring out the glue. Glue one fin along the marker nearest the bottom of your rocket, making sure it is square to the body tube. Hold in place for several seconds before releasing, then repeat with each fin until all are in order. Allow to dry overnight.
  9. Install the launch lug. Make sure it is aligned with the body tube.
  10. Place the shock cord. Get your cotton-coated elastic shock cord and place it inside the body tube, about an inch and a half down from the top, and glue and hold.
  11. Build the recovery system. Prepare your parachute or streamer using your modeling knife. Pull it through the hole in the nose cone and secure. Tie the unattached end of the shock cord to the nose cone (it should be placed towards the bottom of the nose cone).
    1. Install the parachute or streamer. Once the recovery system is properly folded and prepared, place wadded up paper into the top of the body tube and insert the recovery system. For more reading see our article on Model Rocket Parachutes vs. Streamers.
    1. Place the nose cone on top of the body tube. Pack the shock cord into the top of the body tube and then secure the nose cone to the top of the body.
  12. Paint your rocket. Use enamel paints or spray paint. In most cases, you will want to prime your rocket first. For more reading see our post on the Best Paints for Model Rockets.
  13. Test your stability. You can use the swing test to find out if your rocket is set up for success. Use the largest engine you plan to use in the rocket, and balance the rocket on your finger horizontally. Tie a string of five or six feet around the rocket, securing it with tape. Swing the rocket around your head, and if it flies straight, your rocket is stable and ready to go.
  14. Test launch time. What’s the difference between a test launch and a regular launch? You want a very wide berth with few to no people, cars, homes, or belongings present, since you have no concept of how far your rocket will fly. Now get that rocket onto your launching pad and see how she flies!
  15. Launch day. Make any needed changes to your rocket before taking it for its first real launch. Once your rocket is ready to roll, invite your friends and family to see the magic!

Here are some other resources with step-by-step guides that can help you assemble your model rocket:

Complete shopping list for building a model rocket

Lists make everything simpler. When I go shopping for anything, especially something I’m unfamiliar with, I need a good list. There’s nothing worse than arriving home and realizing you forgot one of the things you needed most.

Here’s your DIY model rocket building shopping list:

  • Rocket engines
  • Engine mount tube
  • Engine hook
  • Balsa wood
  • Lots of high-quality cardboard
  • Garbage bag or nylon
  • Kevlar string
  • Elastic or shock cord
  • Pencil
  • Ruler
  • Rubber bands
  • Compass
  • Duct tape
  • Scotch tape
  • Painter’s or masking tape
  • Craft knife
  • Sanding block and sandpaper
  • Scissors
  • Glue brush
  • Glue
  • Needle-nose pliers
  • Launch pad or rod
  • Ignition circuit
  • Primer
  • Paint

Keep in mind that your rocket-building needs will vary based on your design, preferences, etc., but this is a great place to start.

Here are a few additional points of information that might be helpful while you are picking out your supplies.

Rocket Engines

How do you pick out your engine? Every rocket design has different requirements.

You’ll want to start with a smaller engine if you are a beginner. Keep in mind that a “B” size engine will go twice as high as an “A” engine, a “C” goes twice as high as a “B” engine, and so on. For more reading see our Complete Guide to Rocket Engine Sizes and Classifications.

Balsa Wood

Balsa wood is an excellent material for model rocket building because it is both tough and lightweight. You can use balsa wood for the fins and the nose cone, as well as other parts of your rocket if you so choose.

Cardboard

Cardboard is your best friend in amateur model rocket building. Choose a high-quality cardboard for the body tube, launch lugs, centering rings and bulkheads.

You can substitute cardboard in many cases with a thin and durable sheet of plastic. You can also use high-quality cardstock or paper in some instances.

Garbage Bag or Nylon

At first glance, you may wonder how a garbage bag could be interchangeable with nylon! You’ll need a recovery system, and a garbage bag, trash bag, or nylon can be suitable for constructing a parachute. You could also use a streamer instead of a parachute.

Kevlar String

Kevlar string is the best choice for constructing your parachute and can also be useful throughout your project. It is stronger and more resistant to heat than most other string.

Elastic or Shock Cord

You can buy a shock cord or use elastic to design your own. Cotton-coated elastic is usually preferable to elastics coated with synthetic materials.

Glue

There are dozens of varieties of glue, and many of them will work well for your model rocket project.

Regular white glue works fine. Super glue or hot glue work well, but they can be tricky to use. Plastic cement is perfect for plastics, but model aircraft glue is always an excellent choice!

It’s going to be rewarding seeing your project skyrocket into the air knowing you used the right materials and put in the hard work. I hope your first model rocket exceeds your expectations!

Build Your Own Launch Controller

Don’t forget! You can ditch the stock controllers and confidently build your own from scratch using our step-by-step instructions and exact materials list! We promise this will make your launch experience 10x better, and using our course License to Launch you can be 100% confident you’ll be able to finish this project and be super proud of what you’ve built! Here’s a sneak peek below.